sewing

Foray into Japanese sewing patterns

I’ve got a bit of a backlog of sewing projects to share – last year before our trip to Japan I churned out a pair of Ginger jeans for me, another pair of Jutland pants for Luke and a merino Ensis tee for me, thus proving to me once and for all that I work best with a deadline in sight! But since it’s summer here in NZ and I’m not currently wearing jeans or merino tops, here’s a project I sewed up today instead.

img_6374

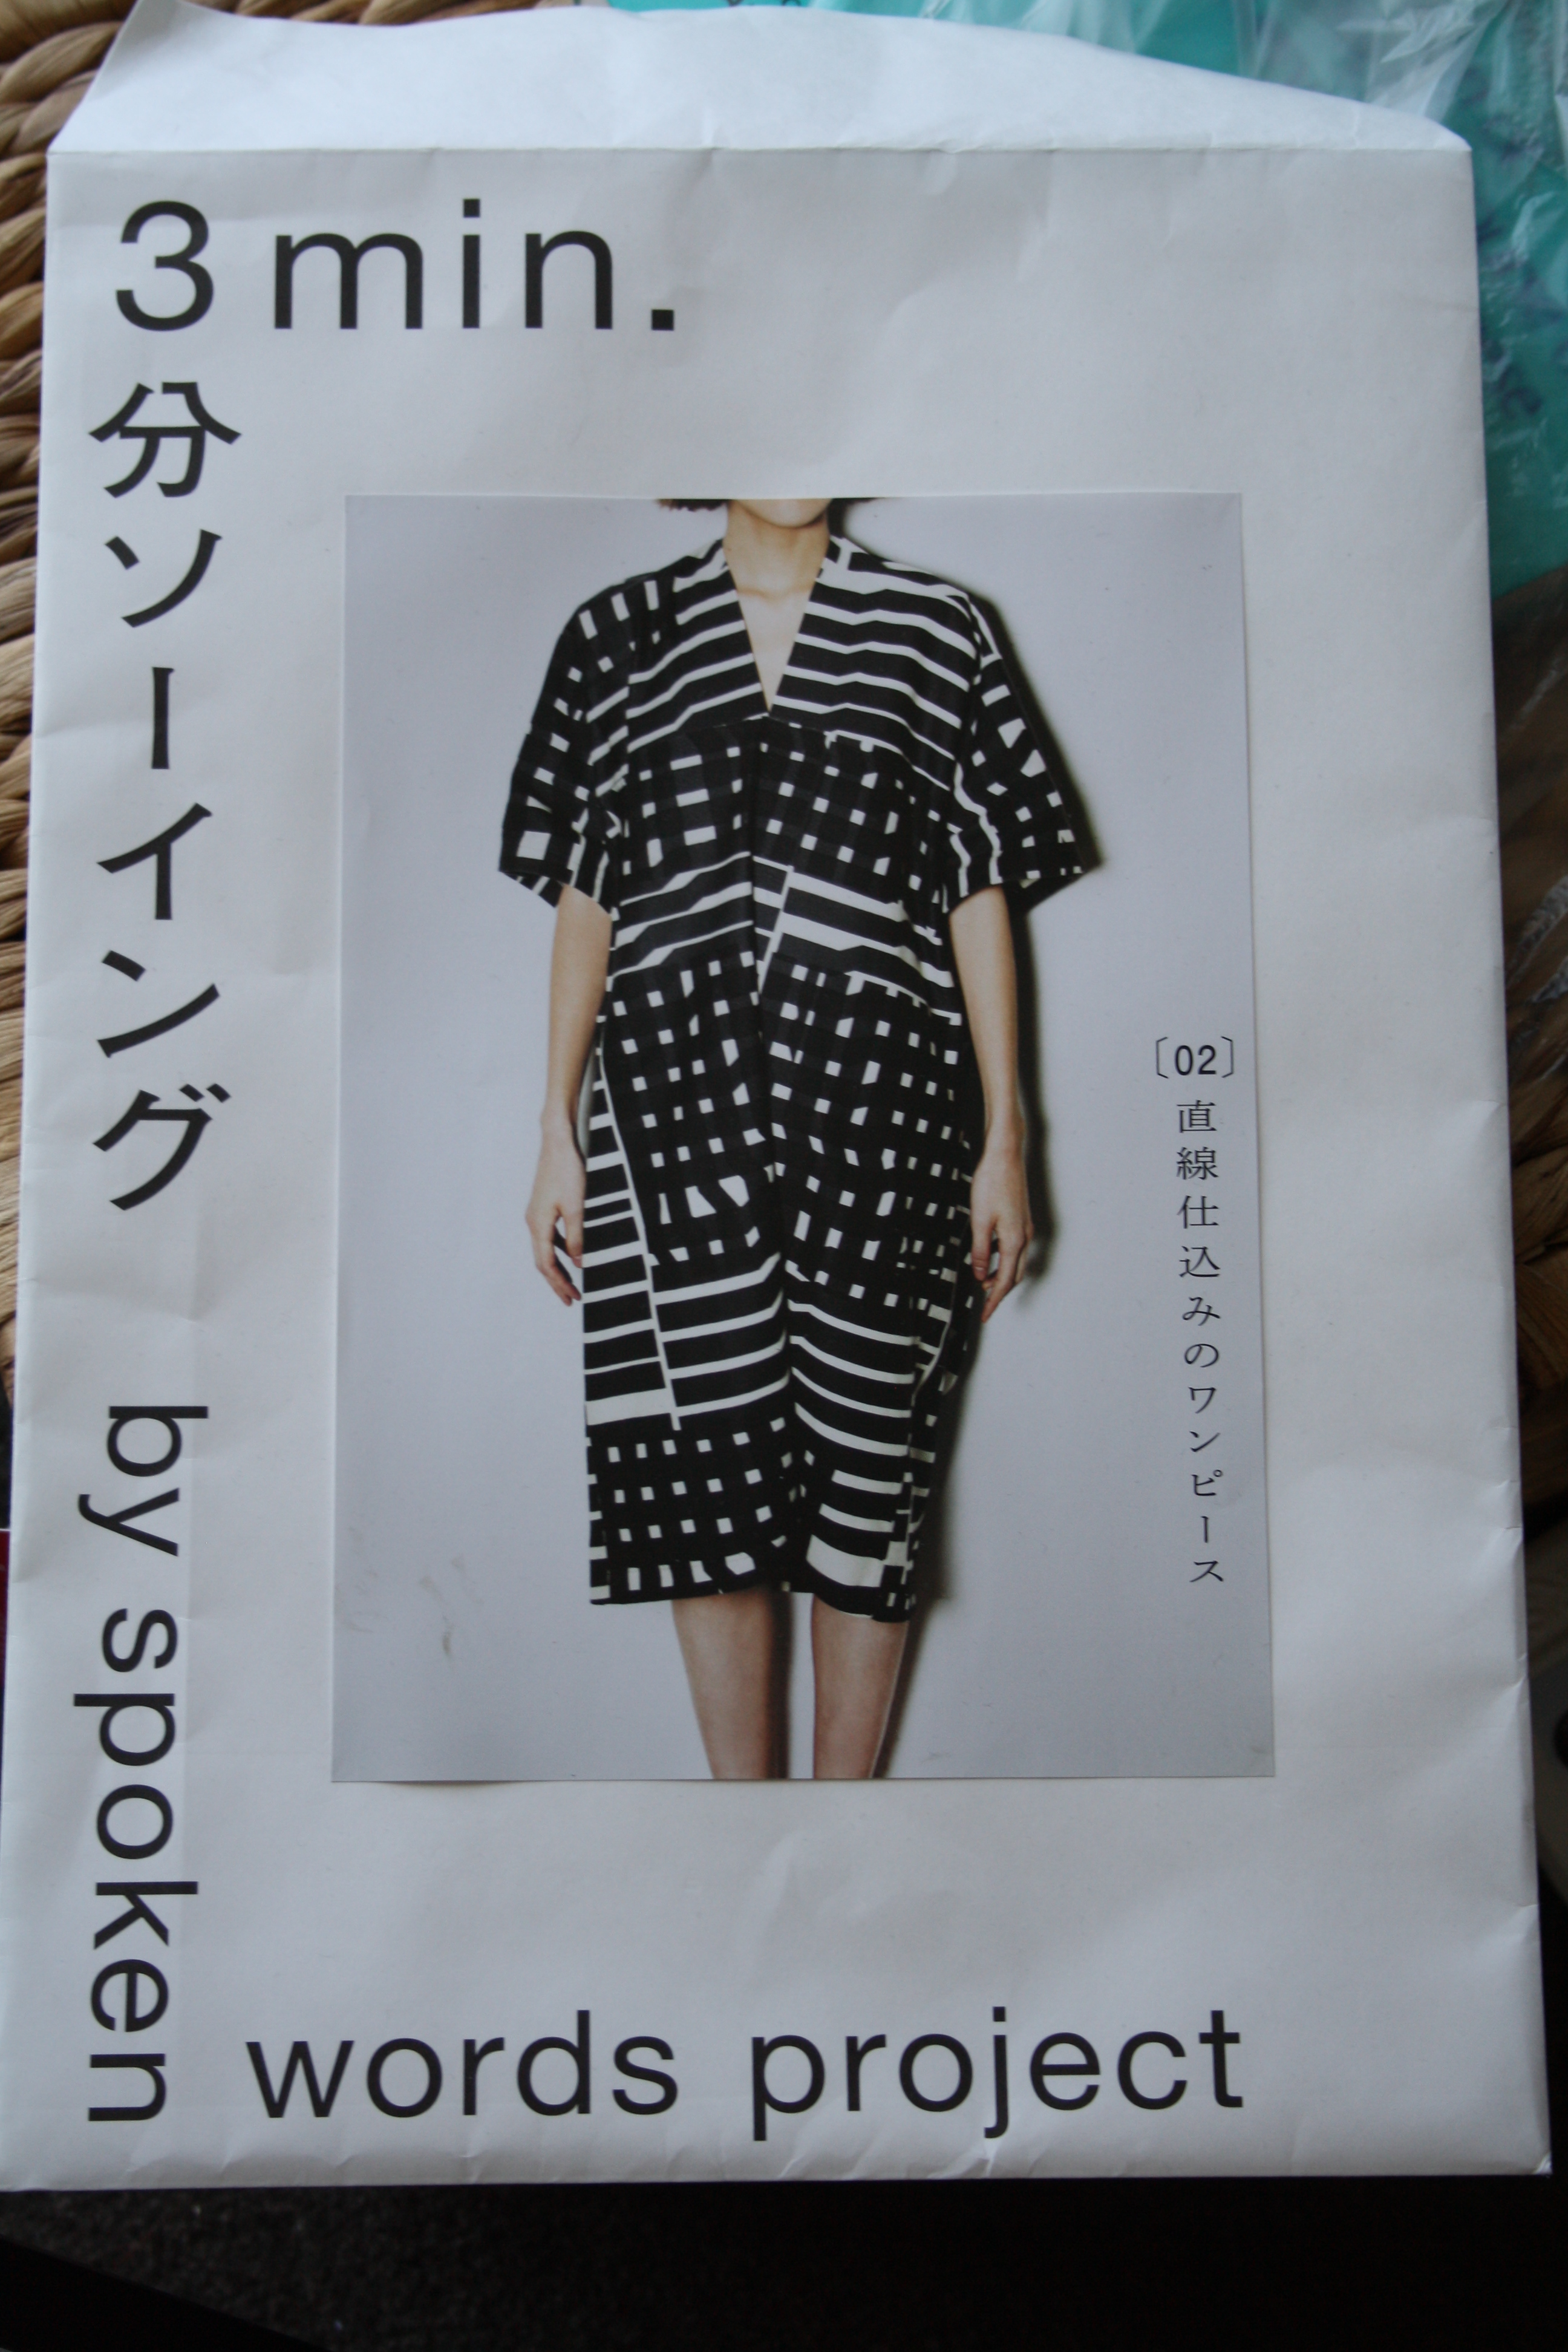
The pattern is one I bought from Miss Matatabi last year, on a whim. I hadn’t heard of the pattern company before, but it was cheap and something about it intrigued me. It seems right now she’s only stocking the blouse in a kit, however. It consists of 3 pieces – the front and back are identical, and then the sleeves/yoke are a separate piece for front and back. The pattern is entirely in Japanese, however there are diagrams to help. I have been teaching myself Japanese for a while now (and previously studied it for a year at University) and so my prior knowledge together with Google Translate helped me to understand most of what was going on. Unfortunately I’m never very good at visualising how to rotate pattern pieces and how everything comes together in English patterns, let alone Japanese ones, so there was definitely some head scratching at first.

img_6366

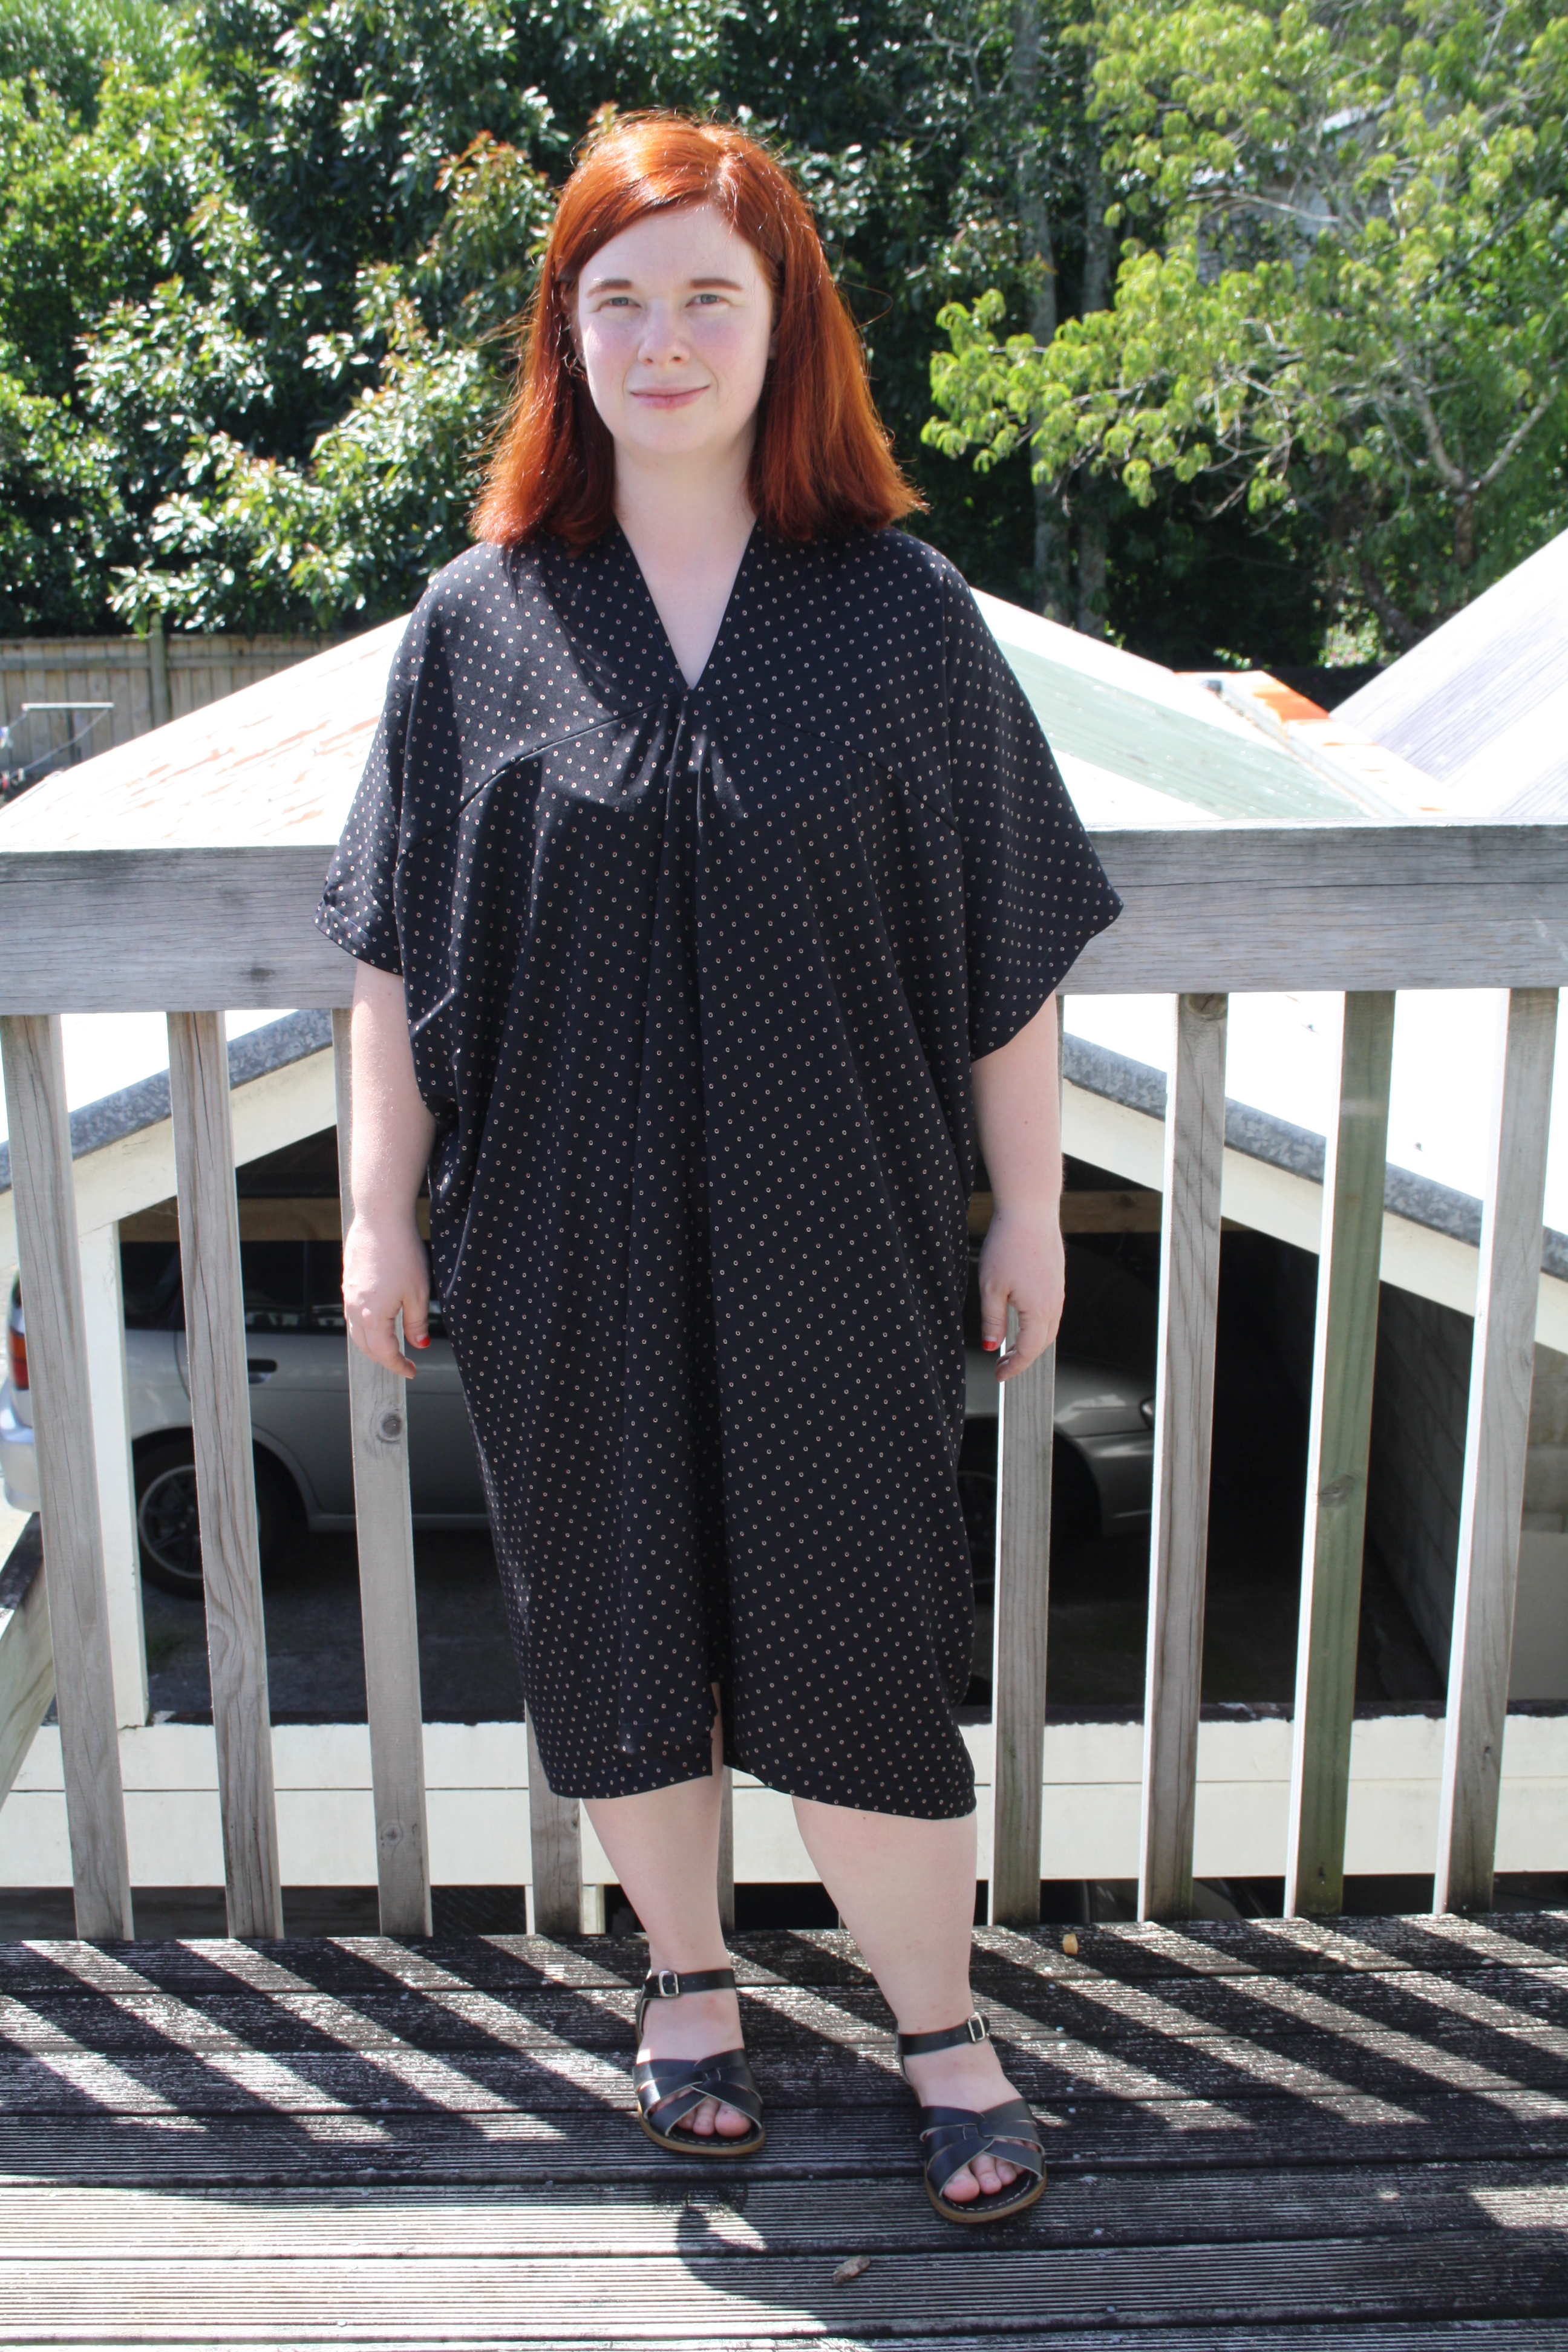
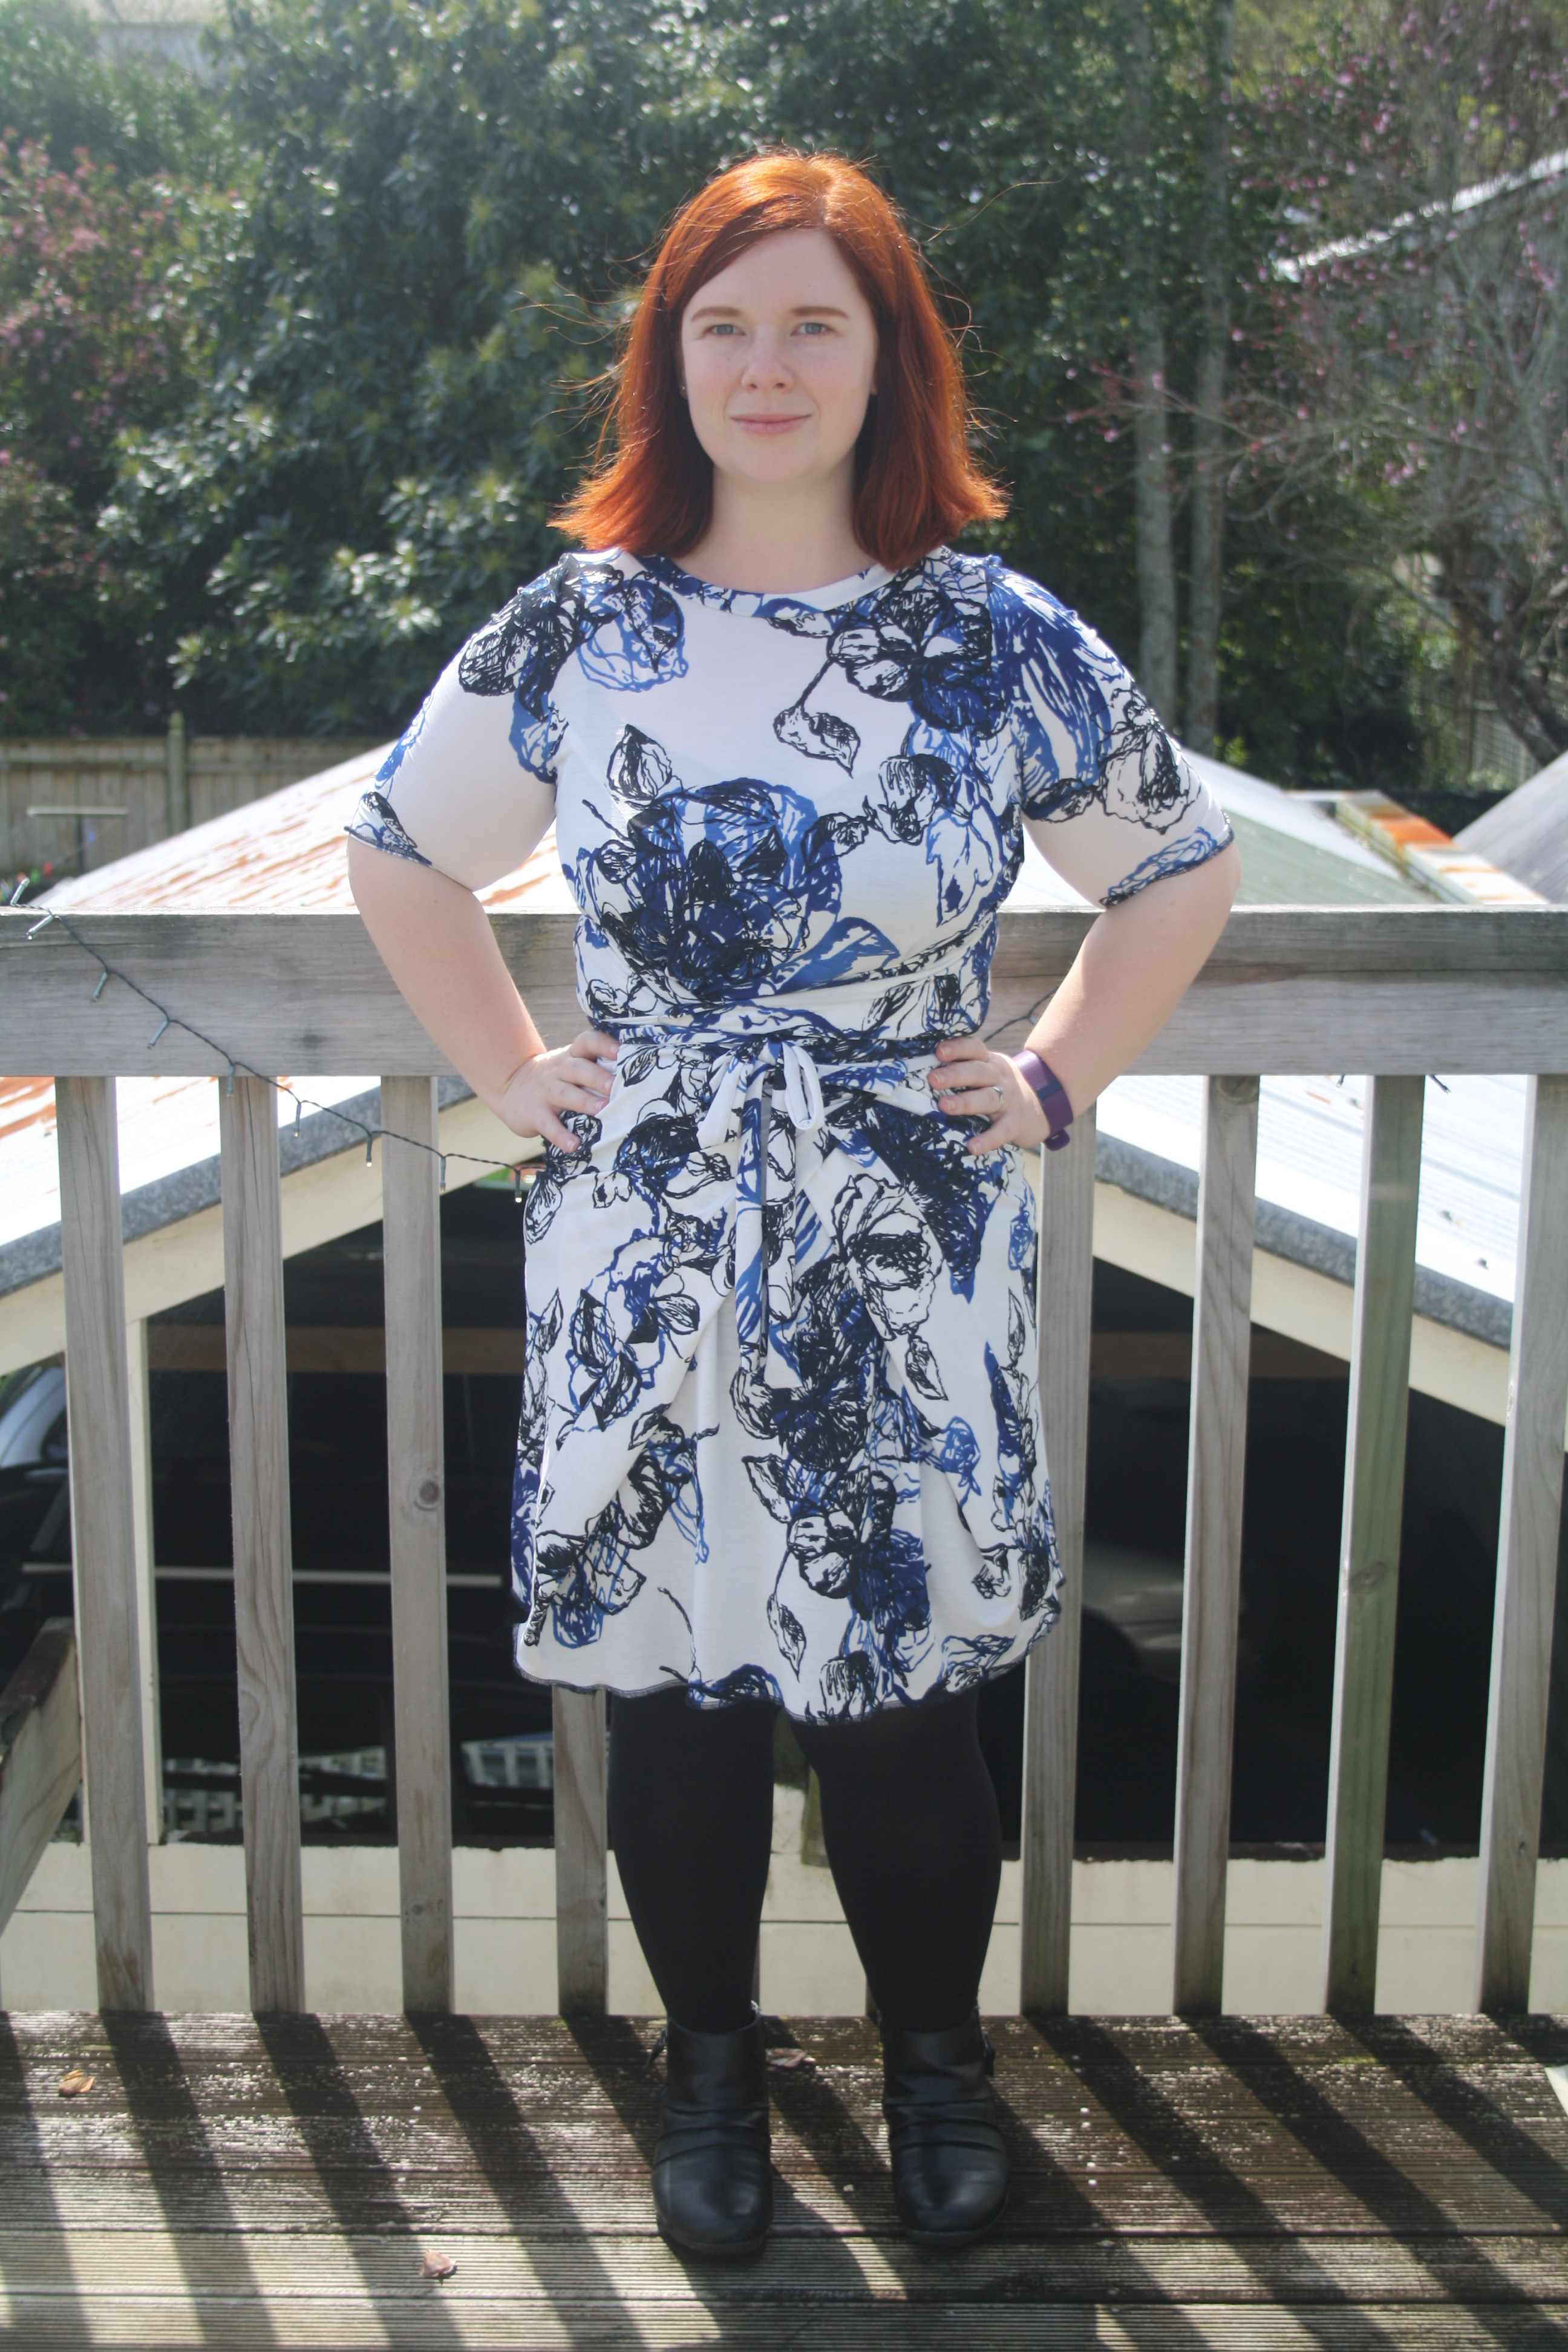
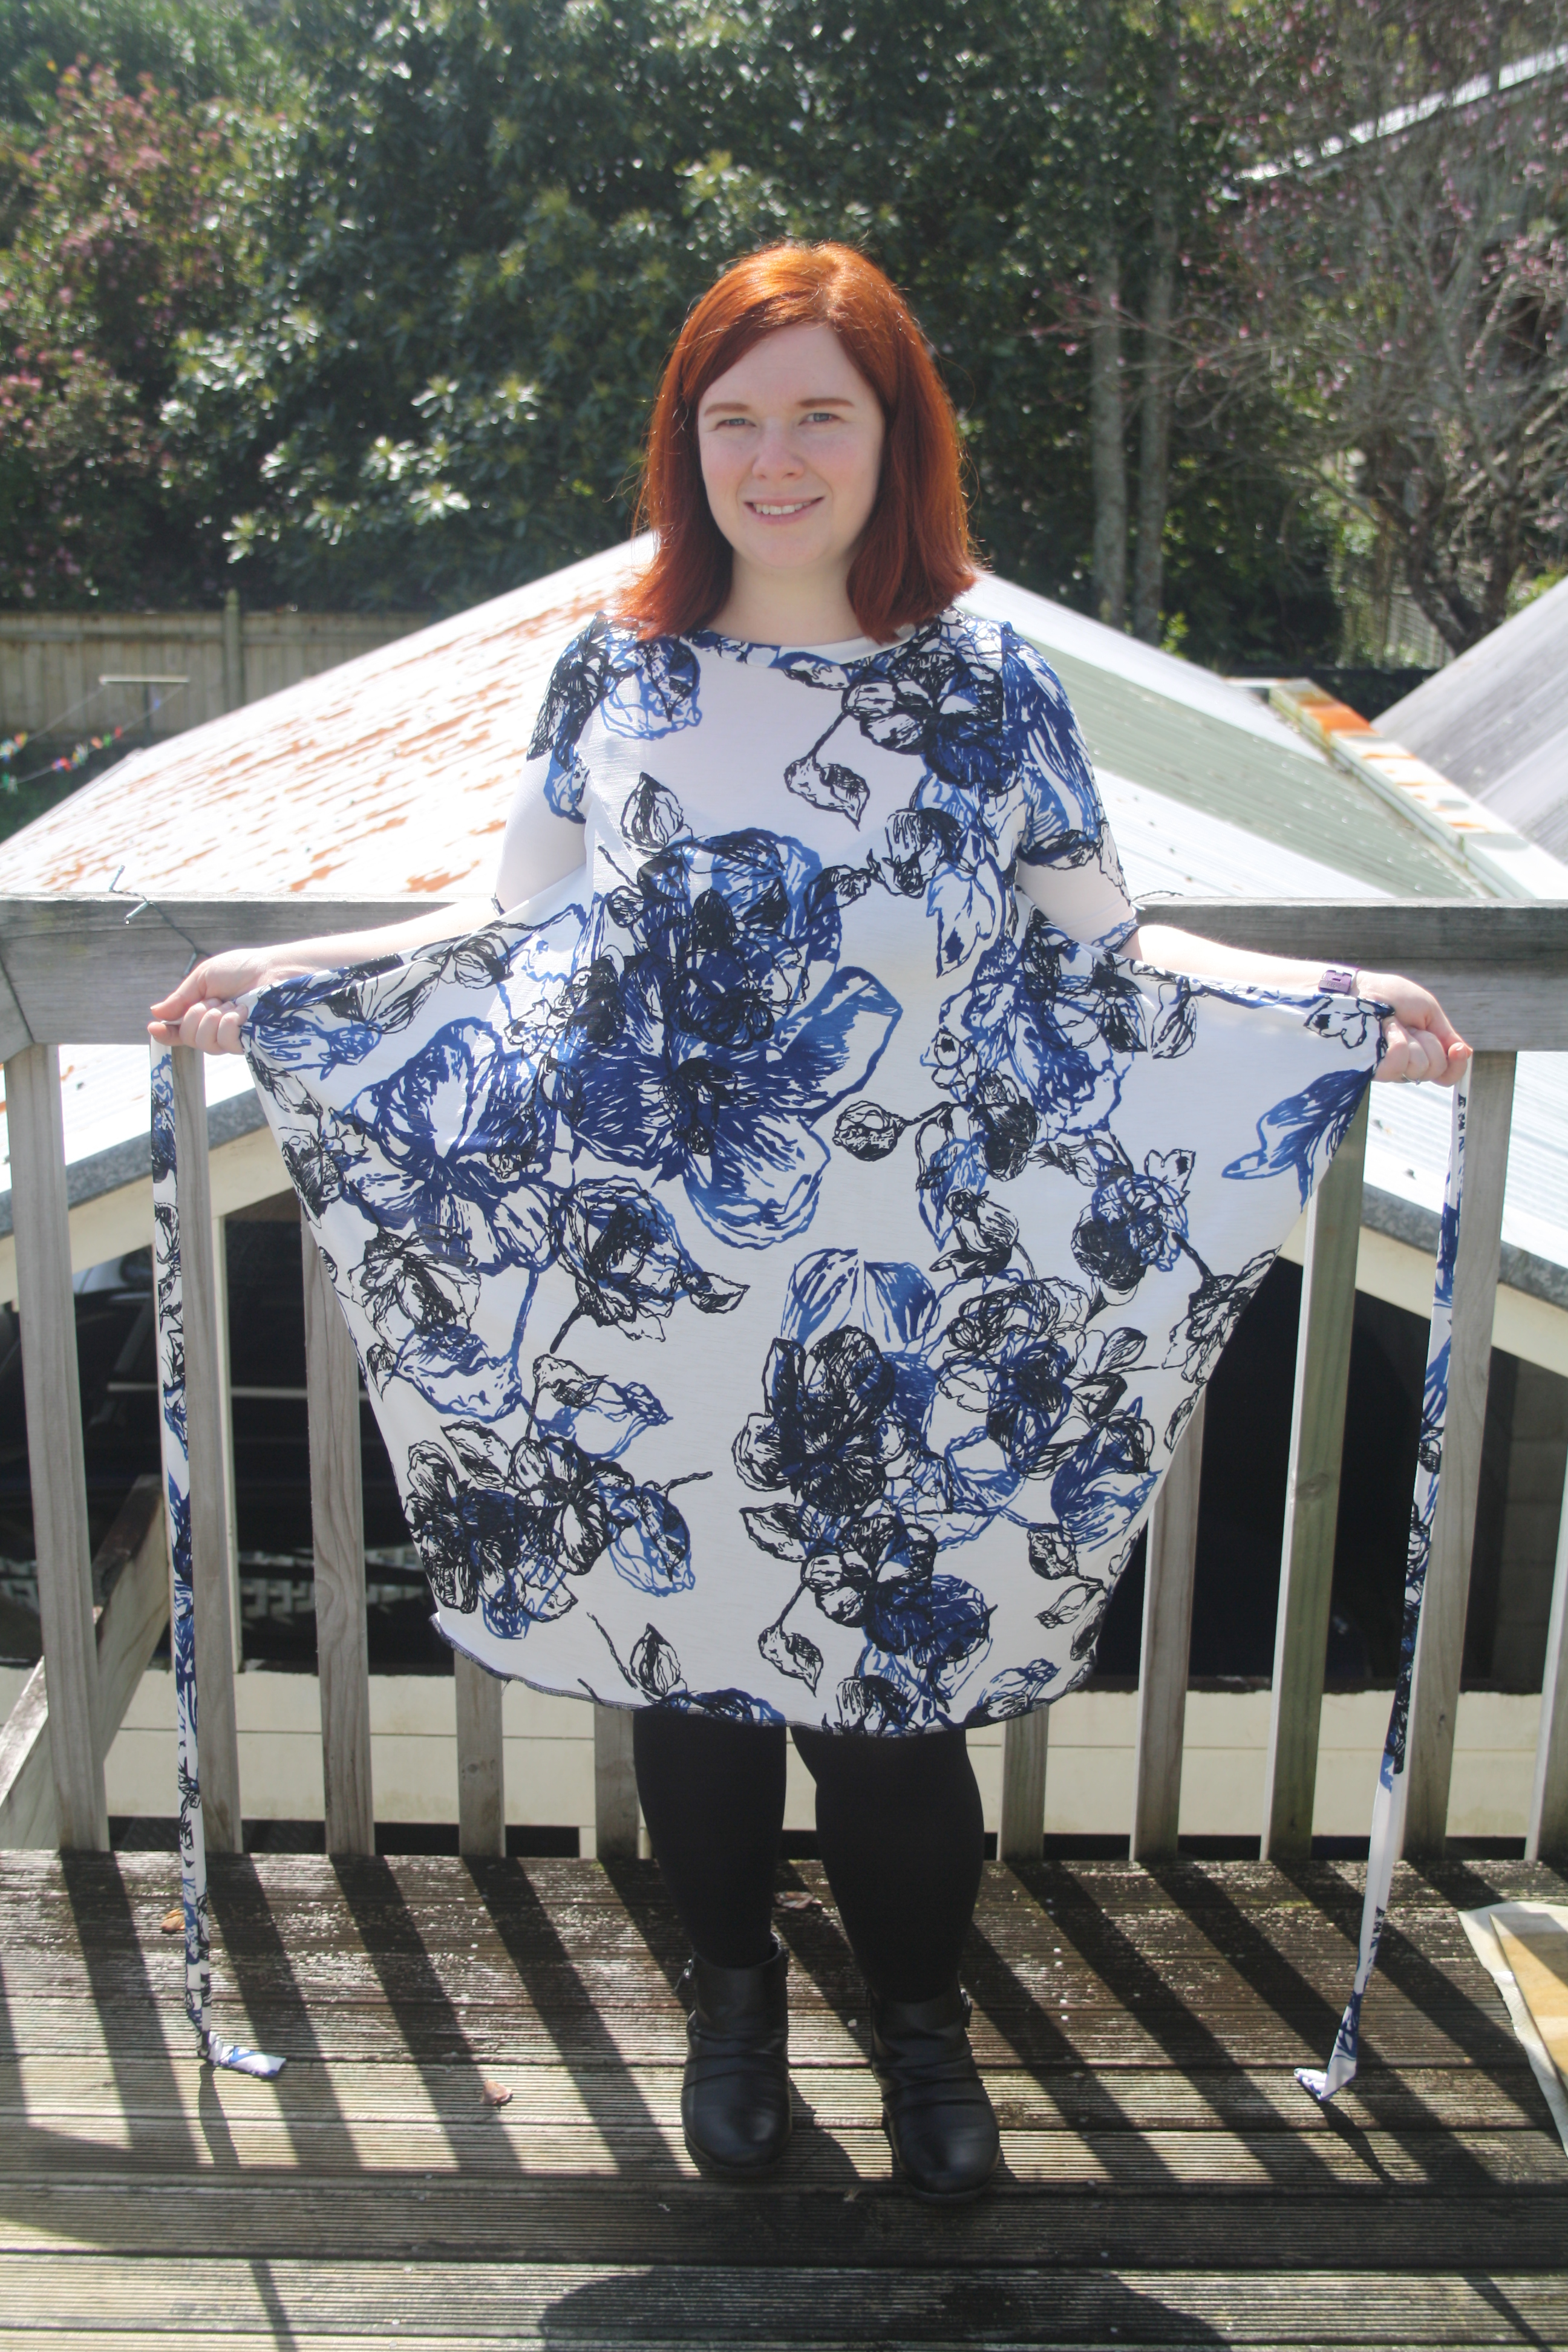
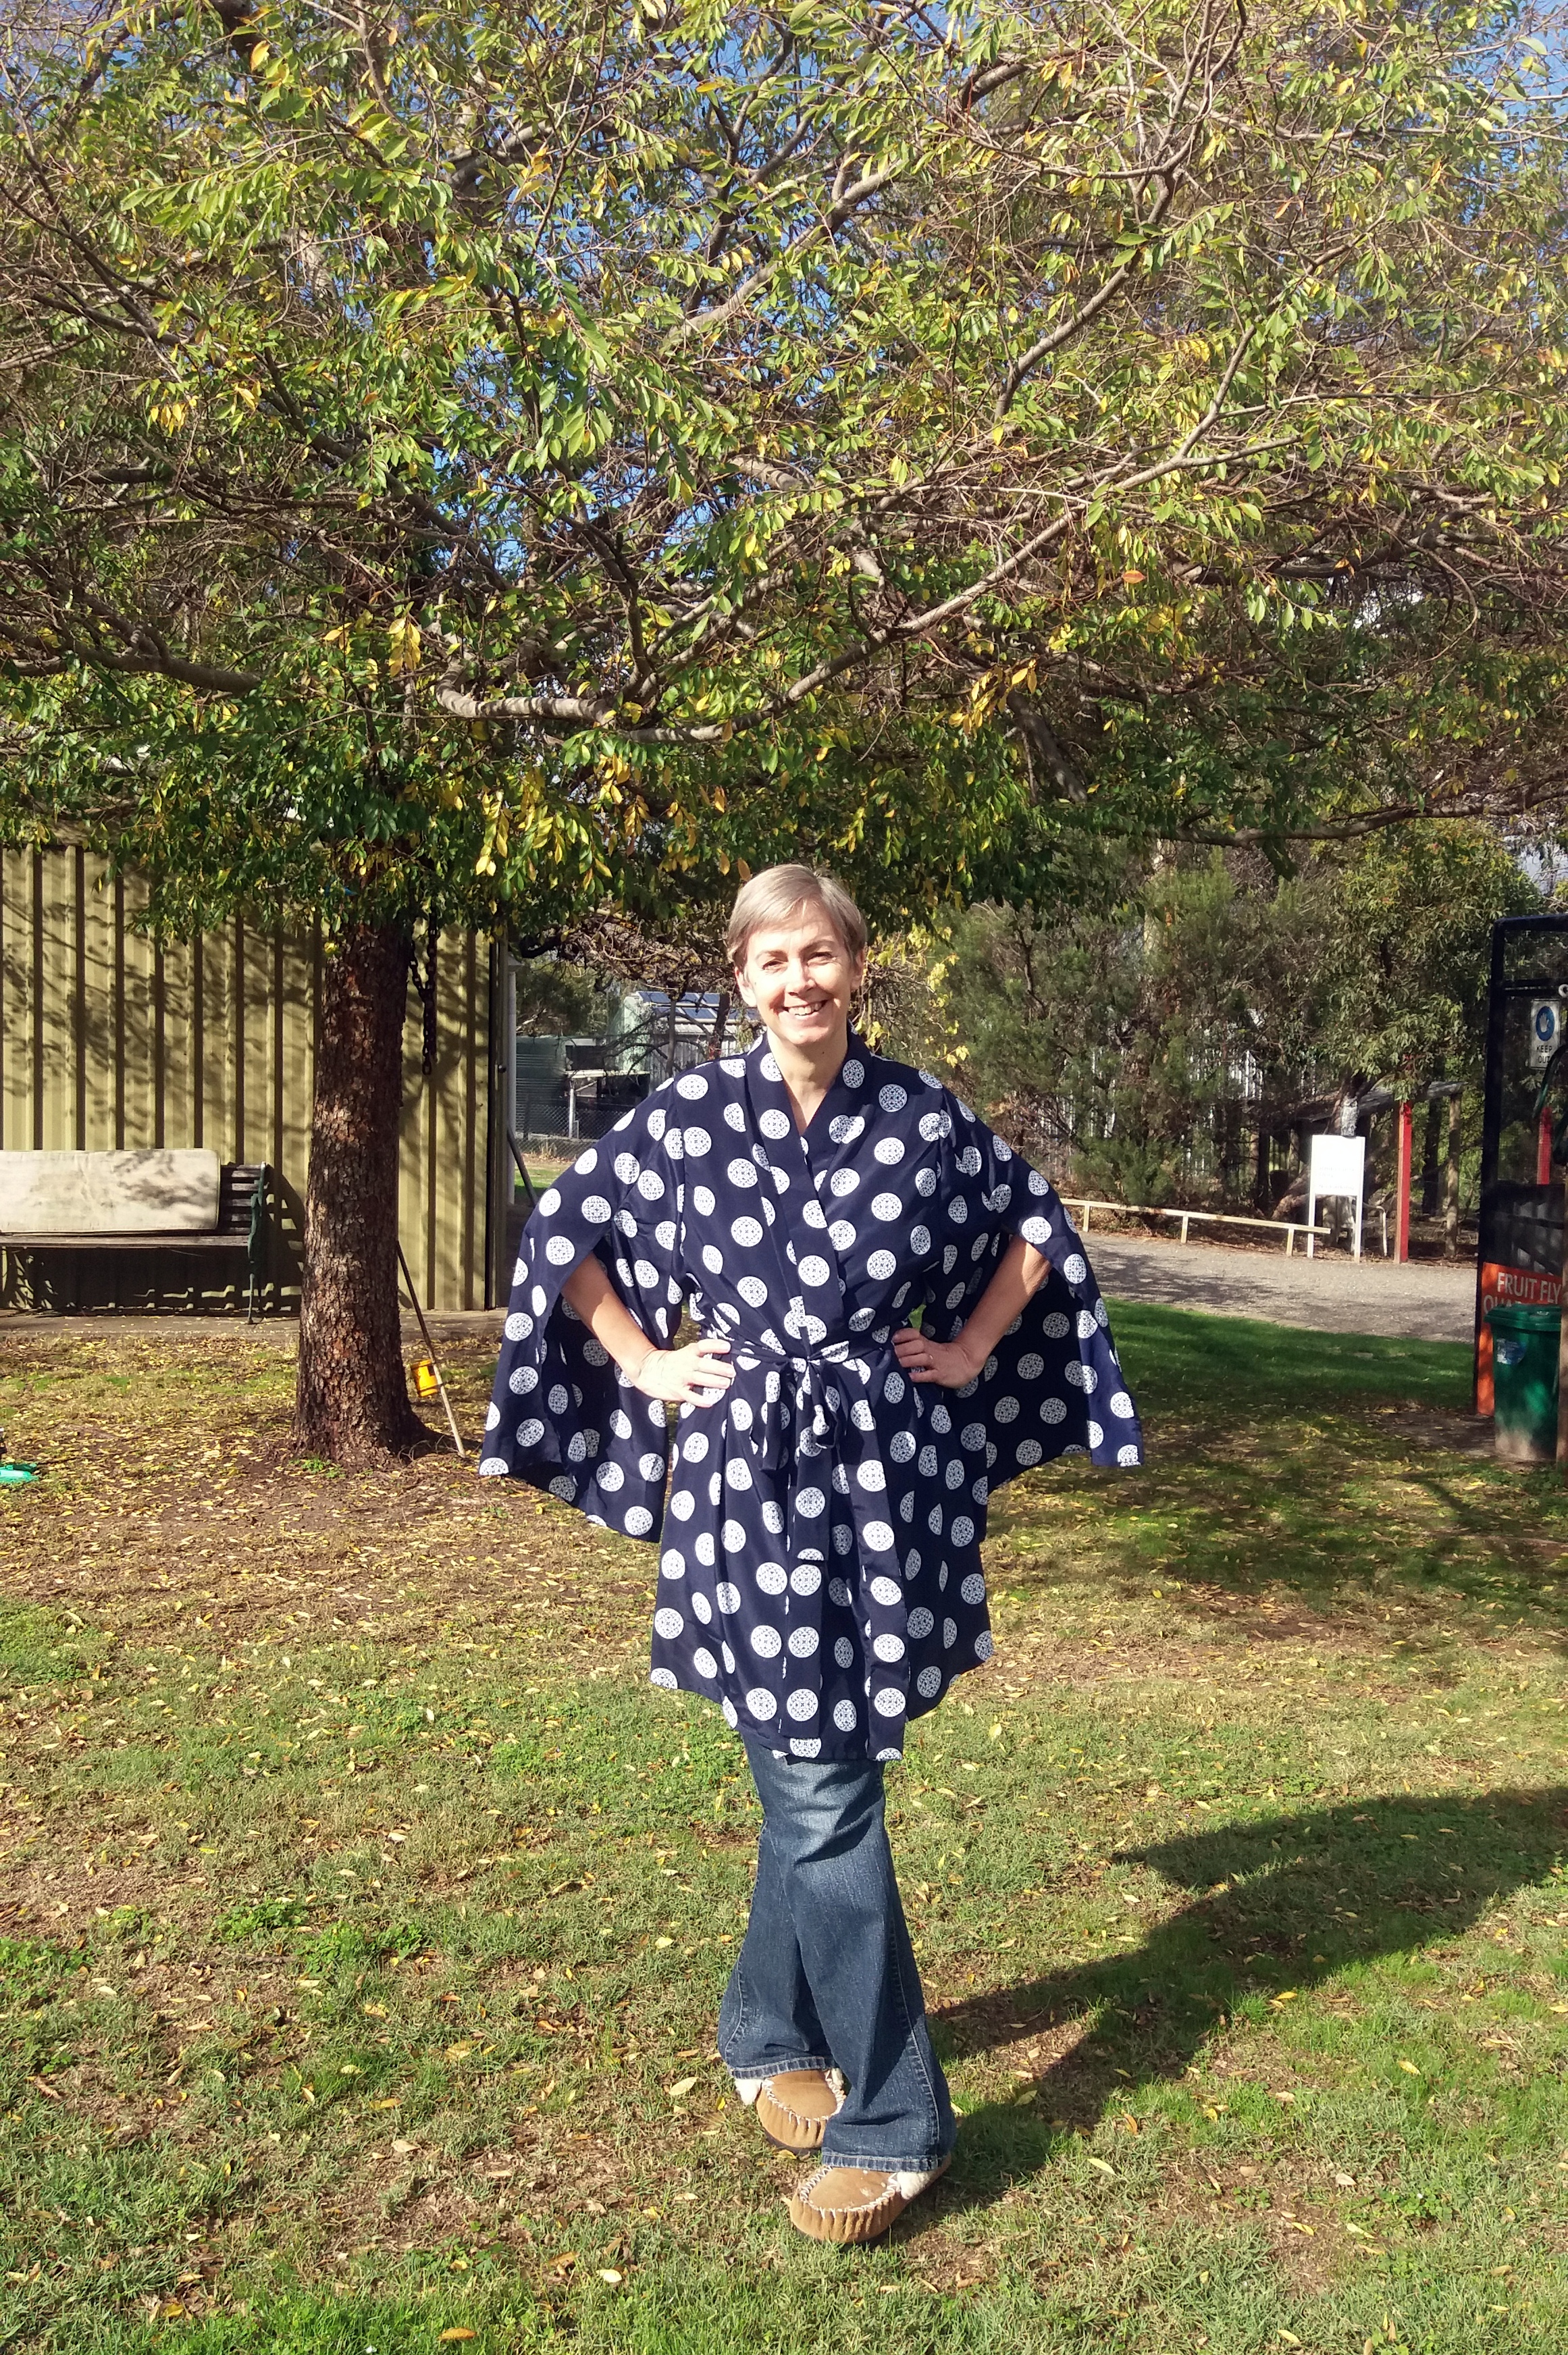
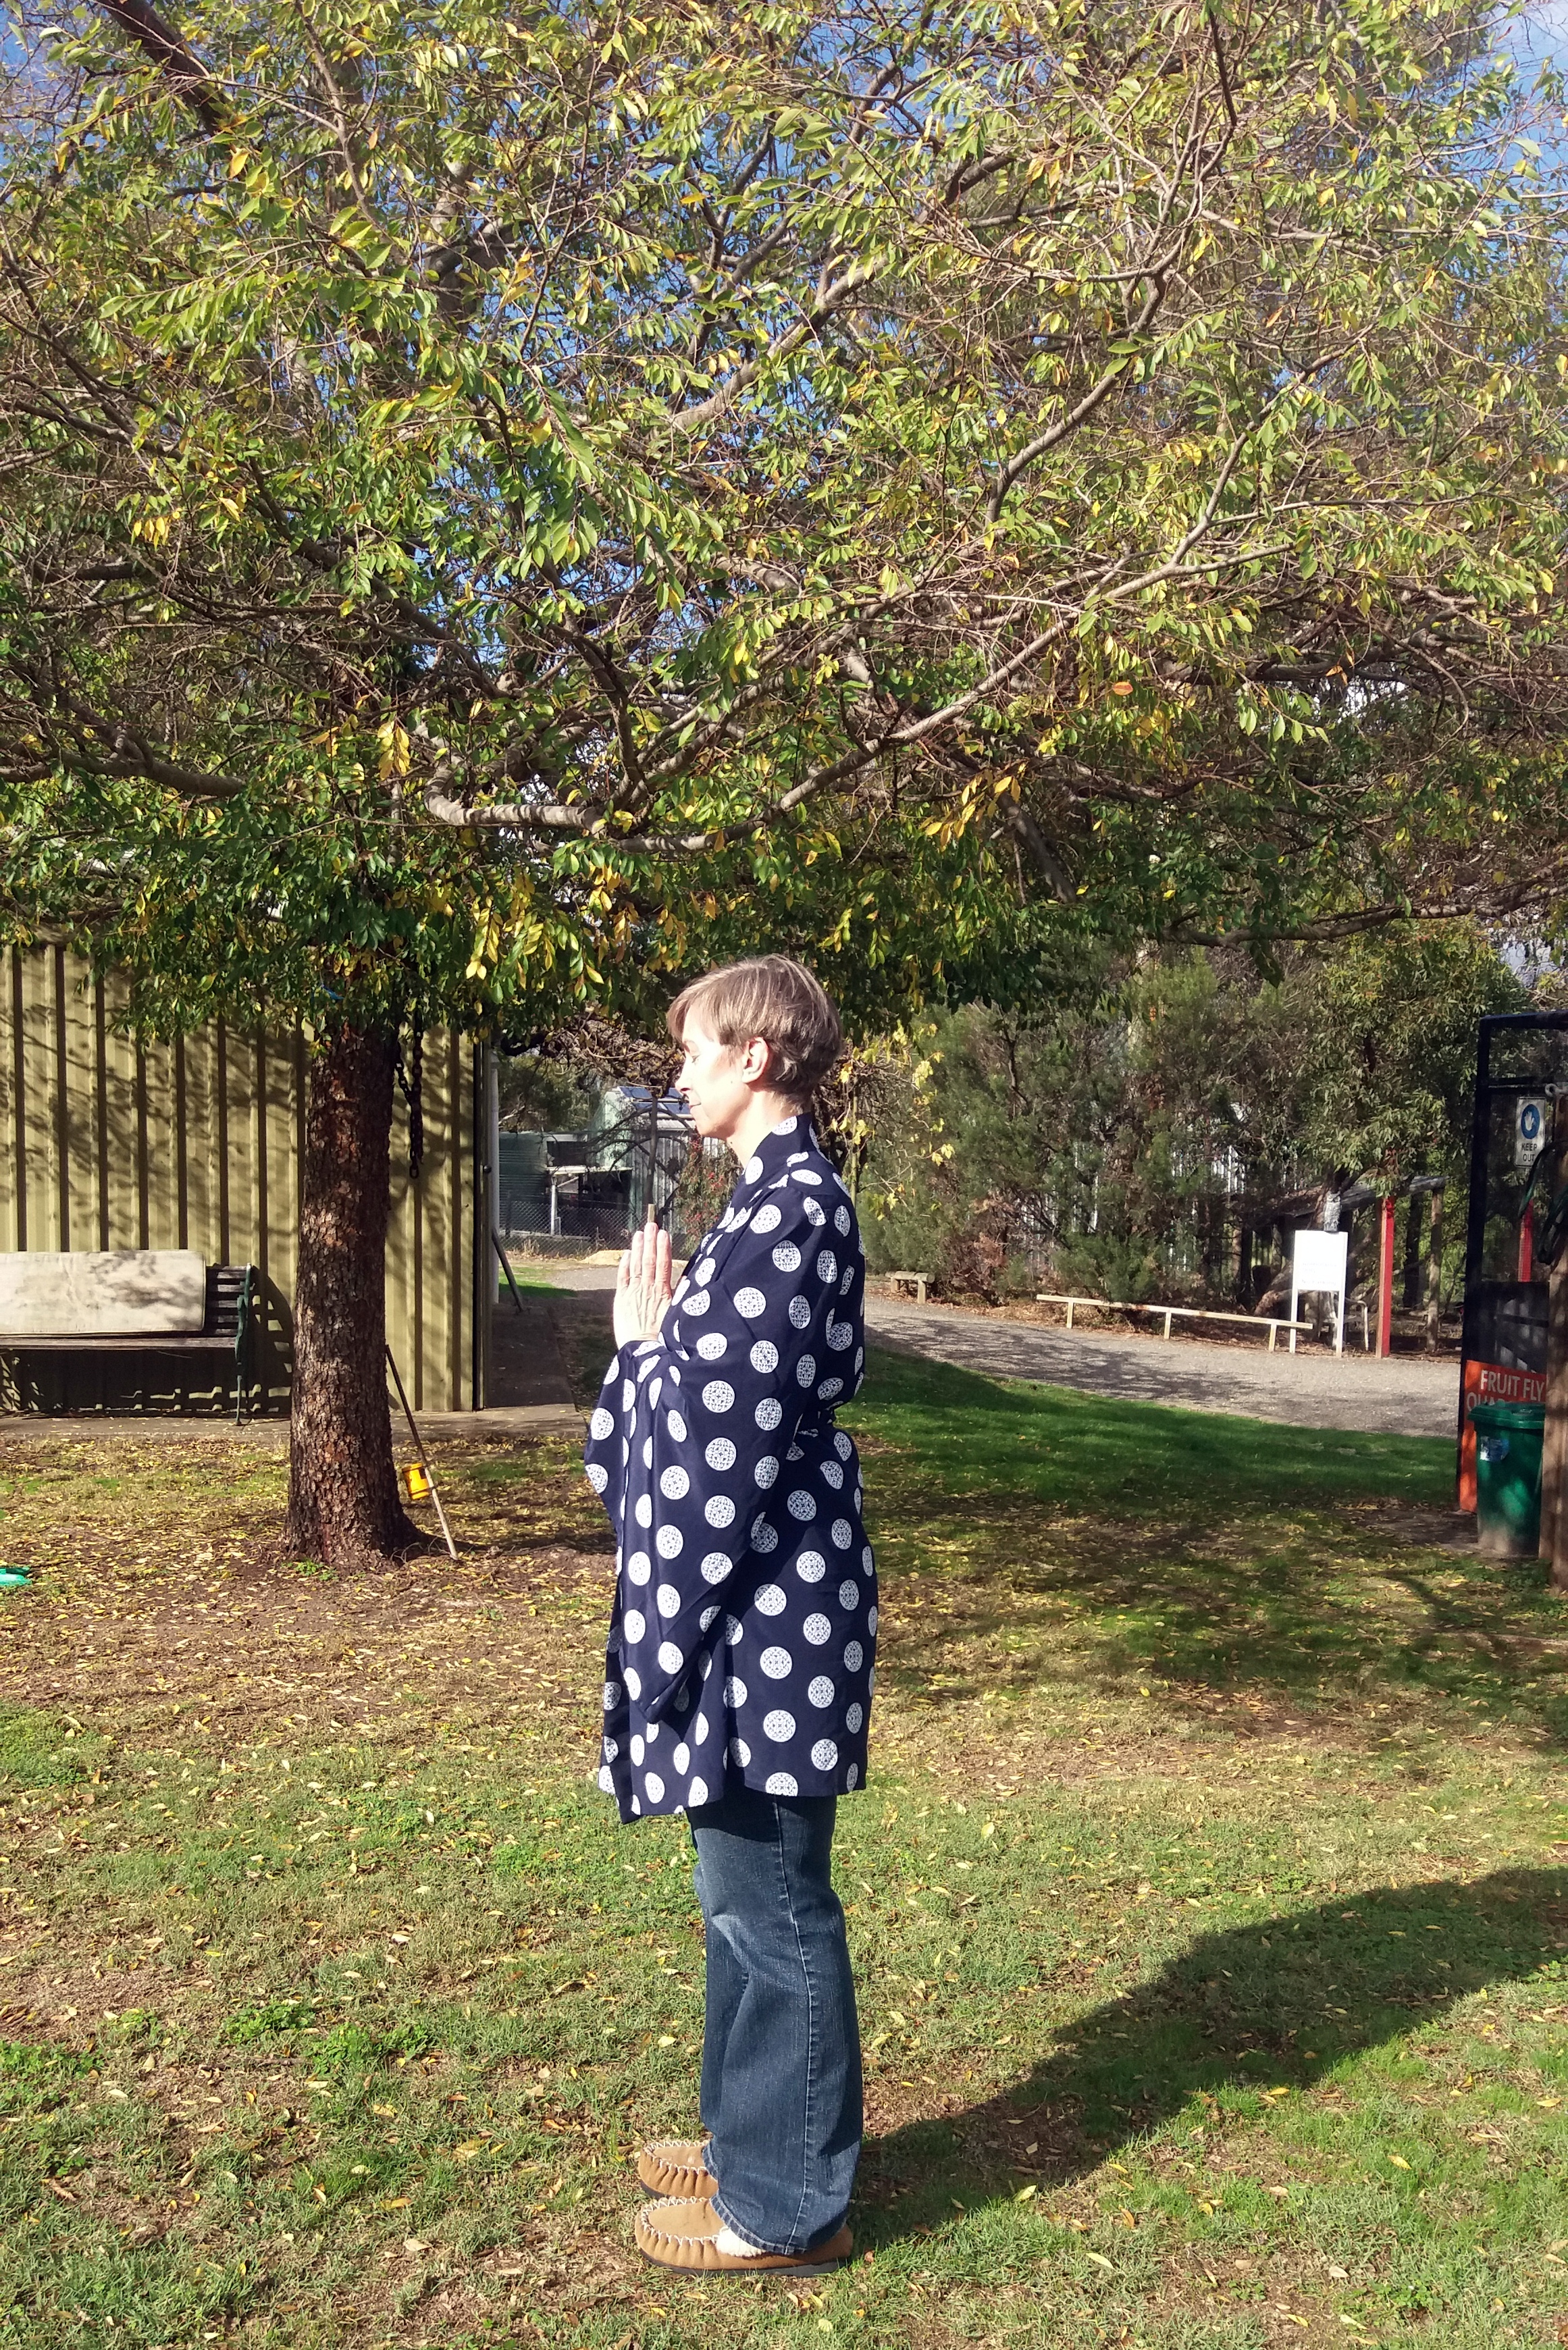
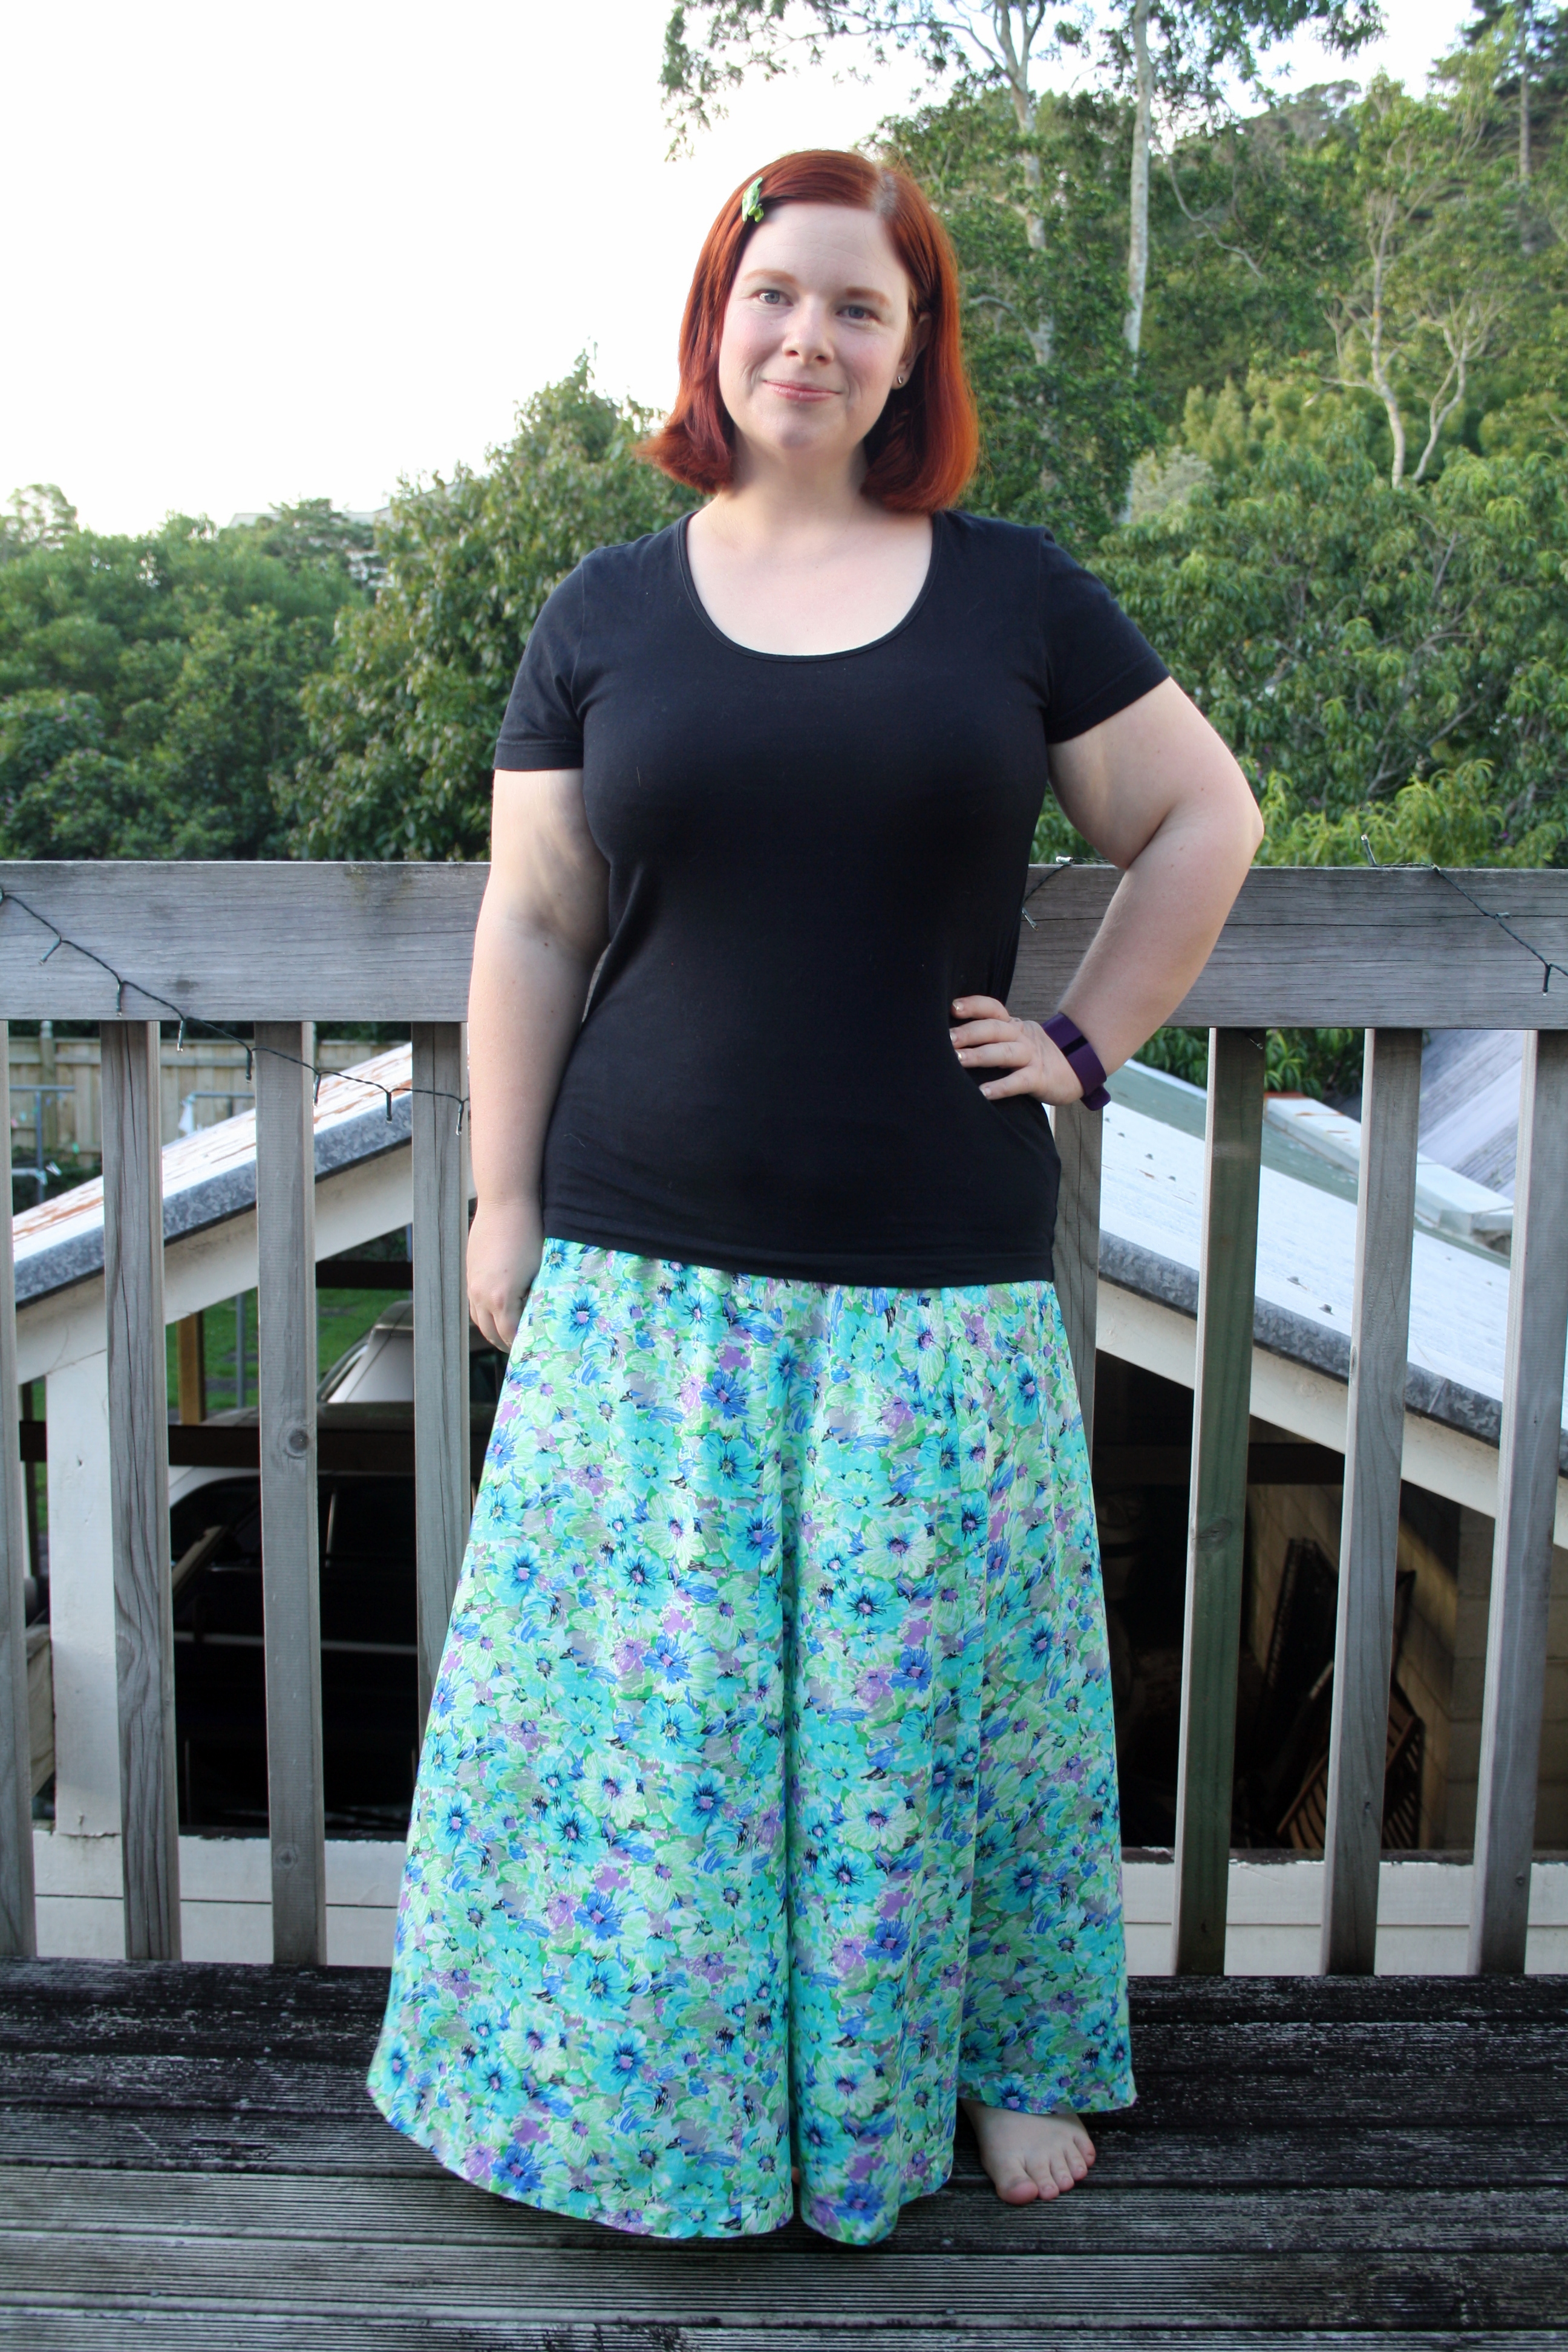
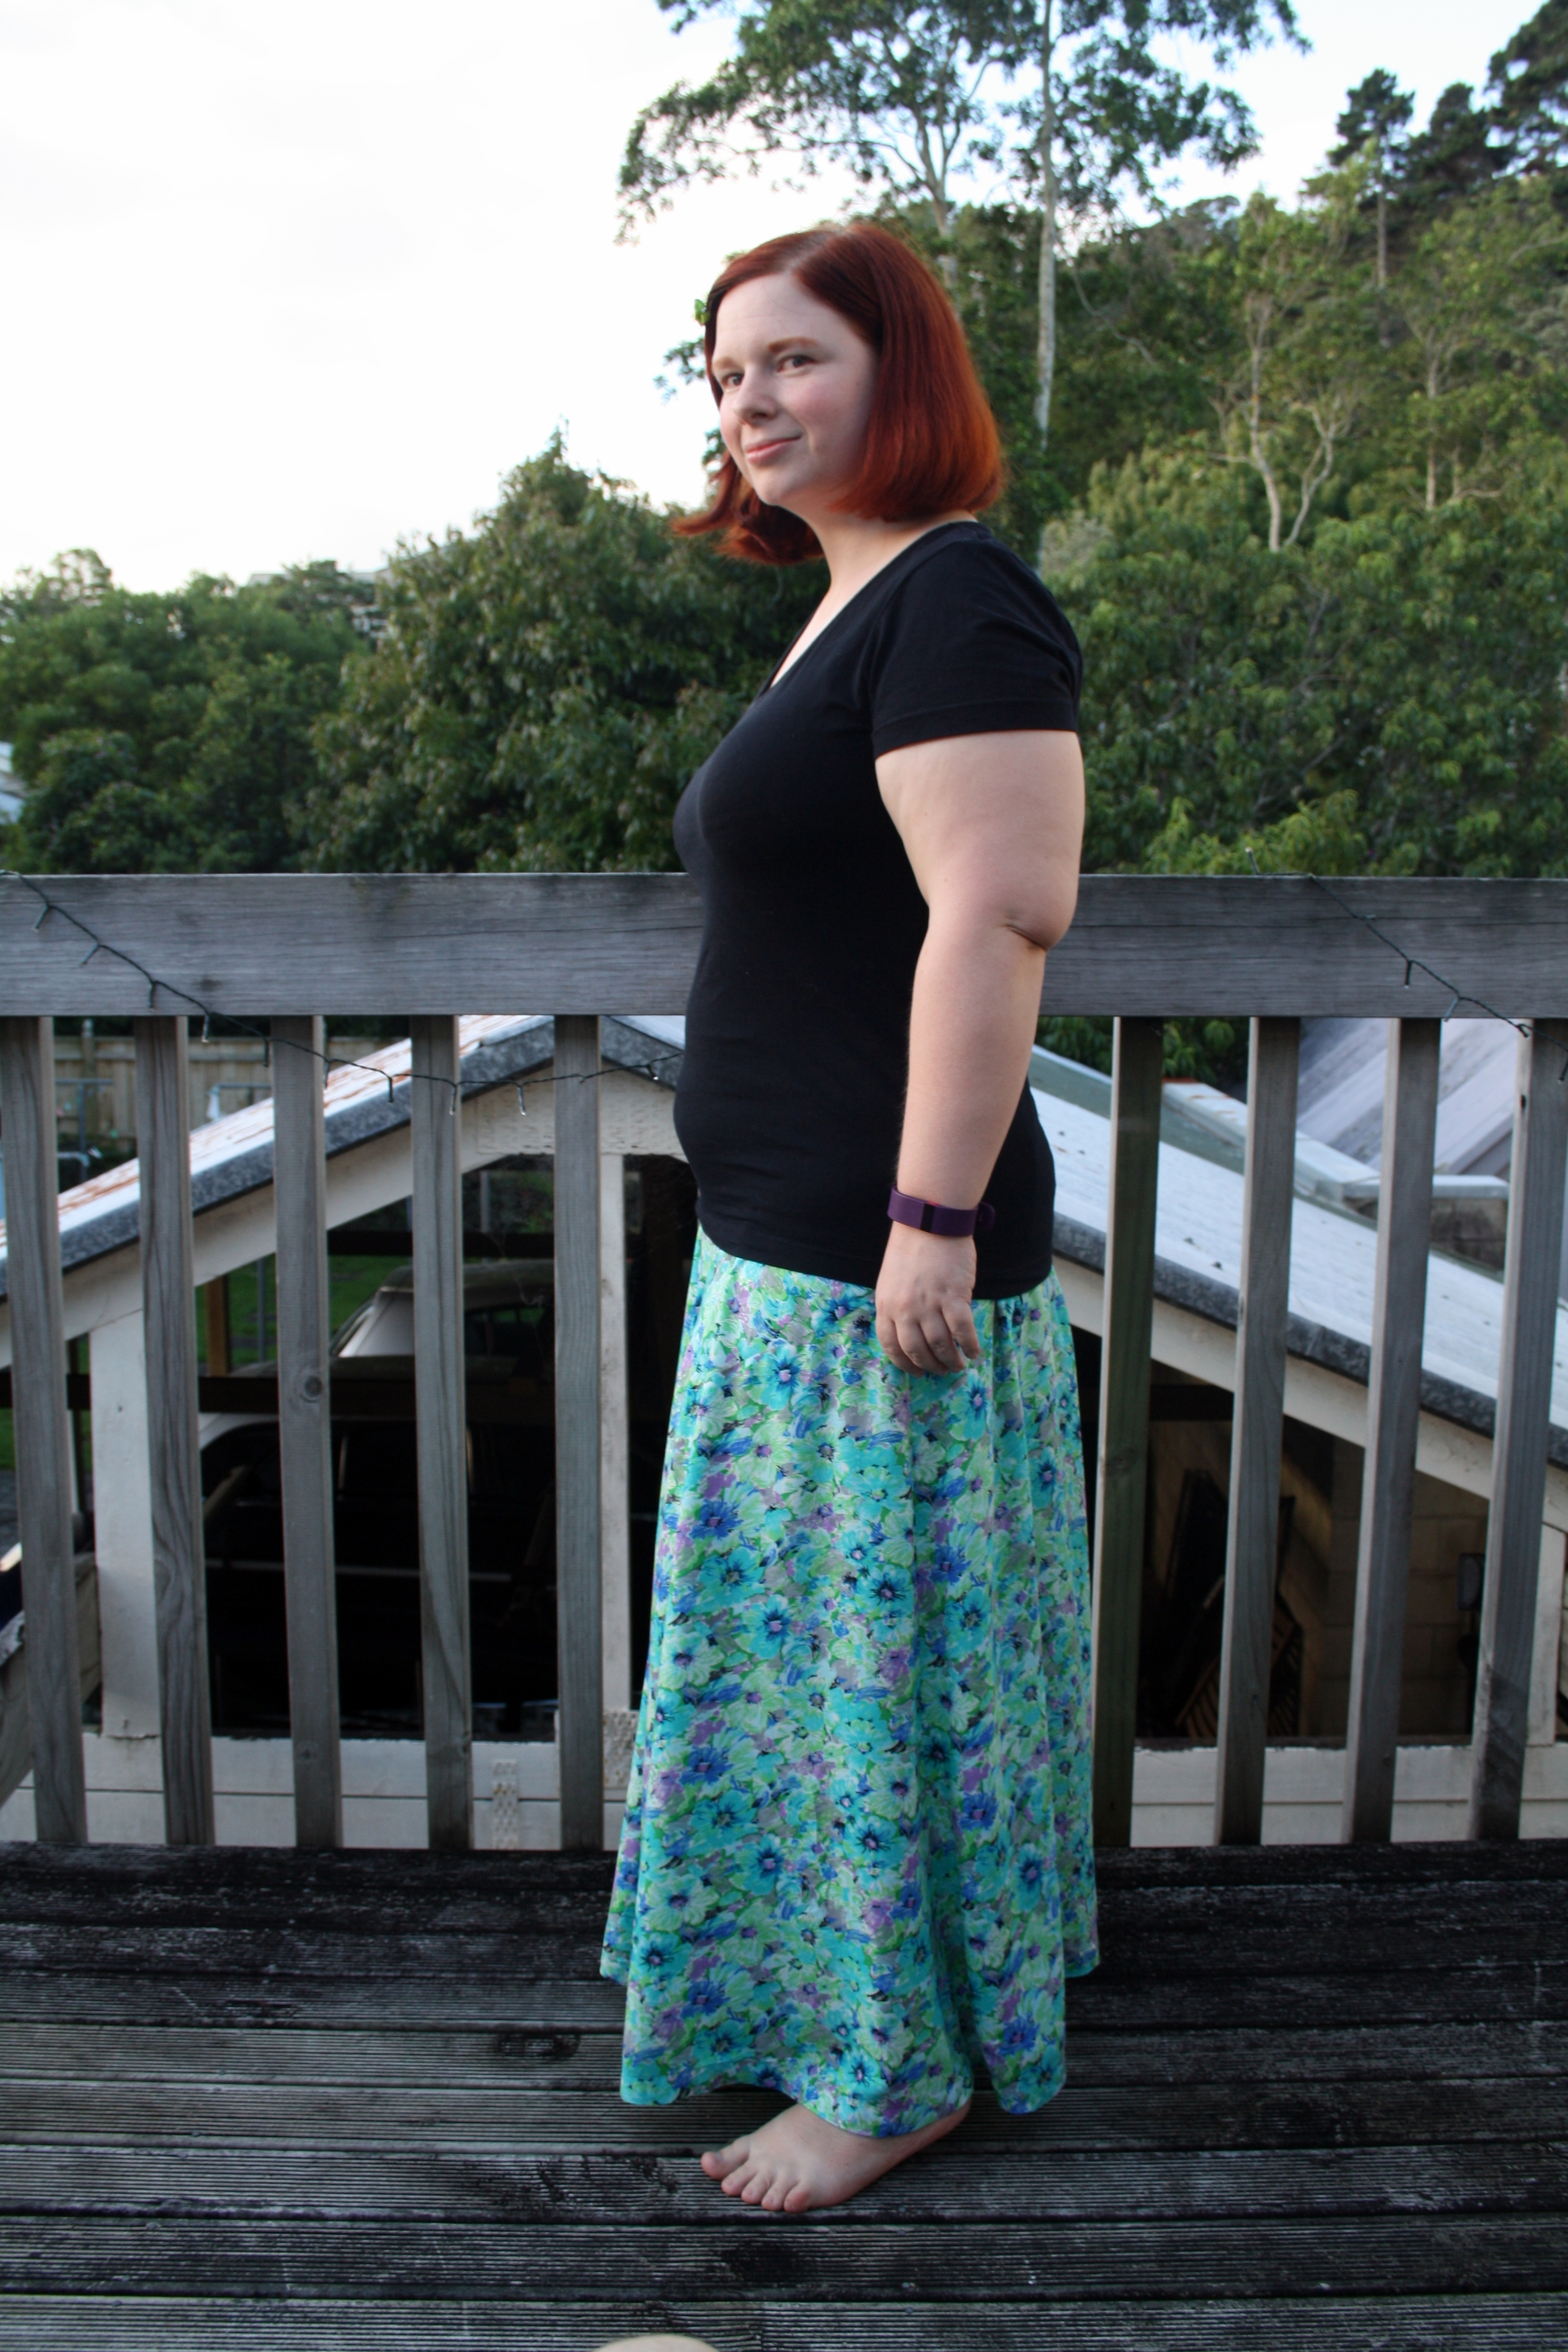
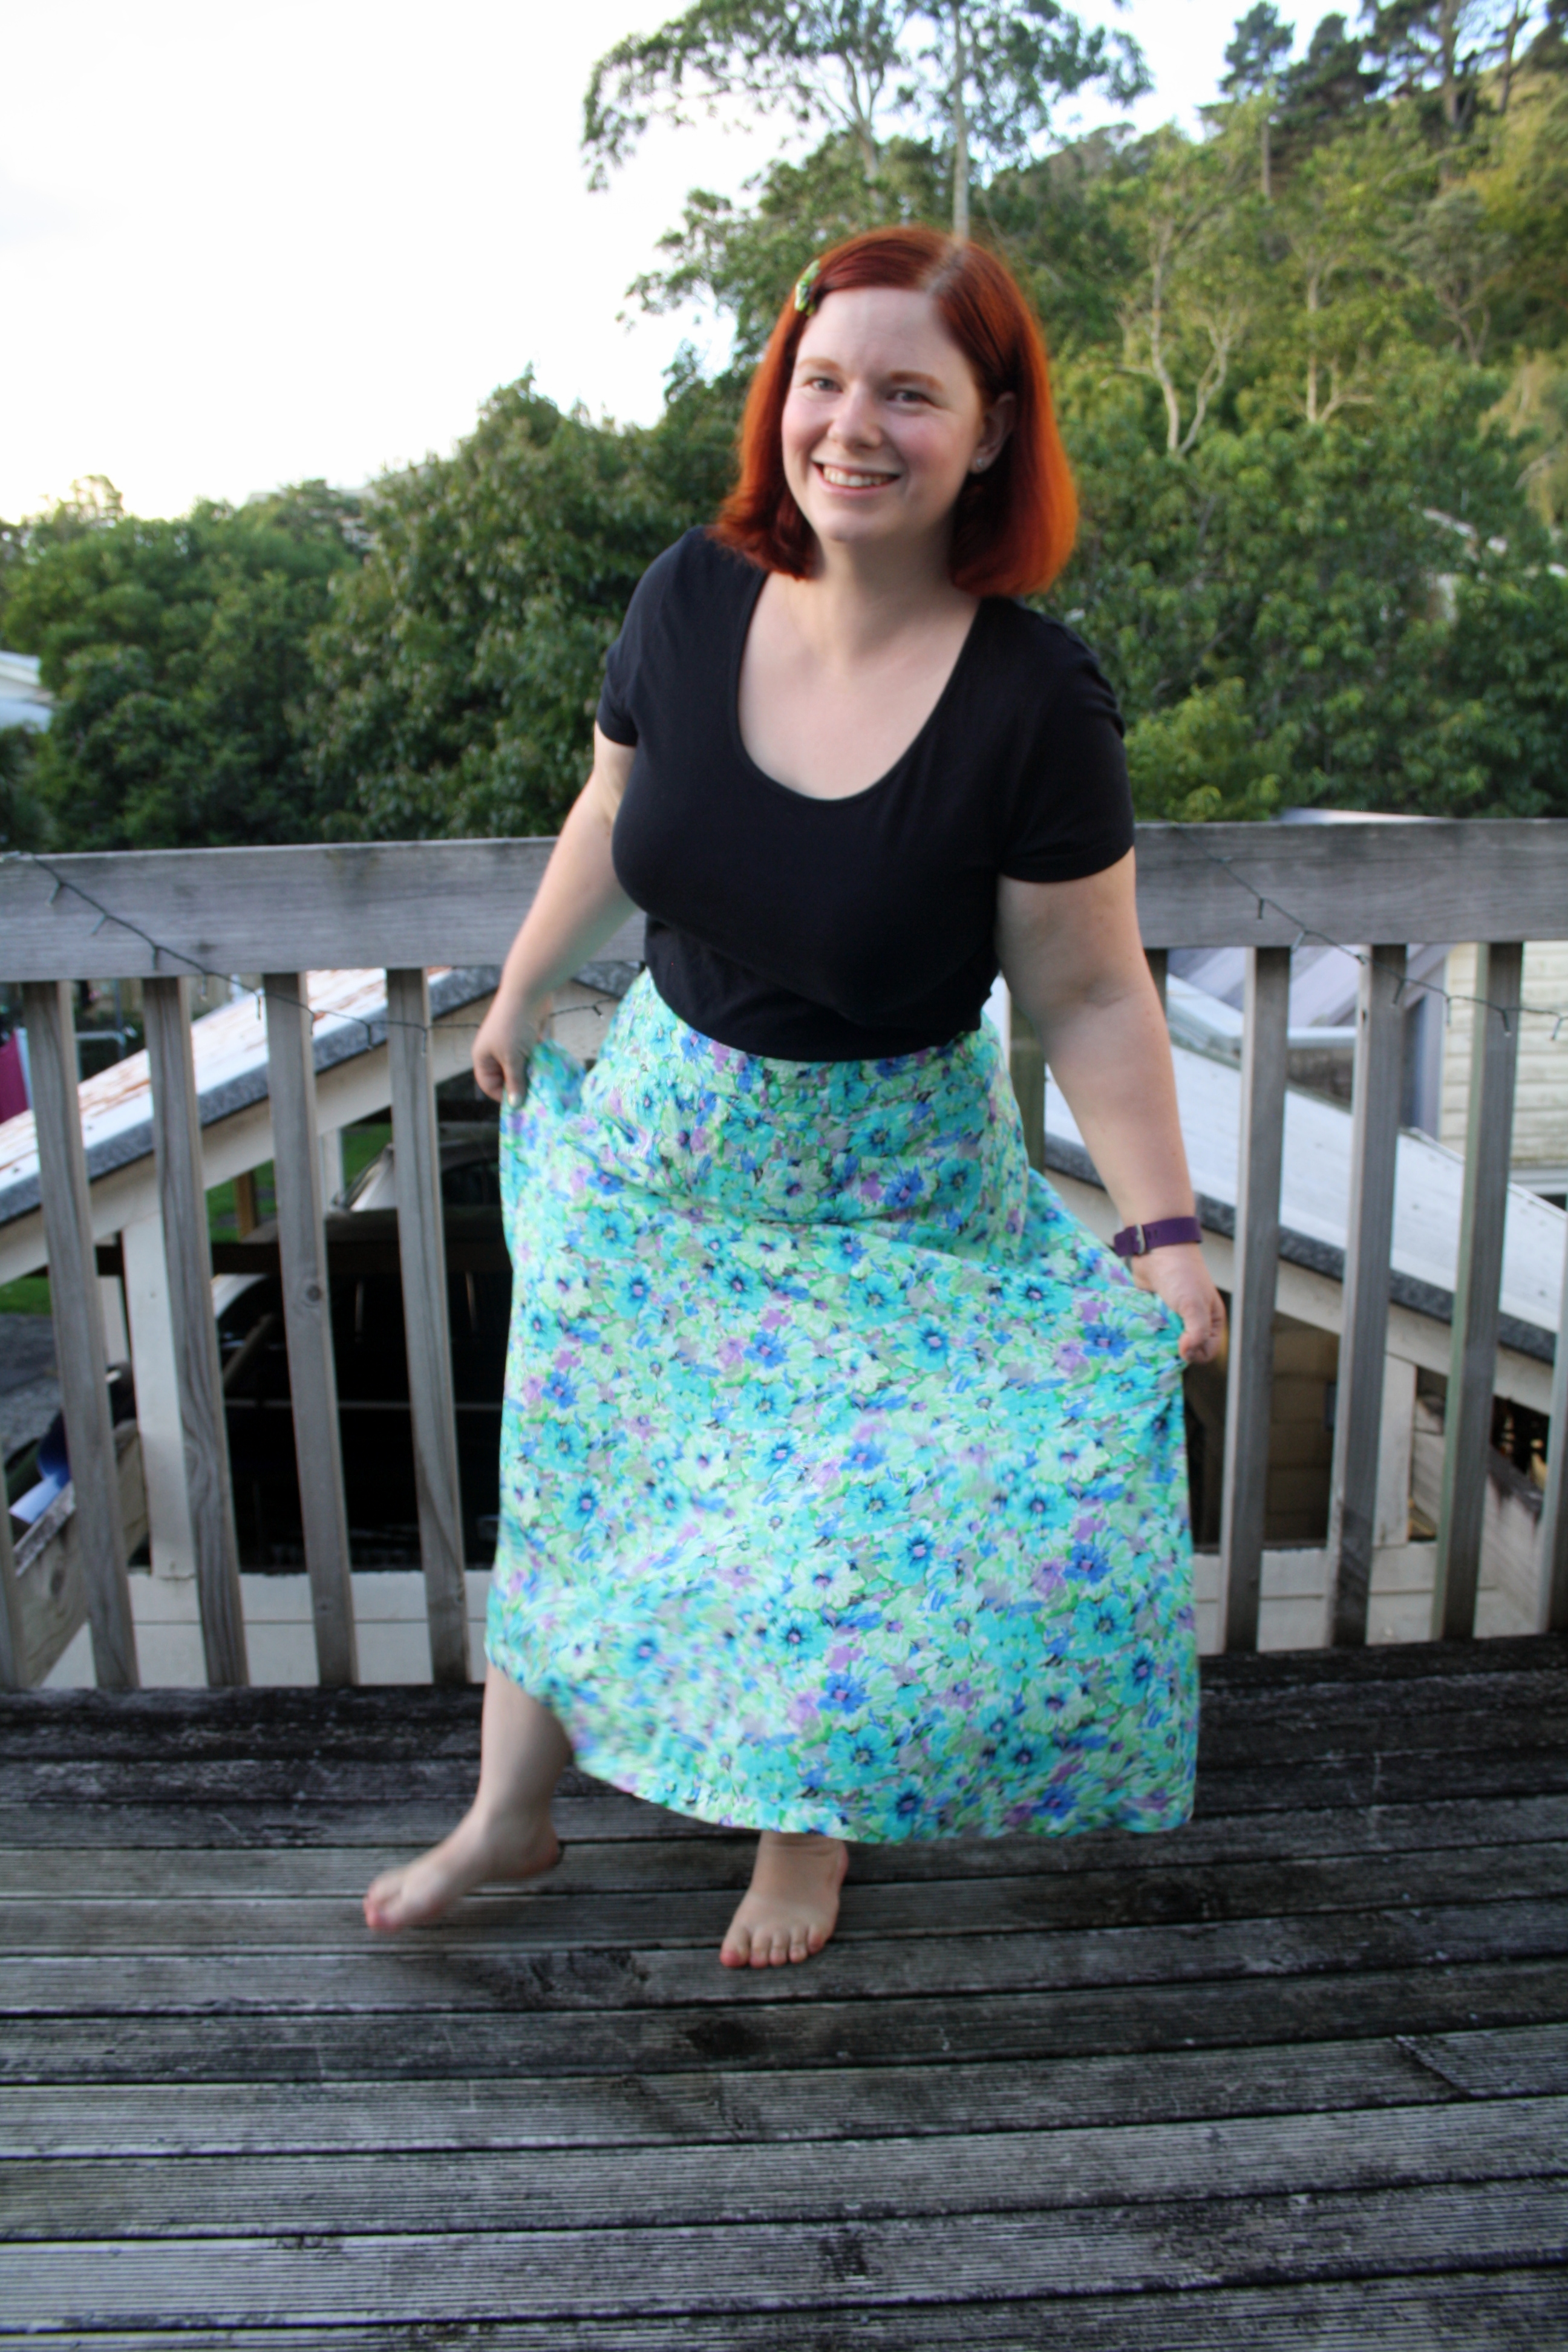
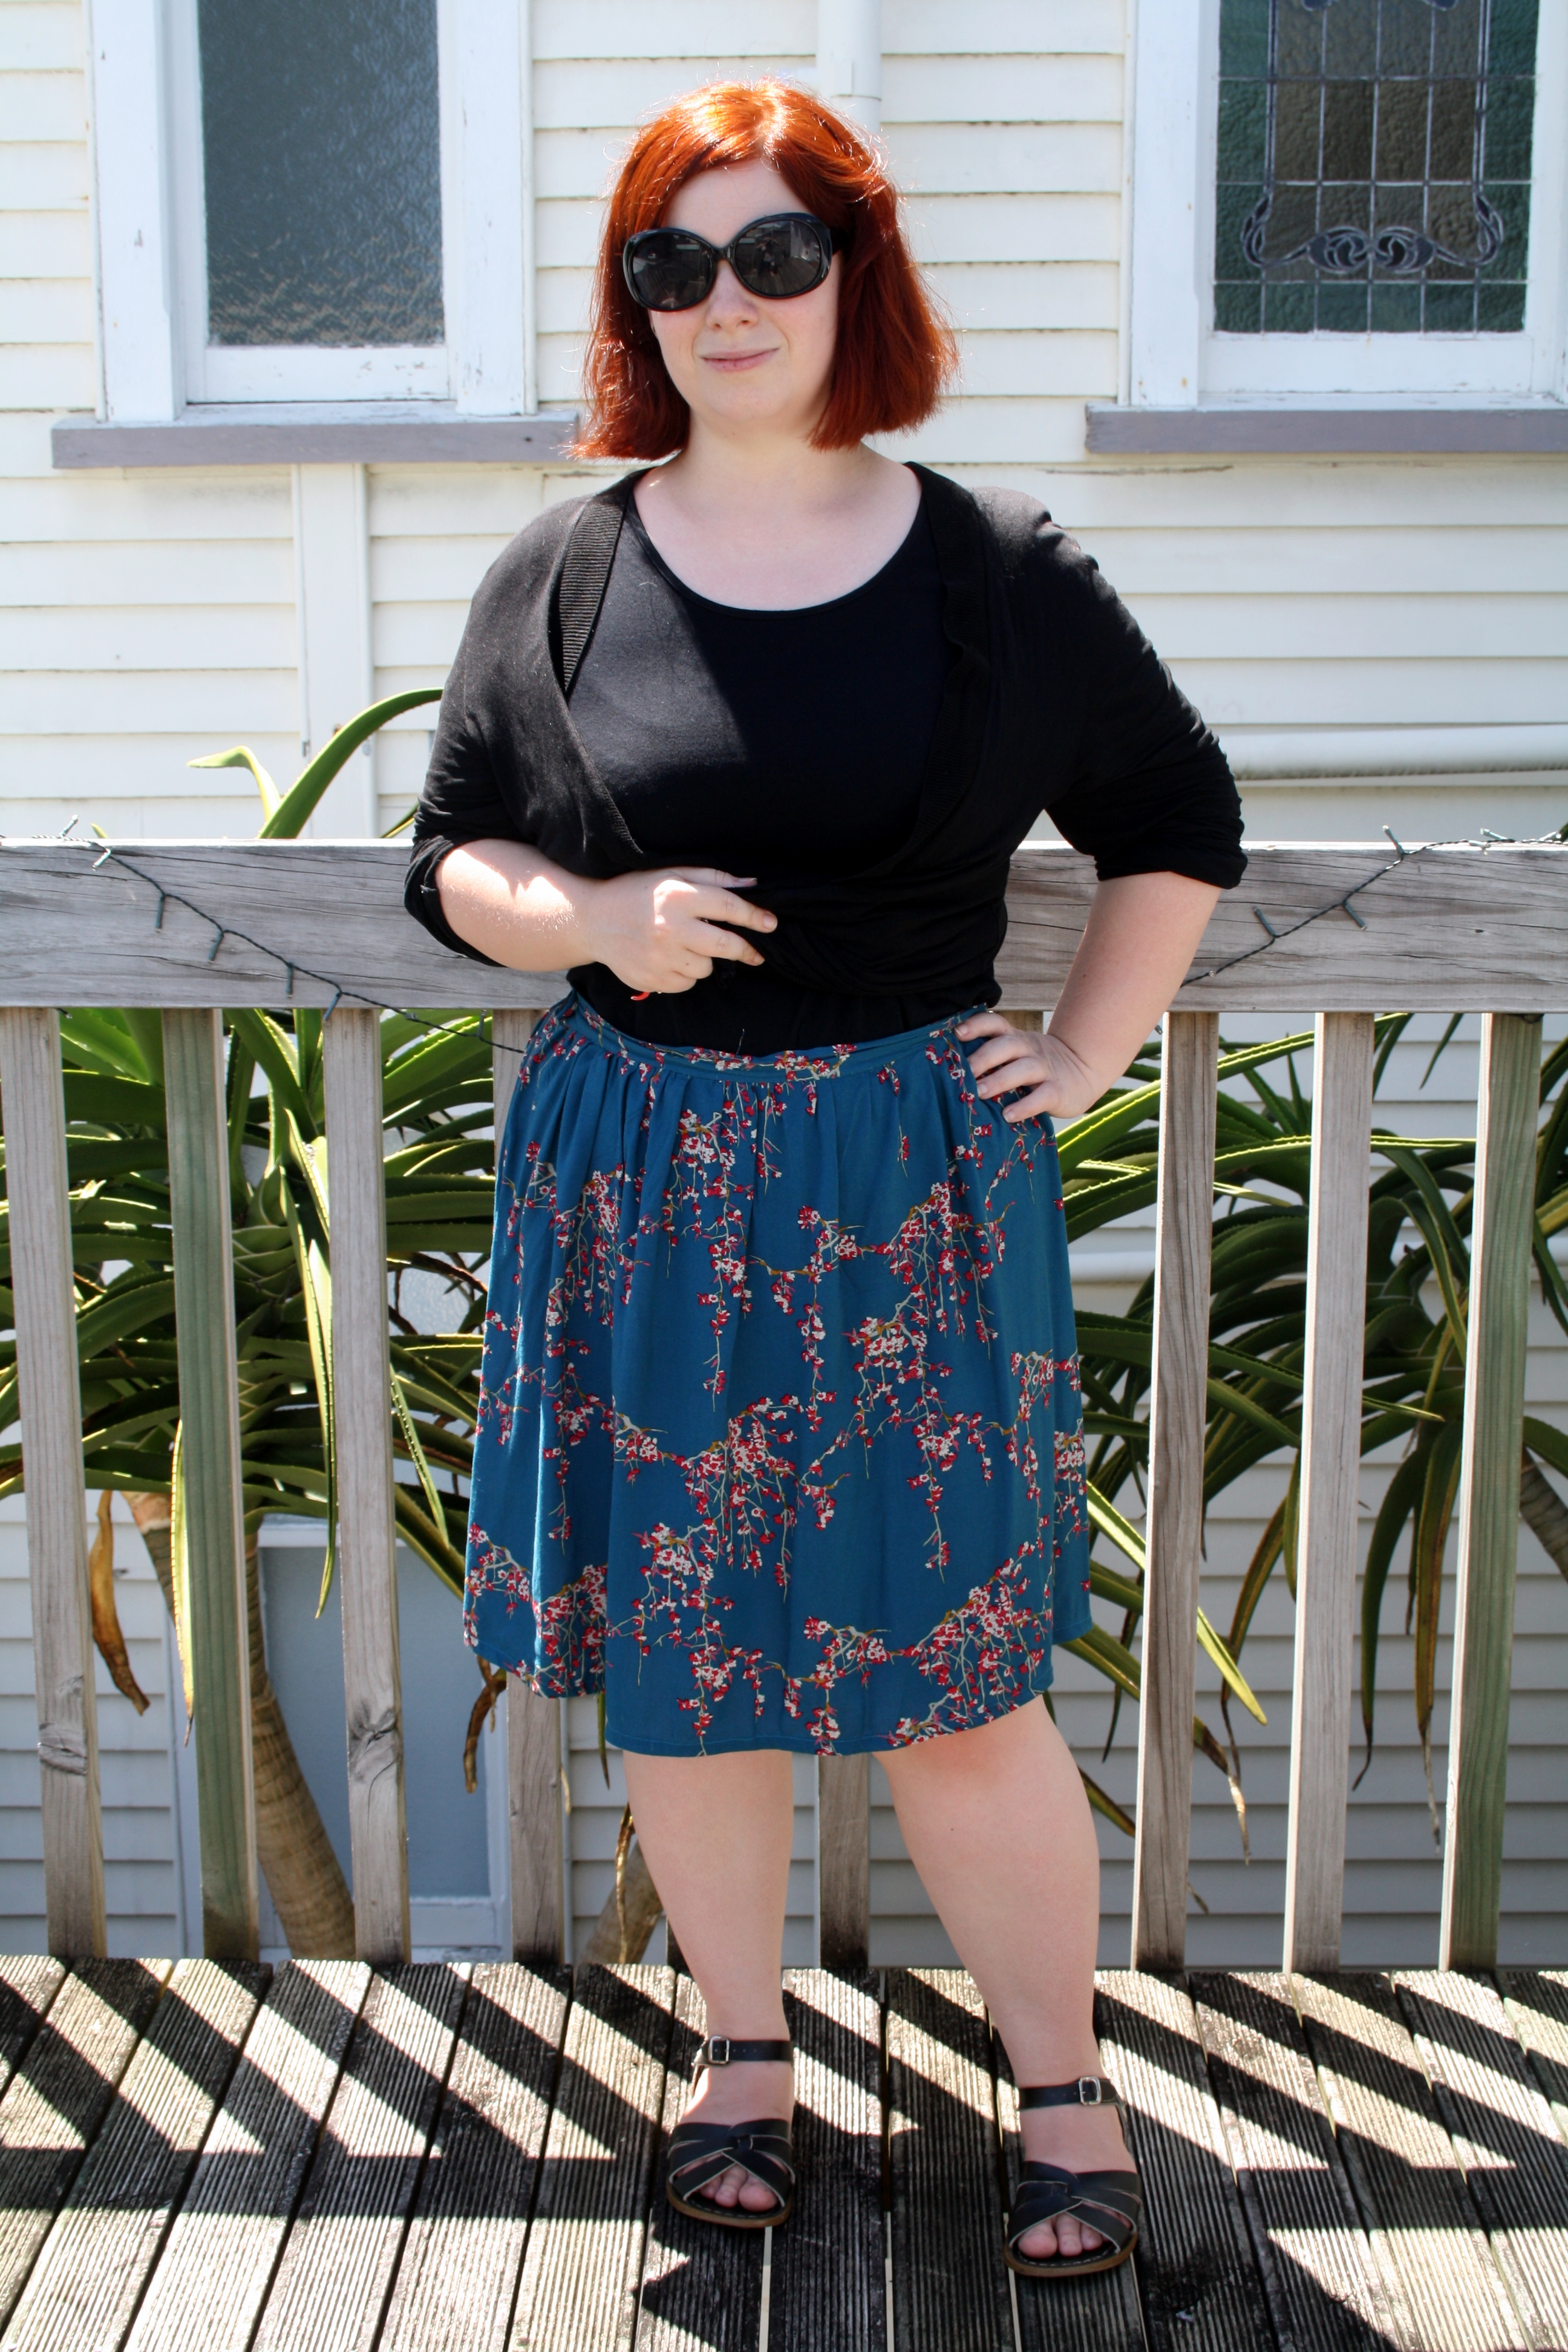
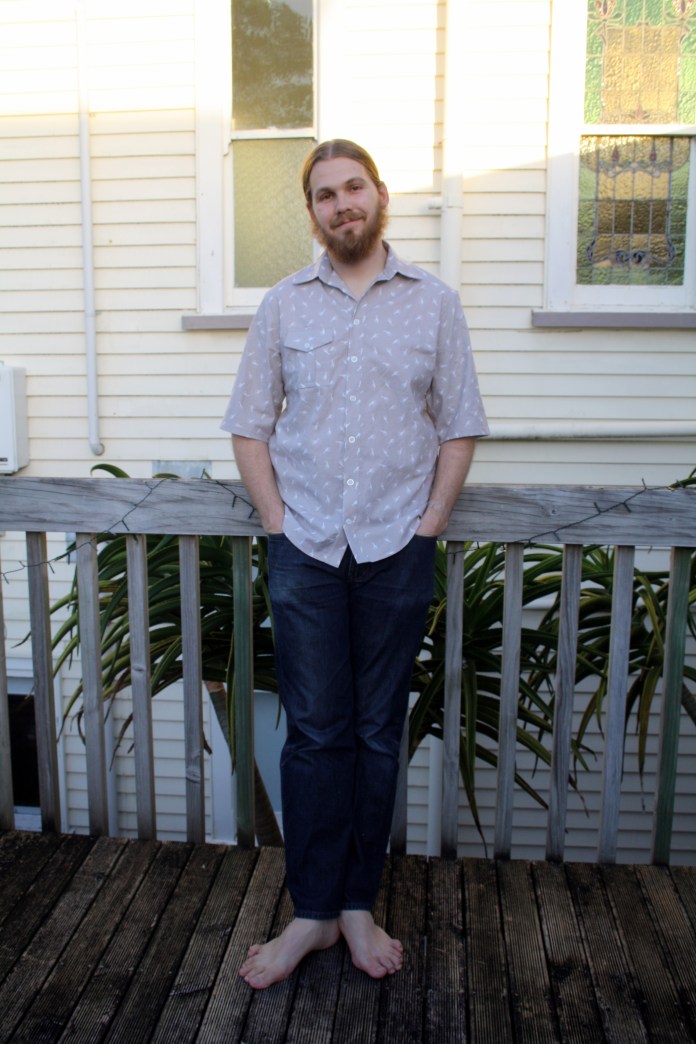
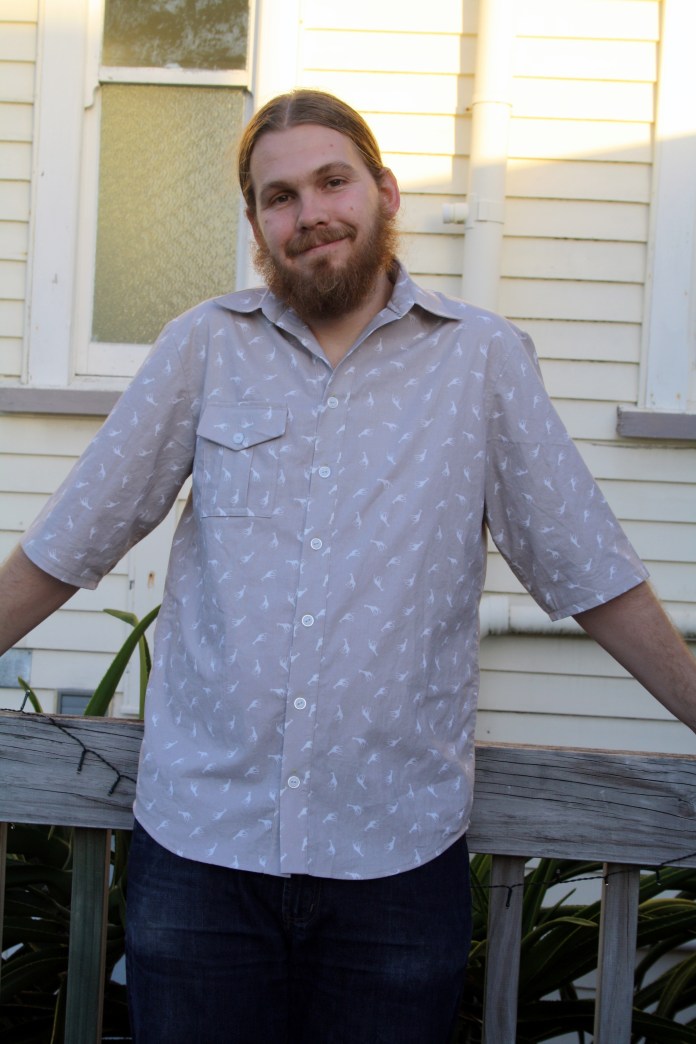
The end result is…well, it’s different. Japanese fashion always looks effortless and elegant on Japanese people, but on me? Not so much. I’ve wanted to give Japanese sewing patterns a go for a while, and I own a couple of books, but up until quite recently I’ve been larger than the largest size, and I can’t be arsed grading up. This particular pattern is one size, but that size is huge so no worries there. I haven’t altered it at all. I’m carrying some extra kilos from eating ALL THE CAKES in Japan, but hey, I could be 6 months pregnant under this dress and no one would be any the wiser.

img_6368

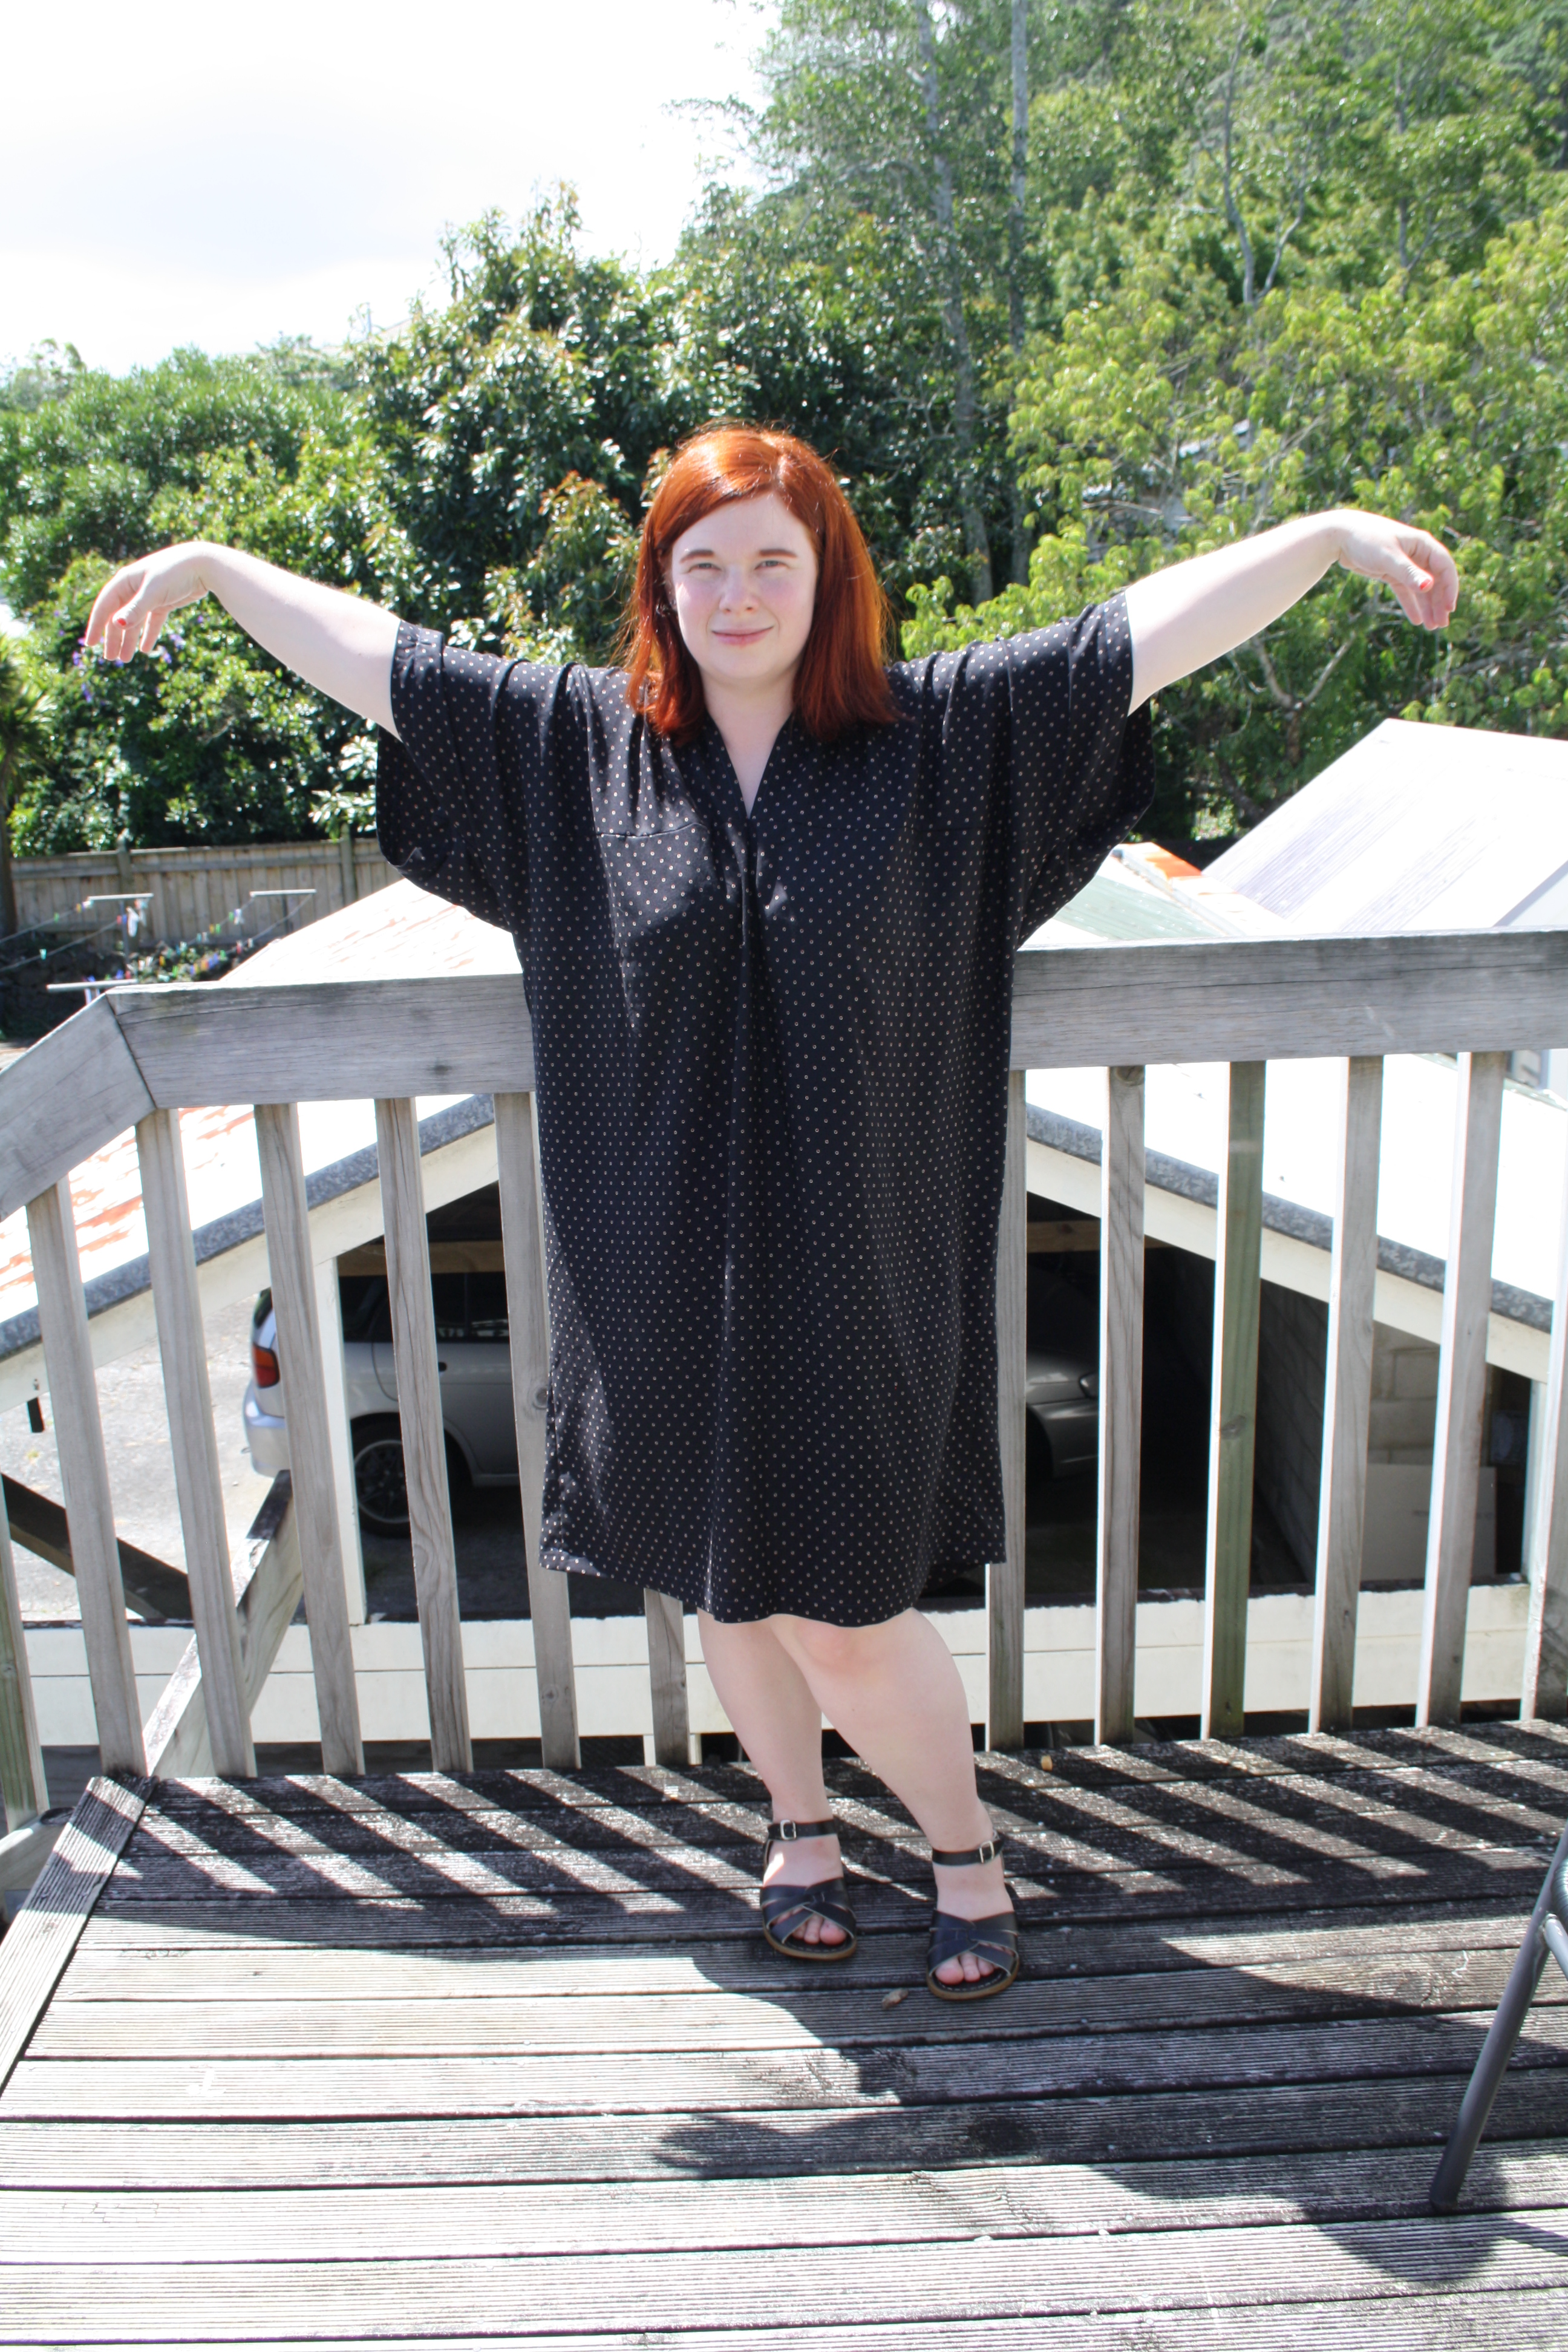
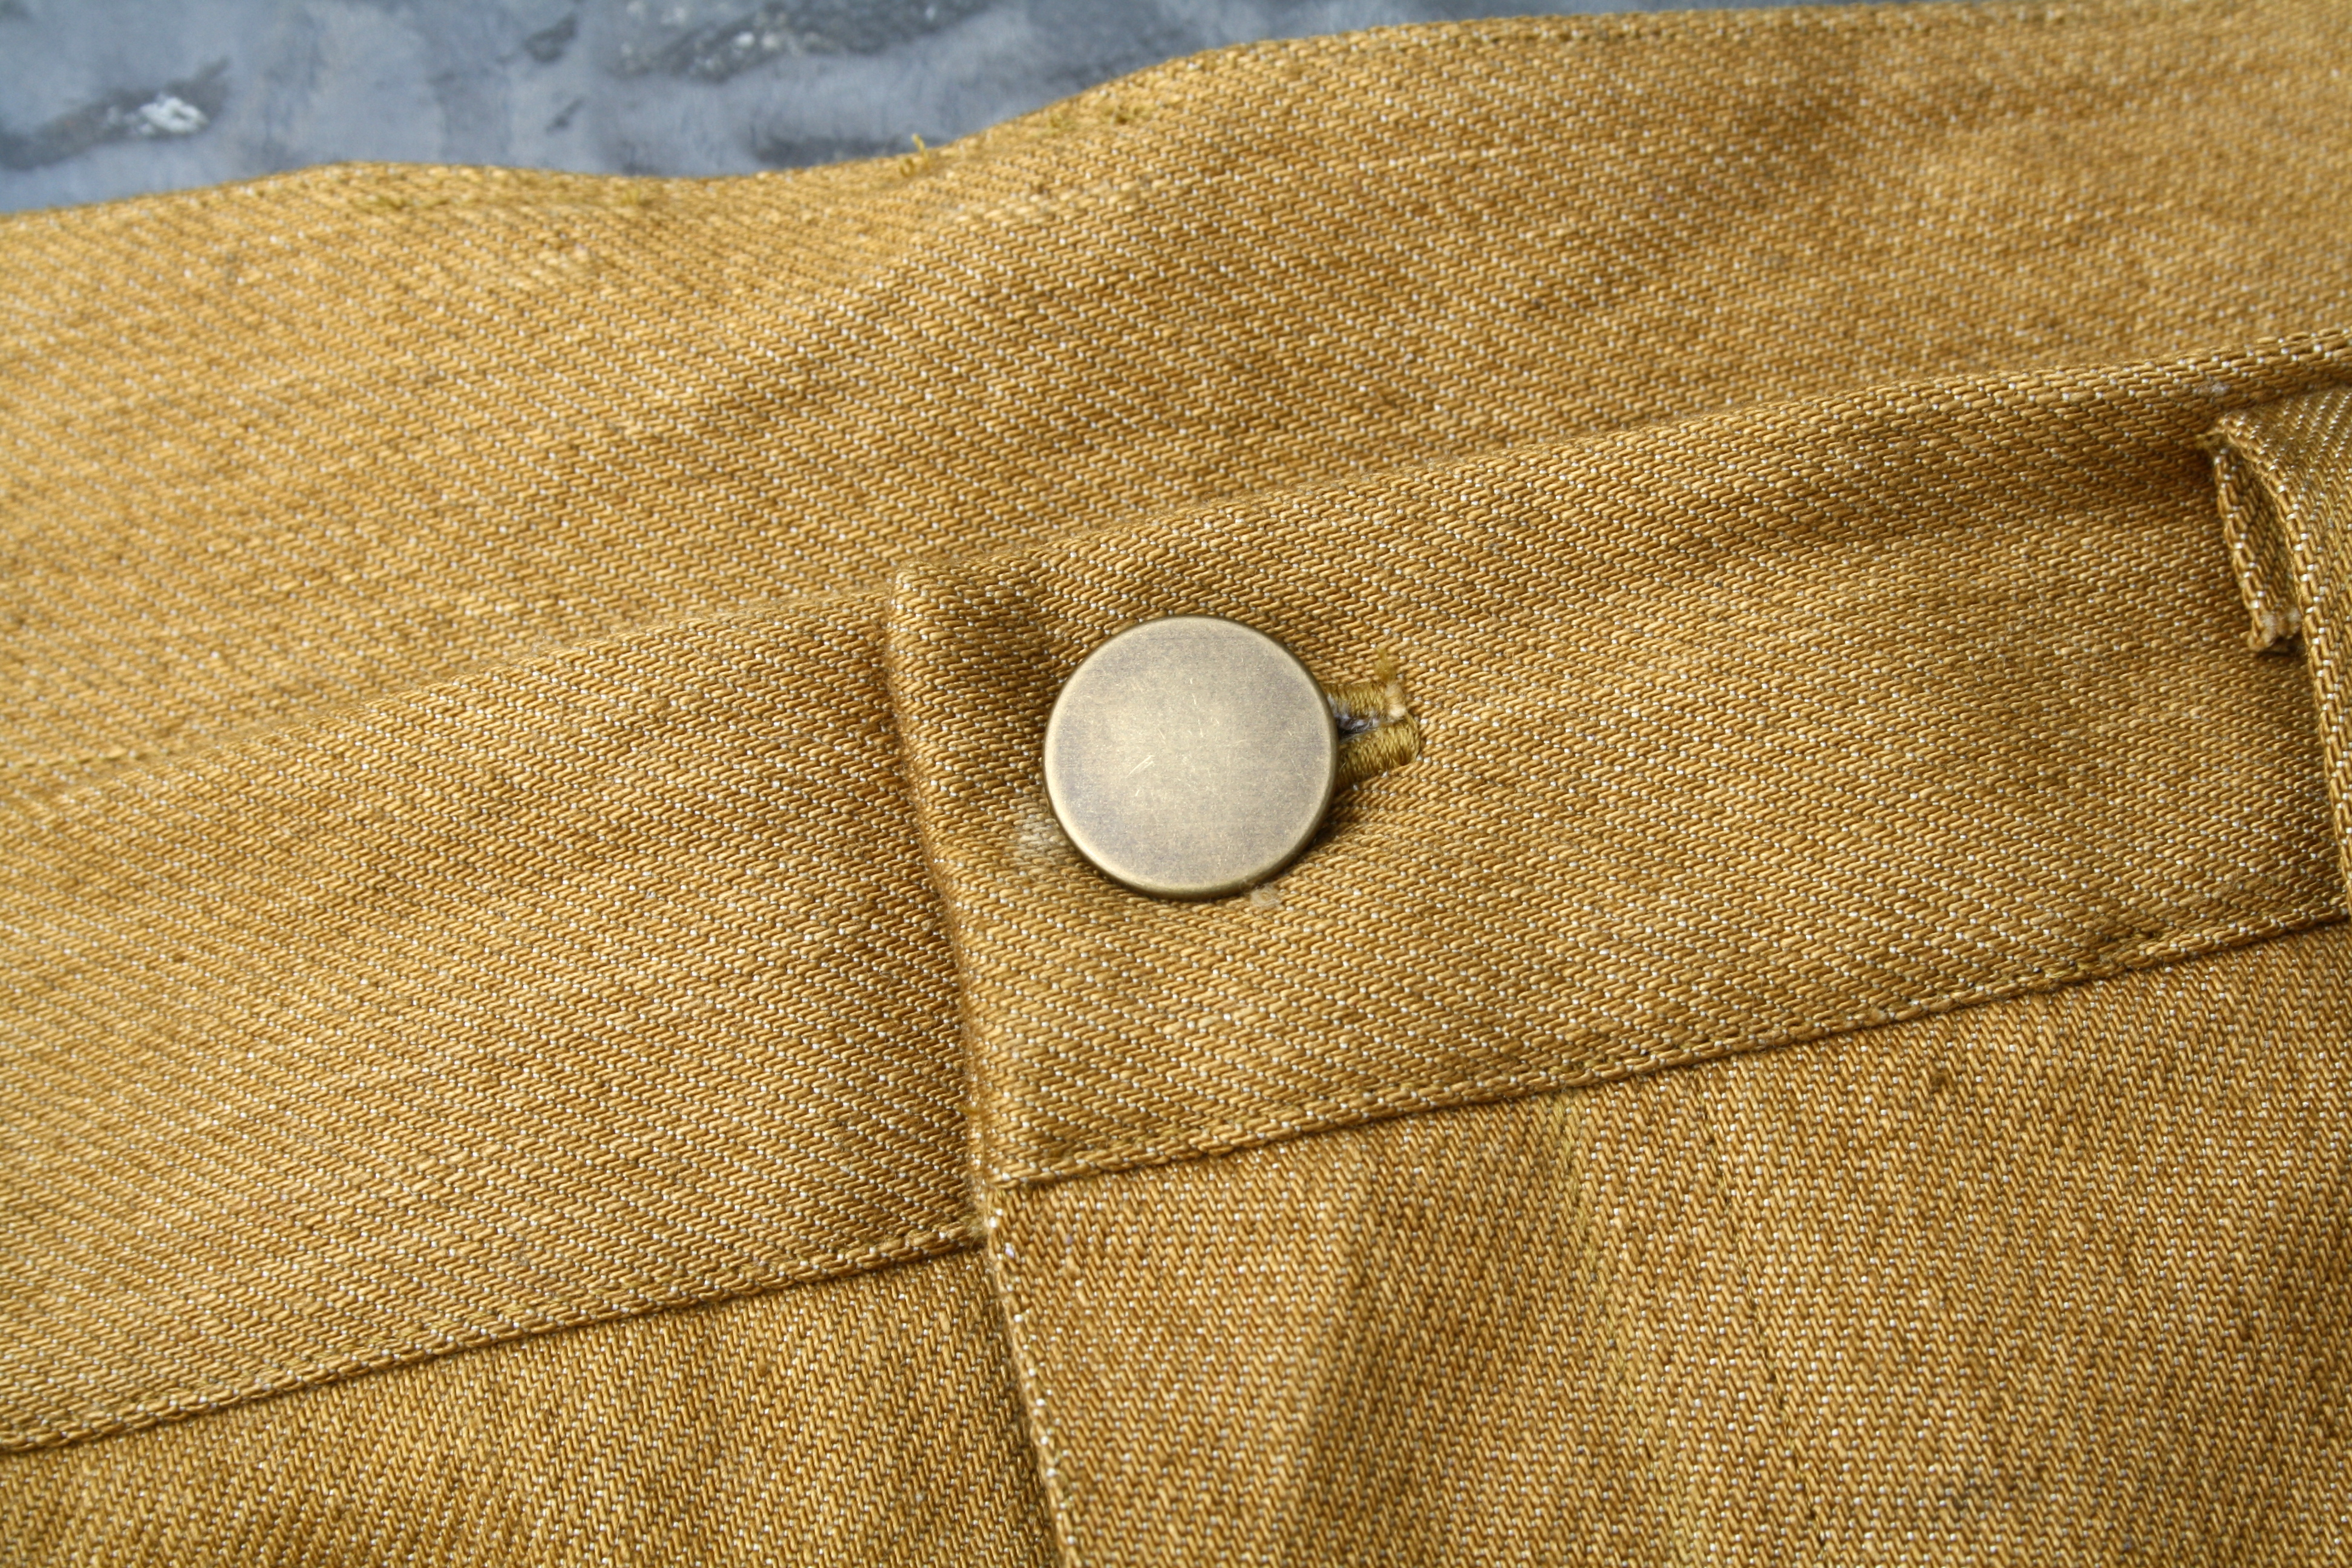
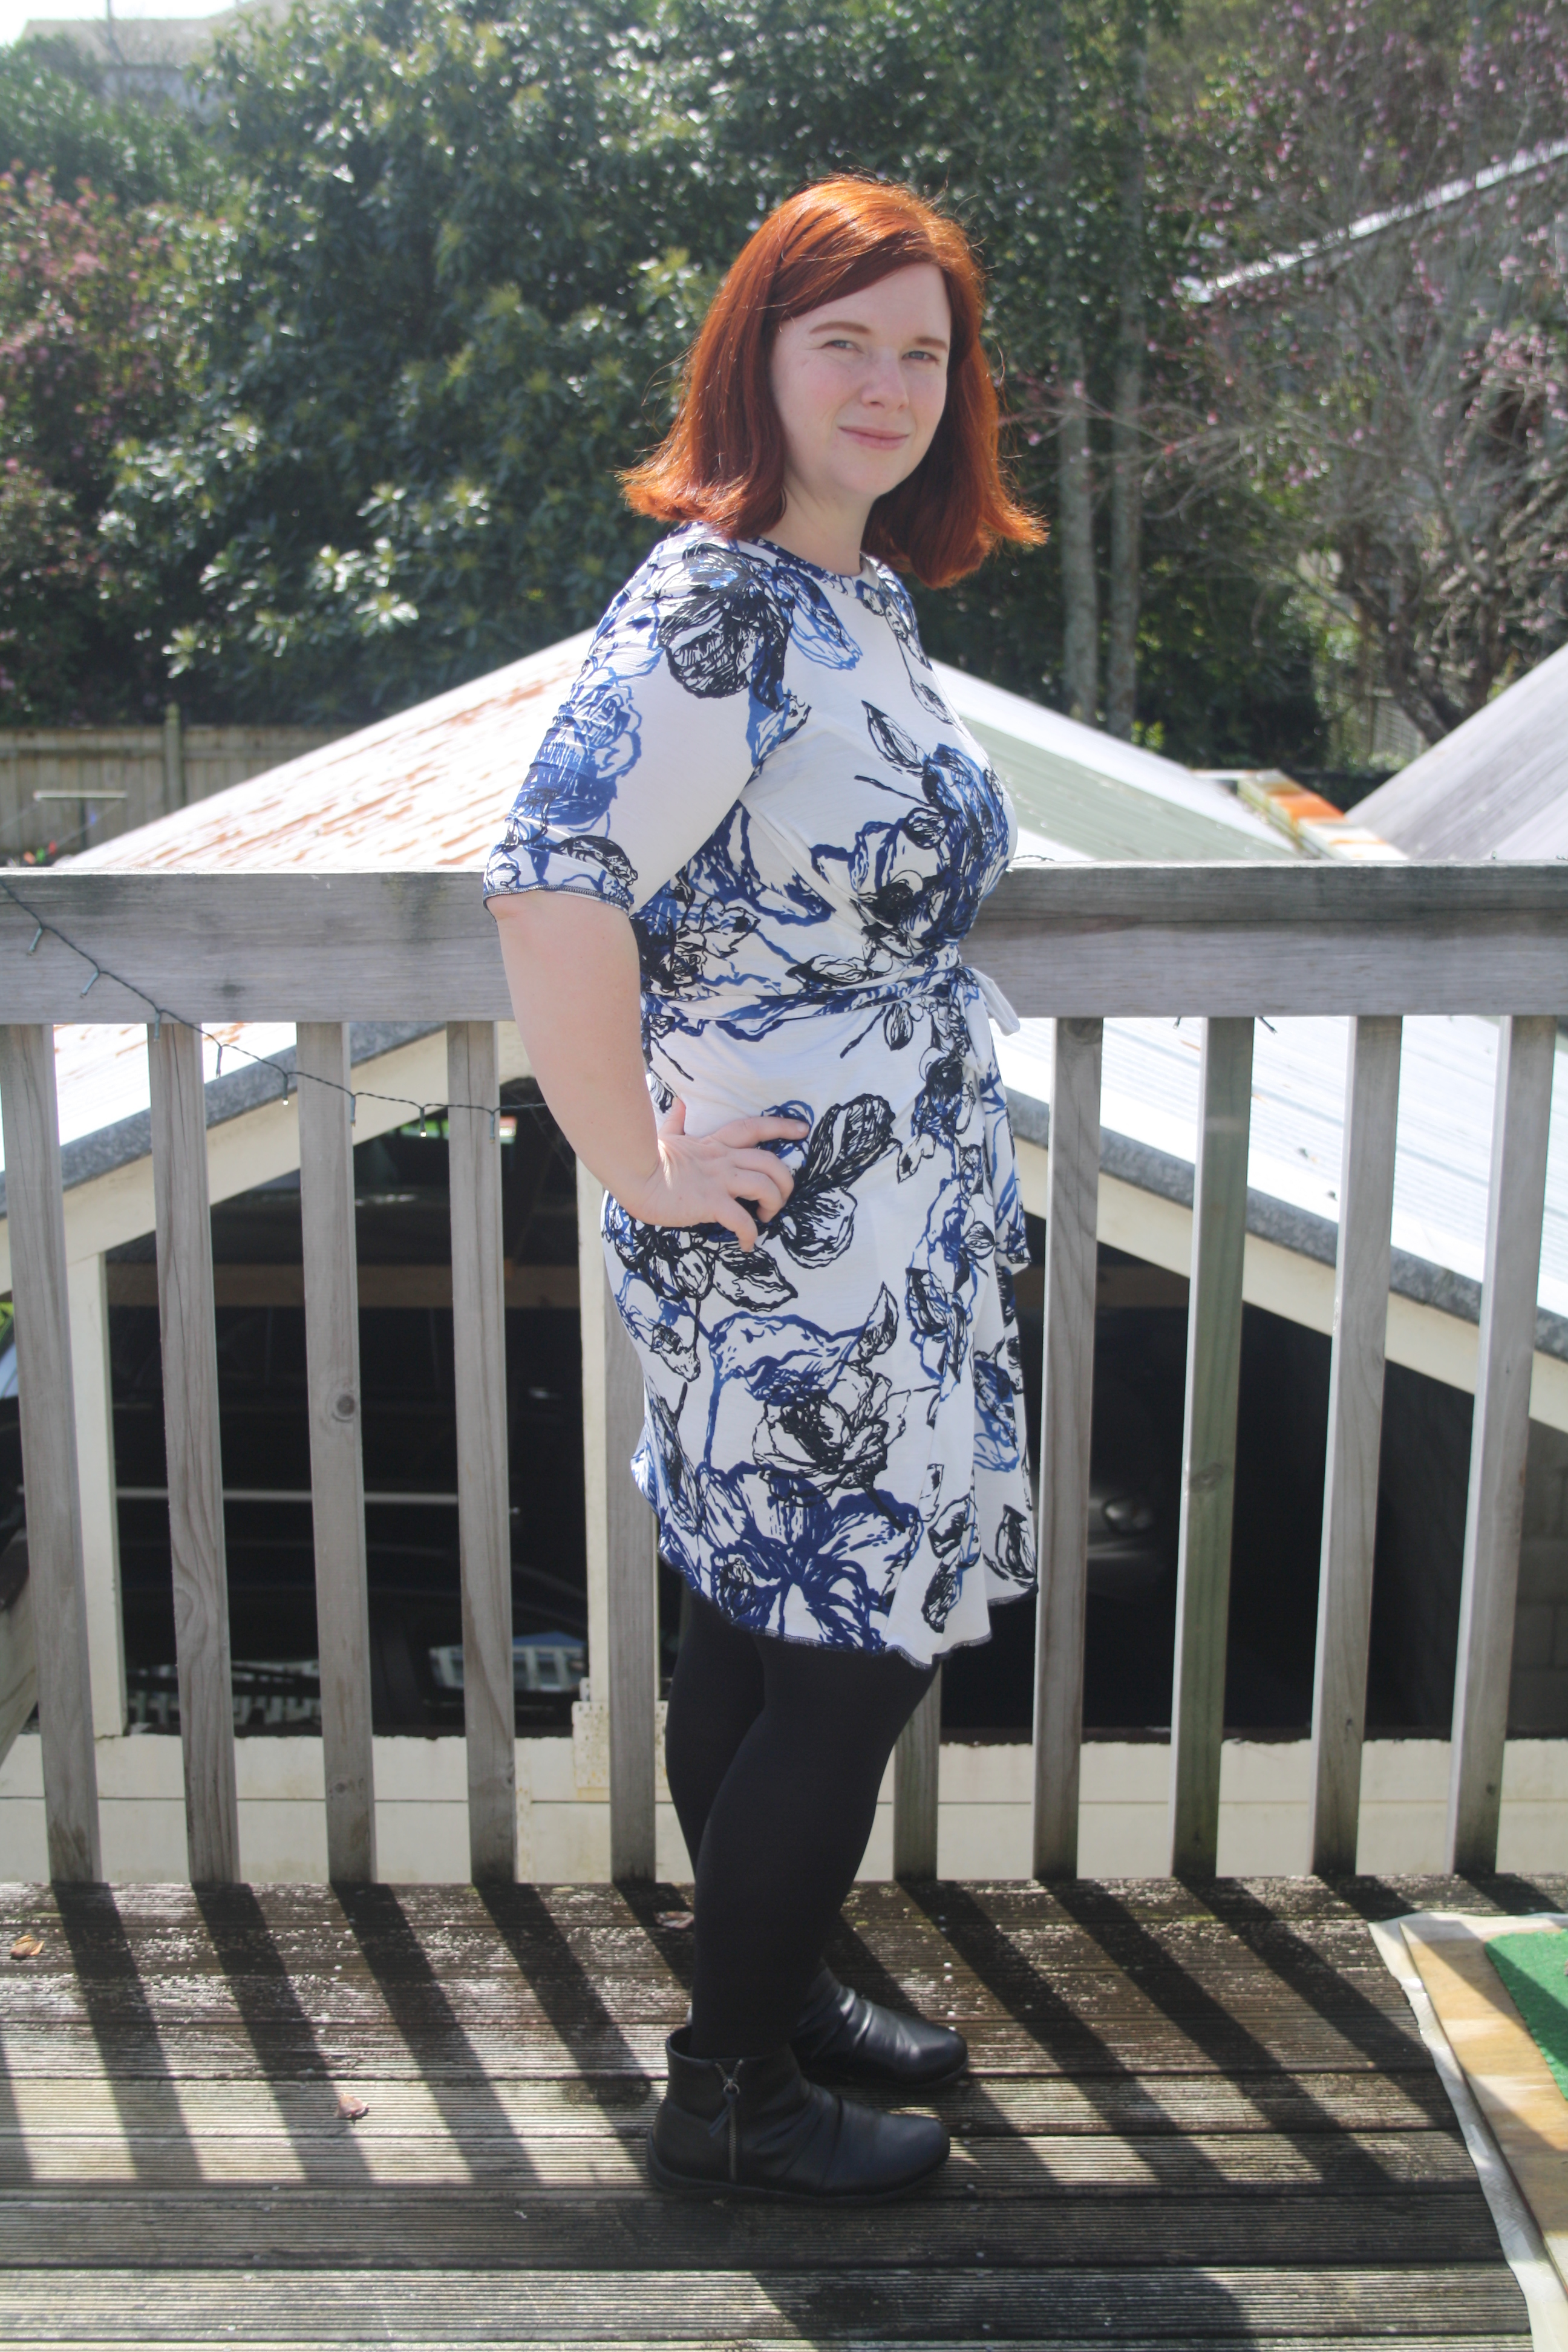
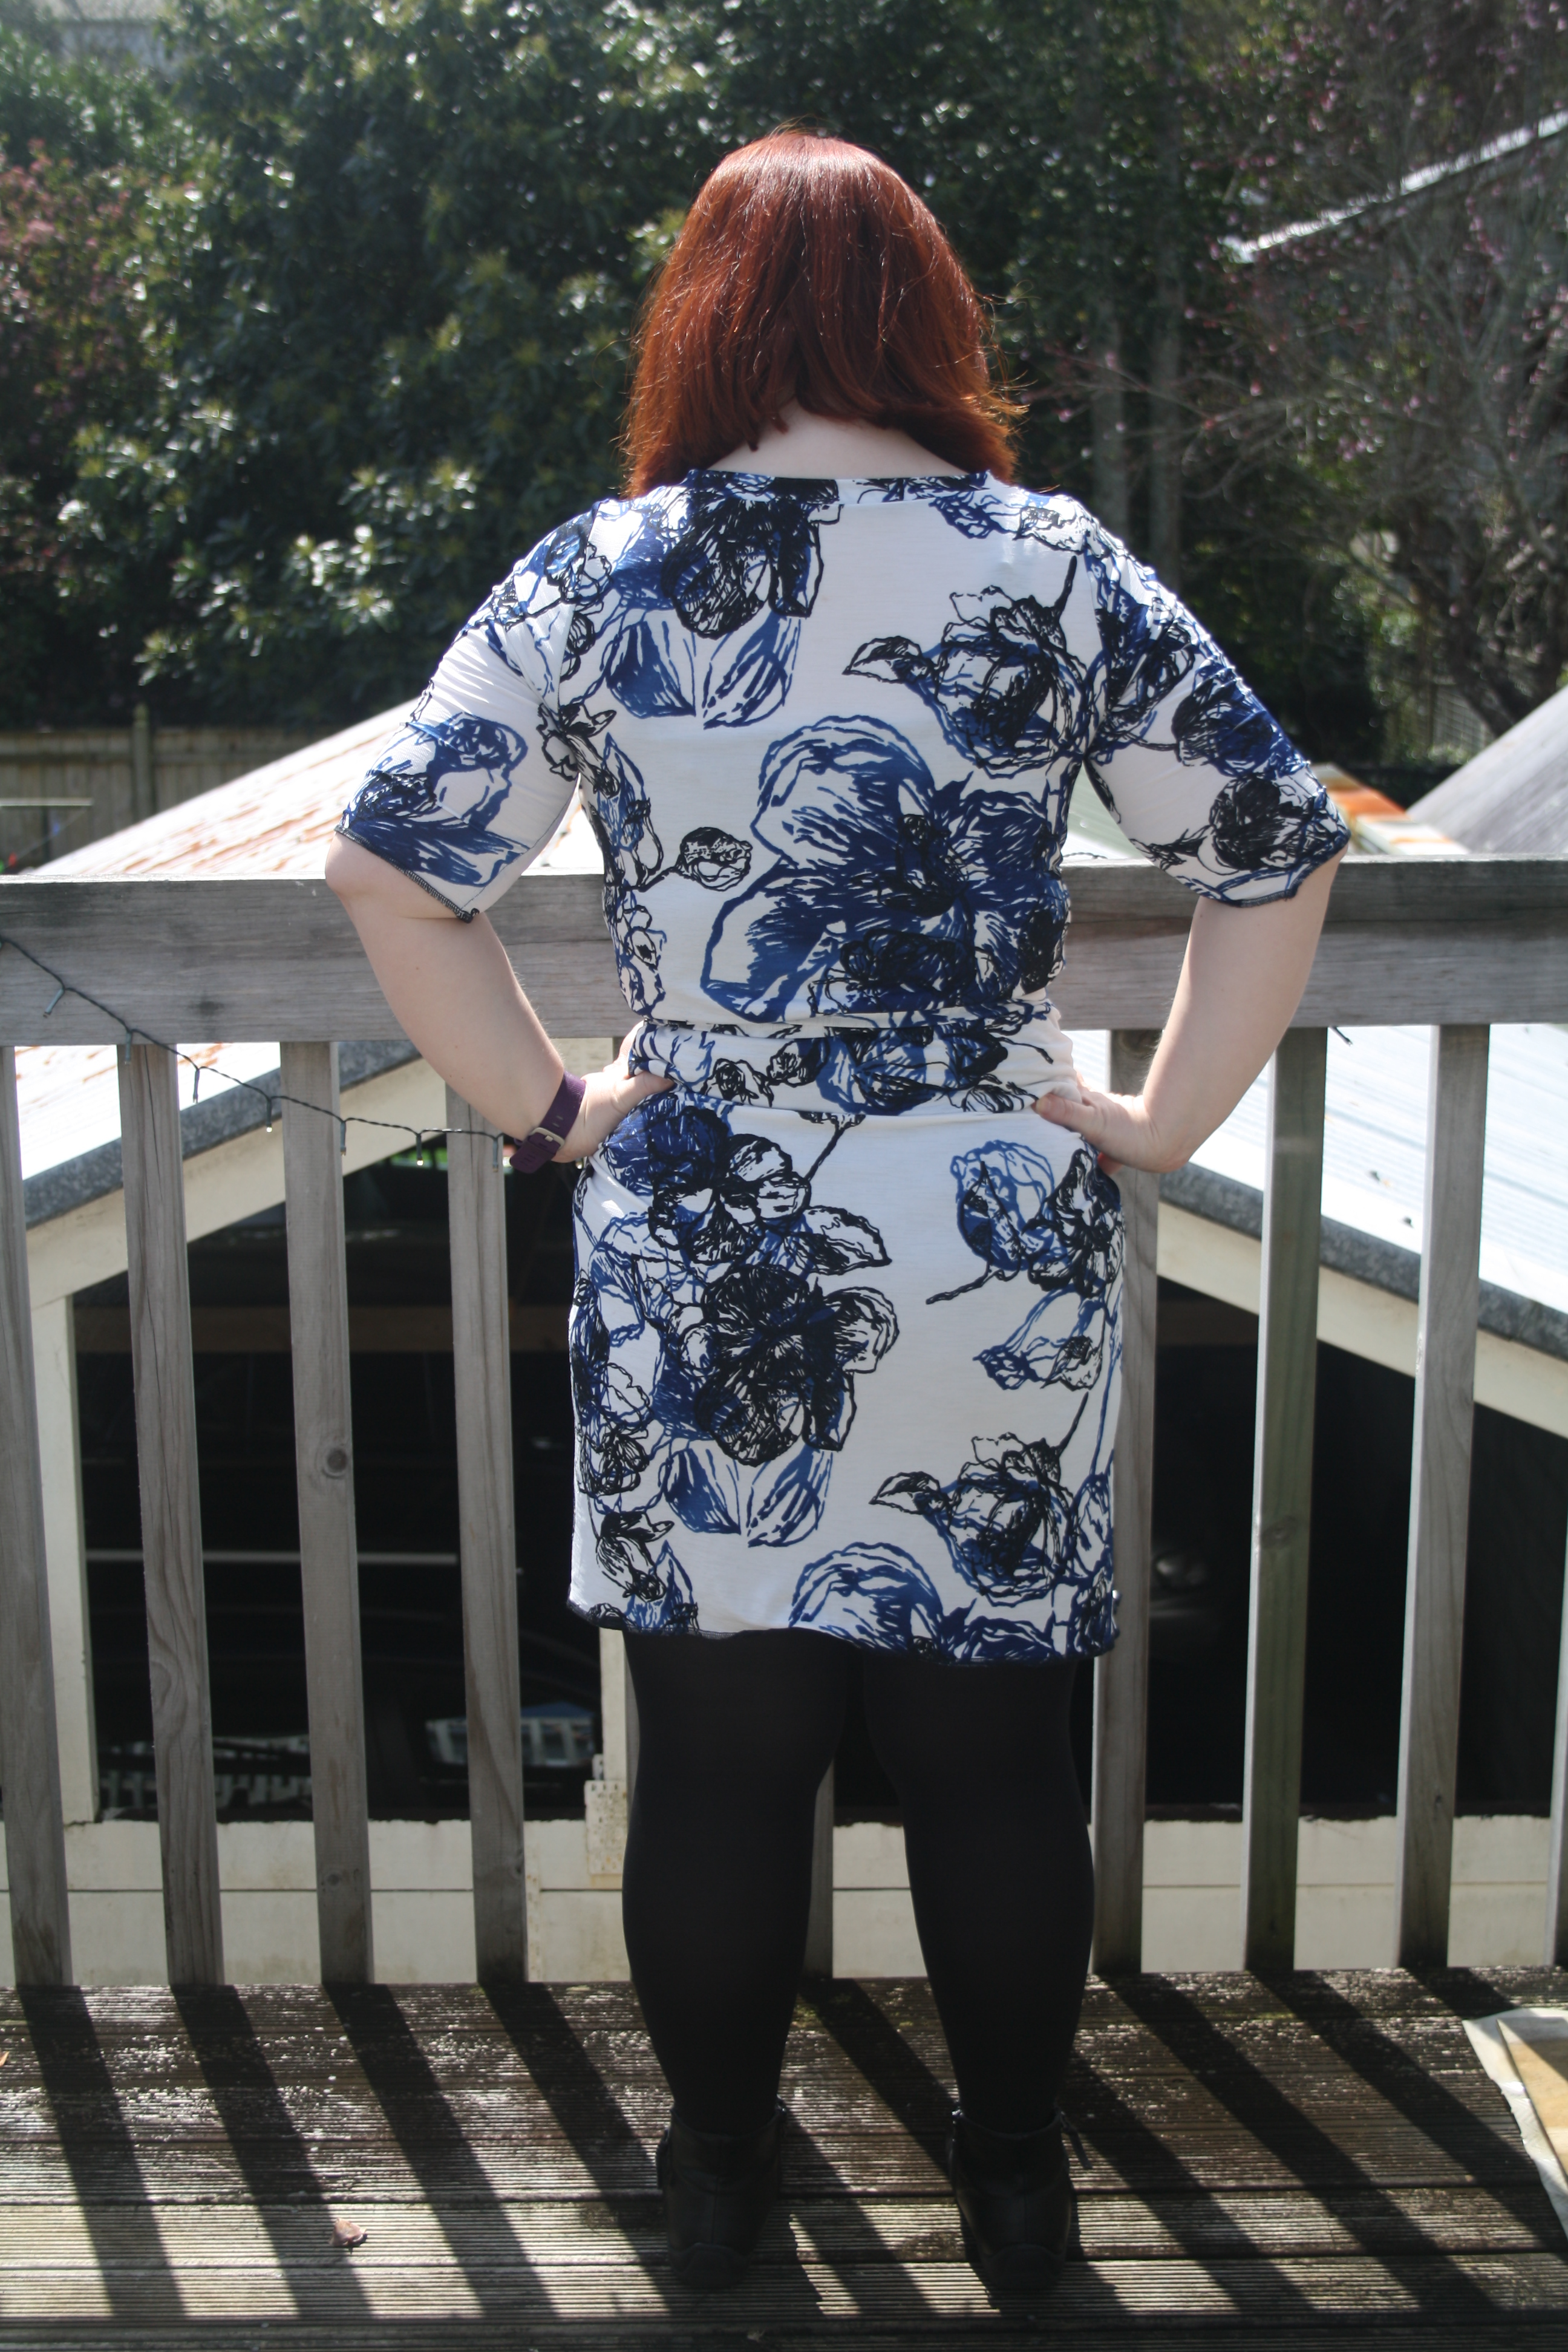
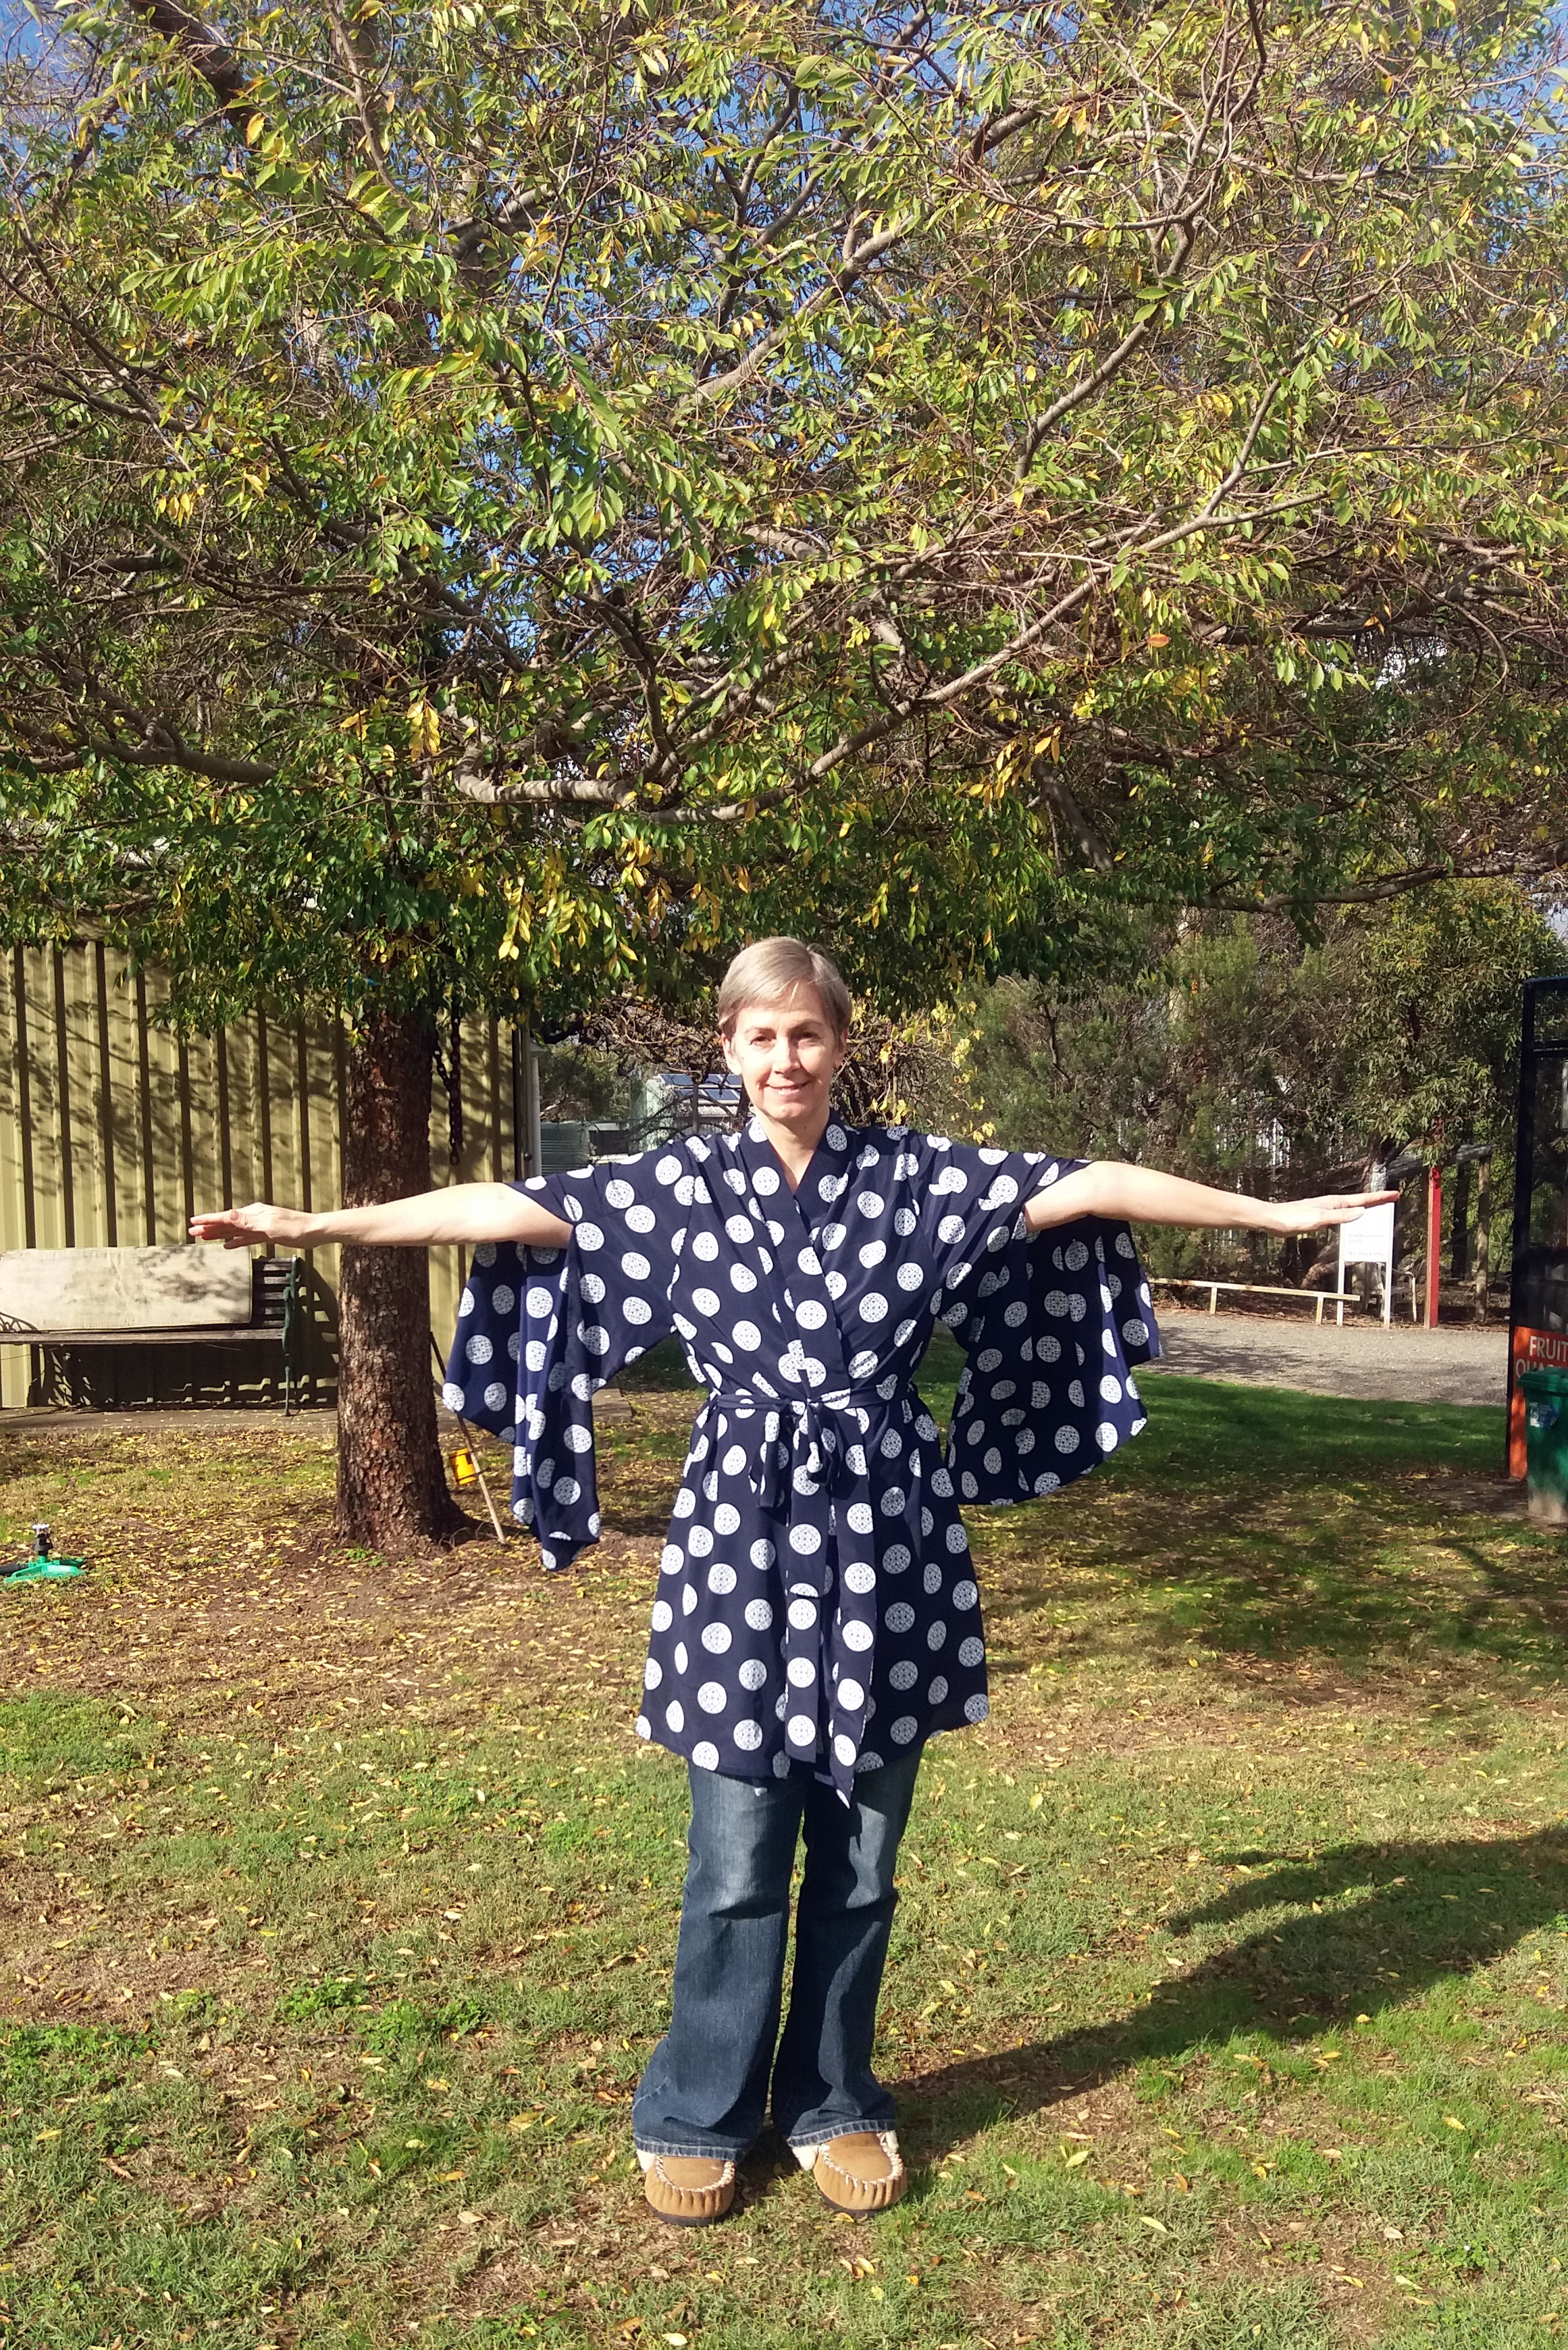
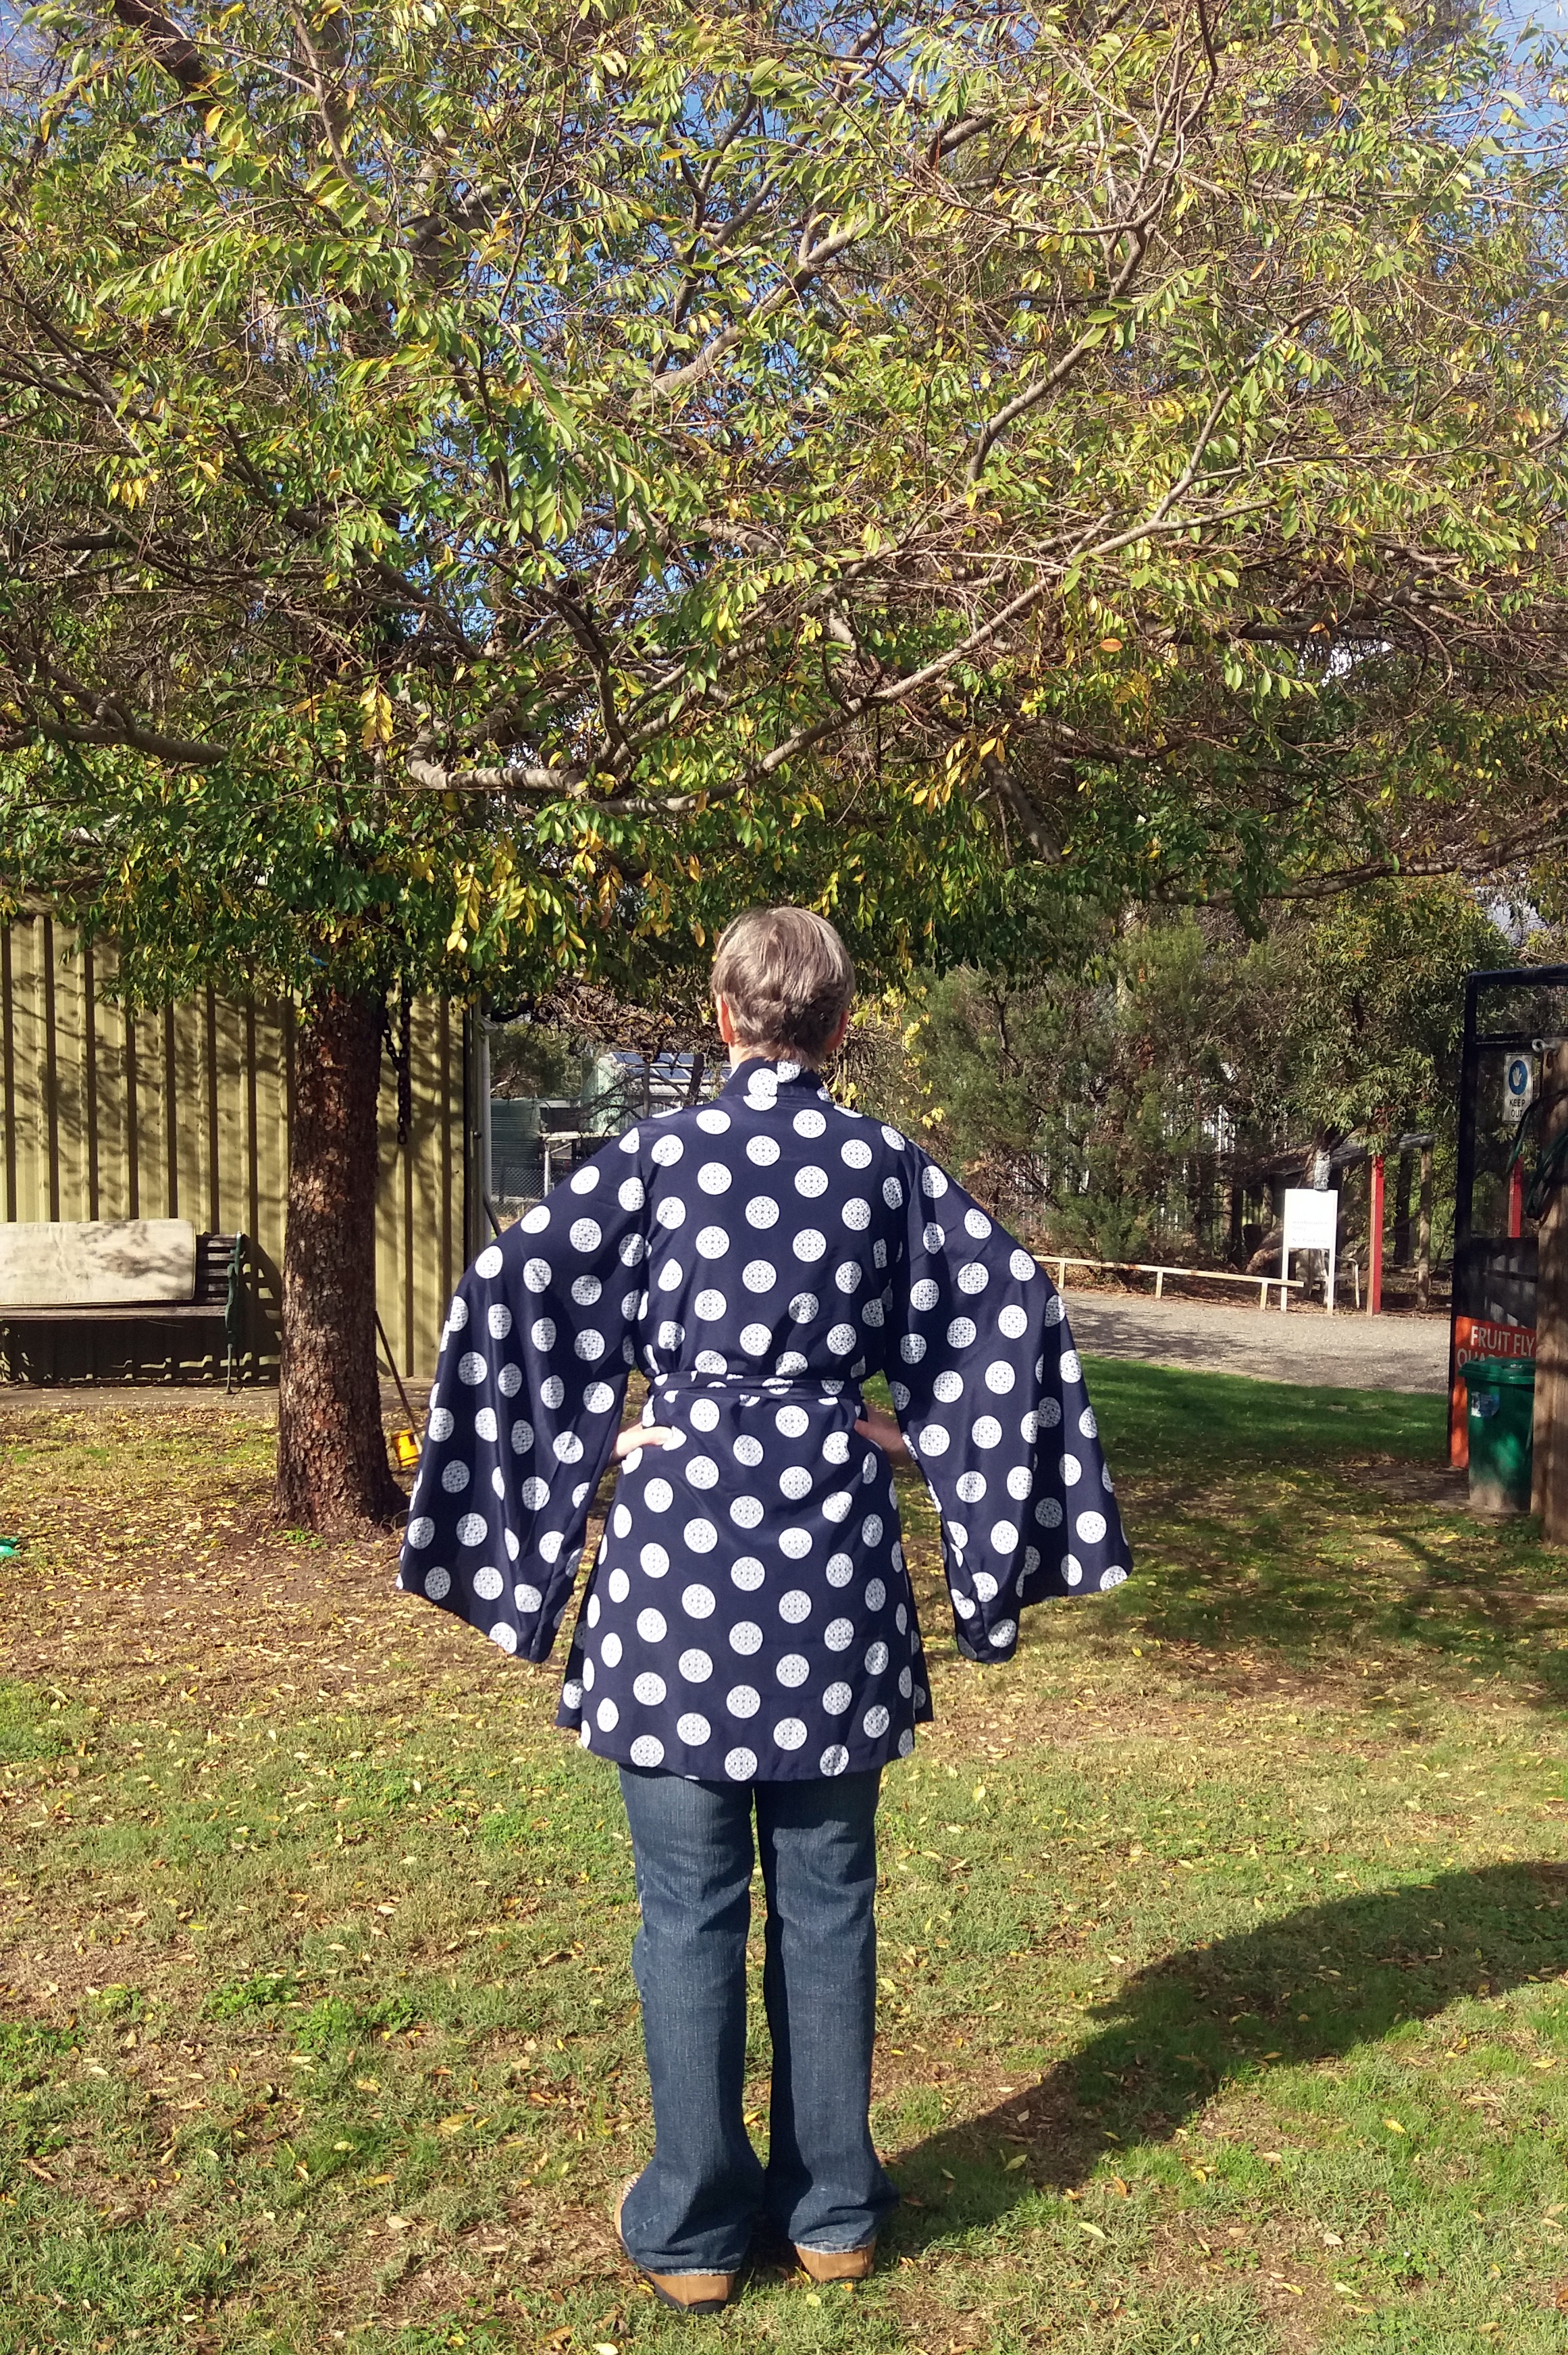
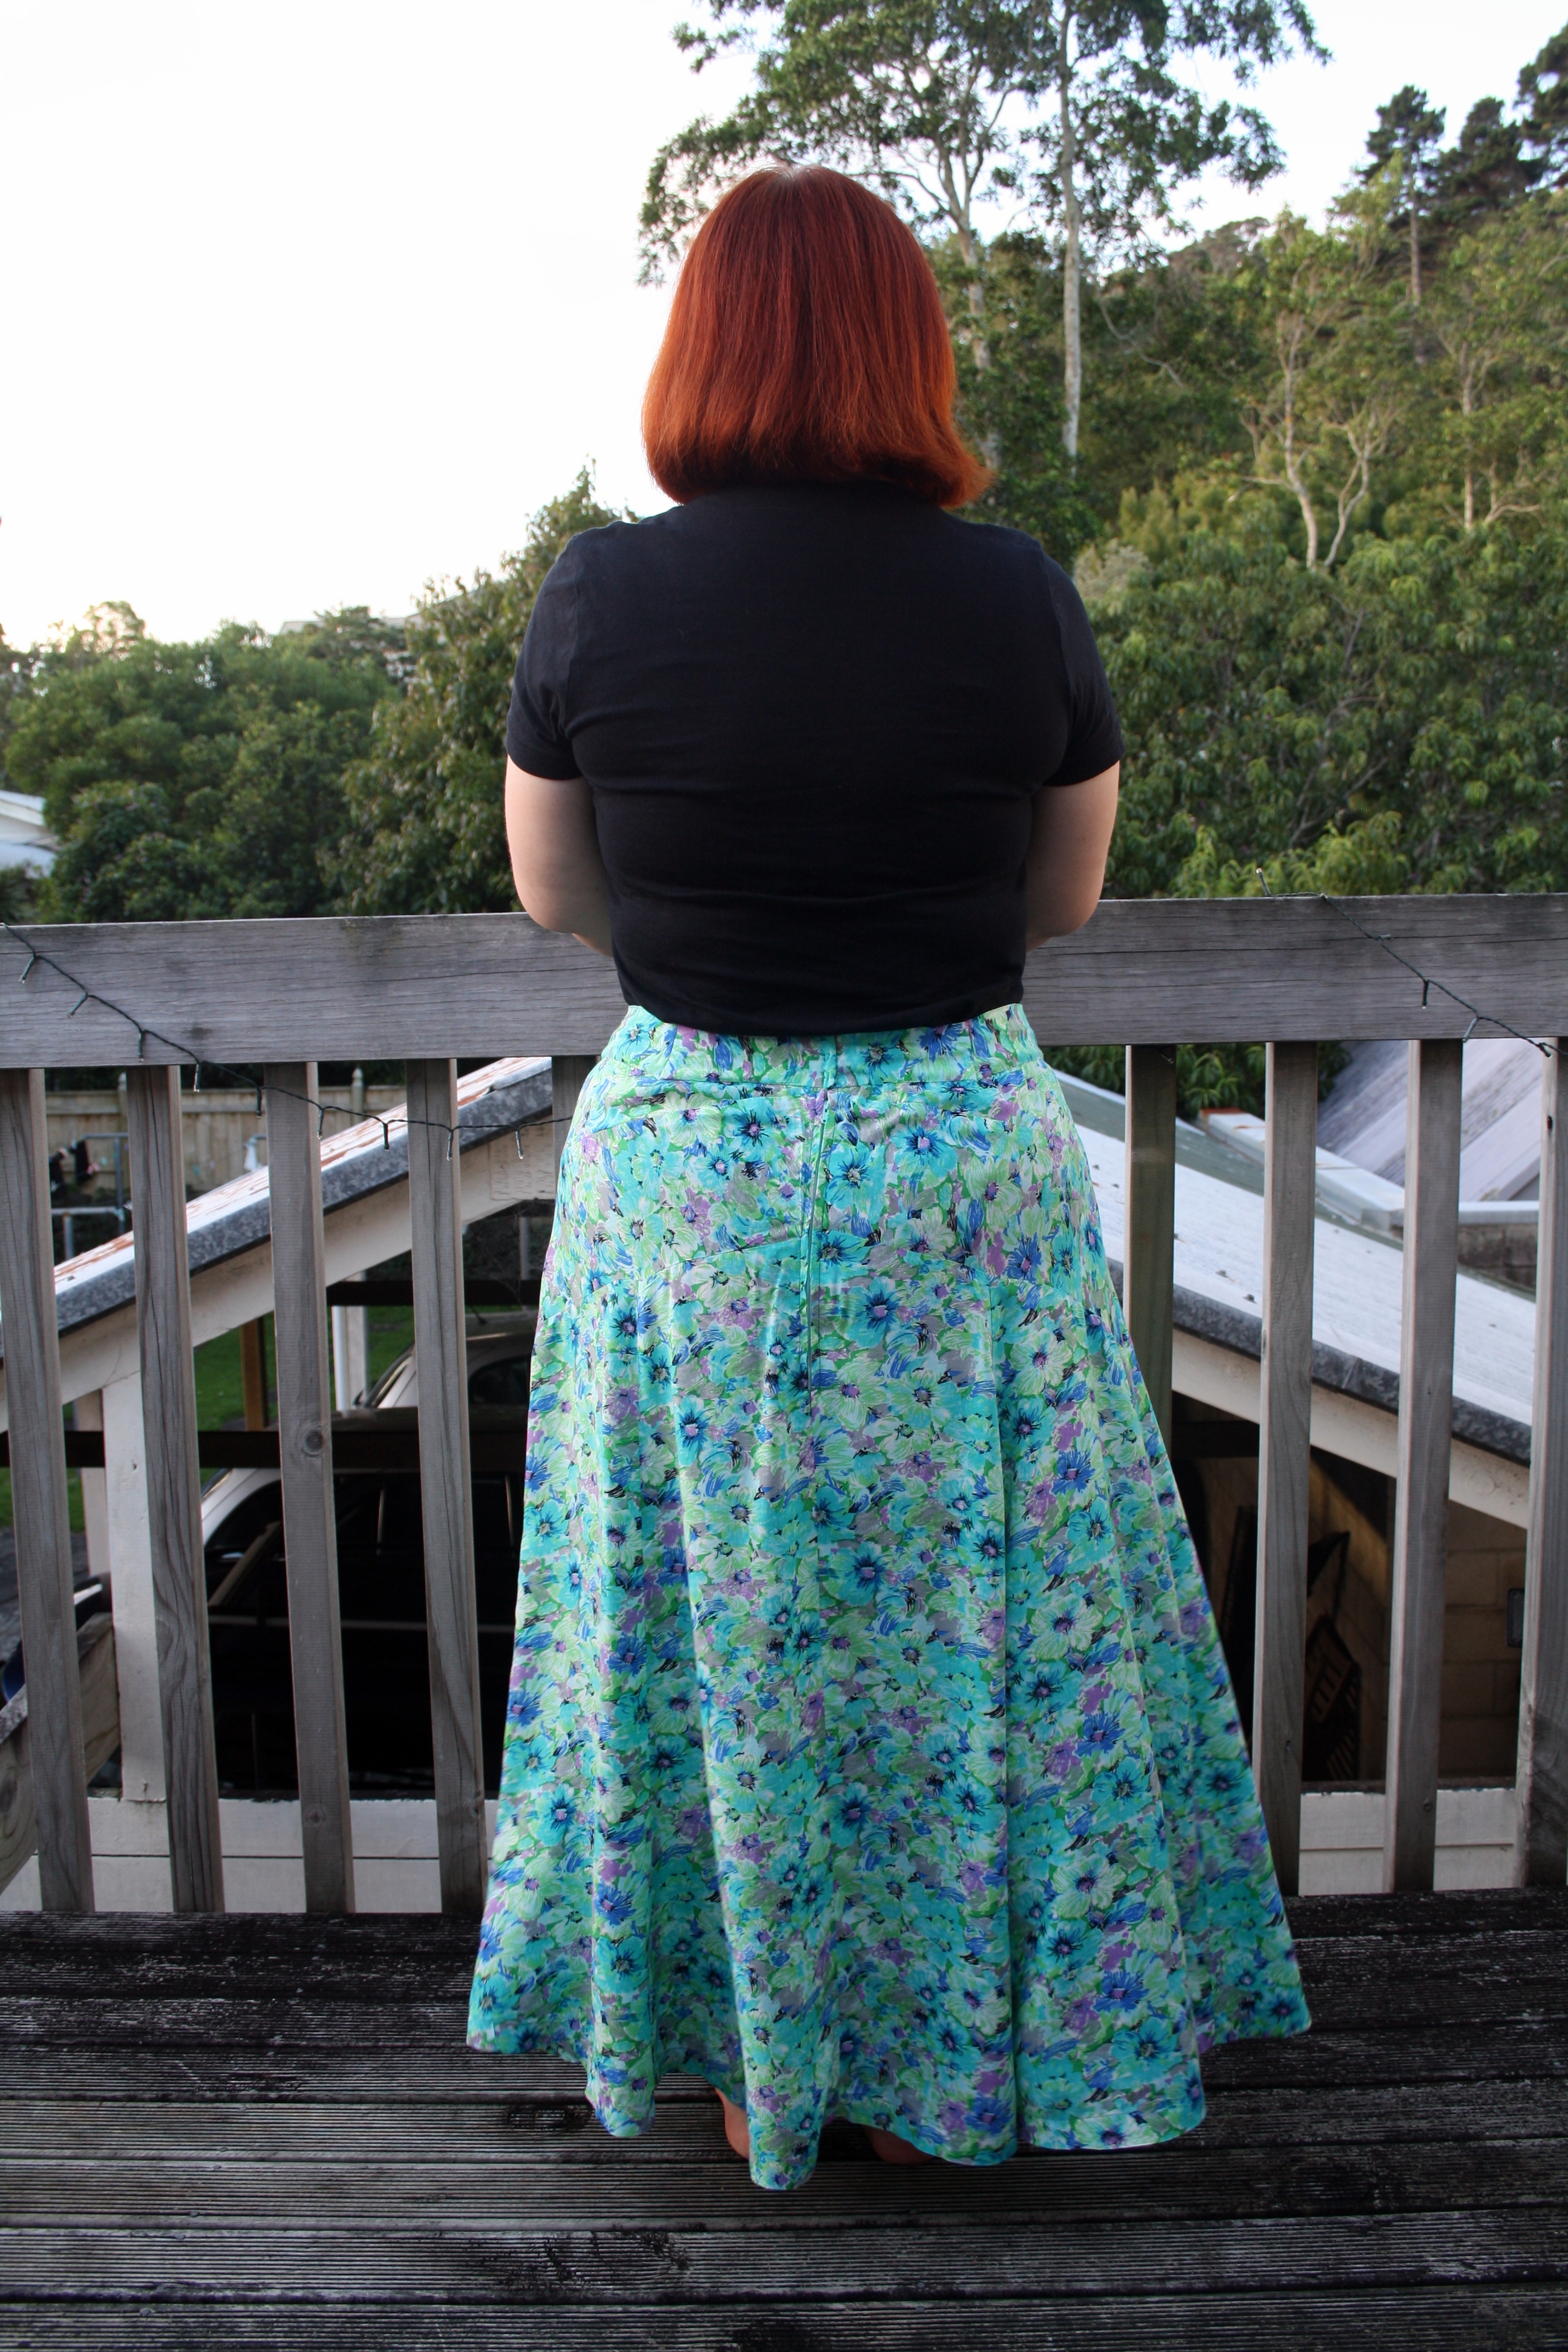
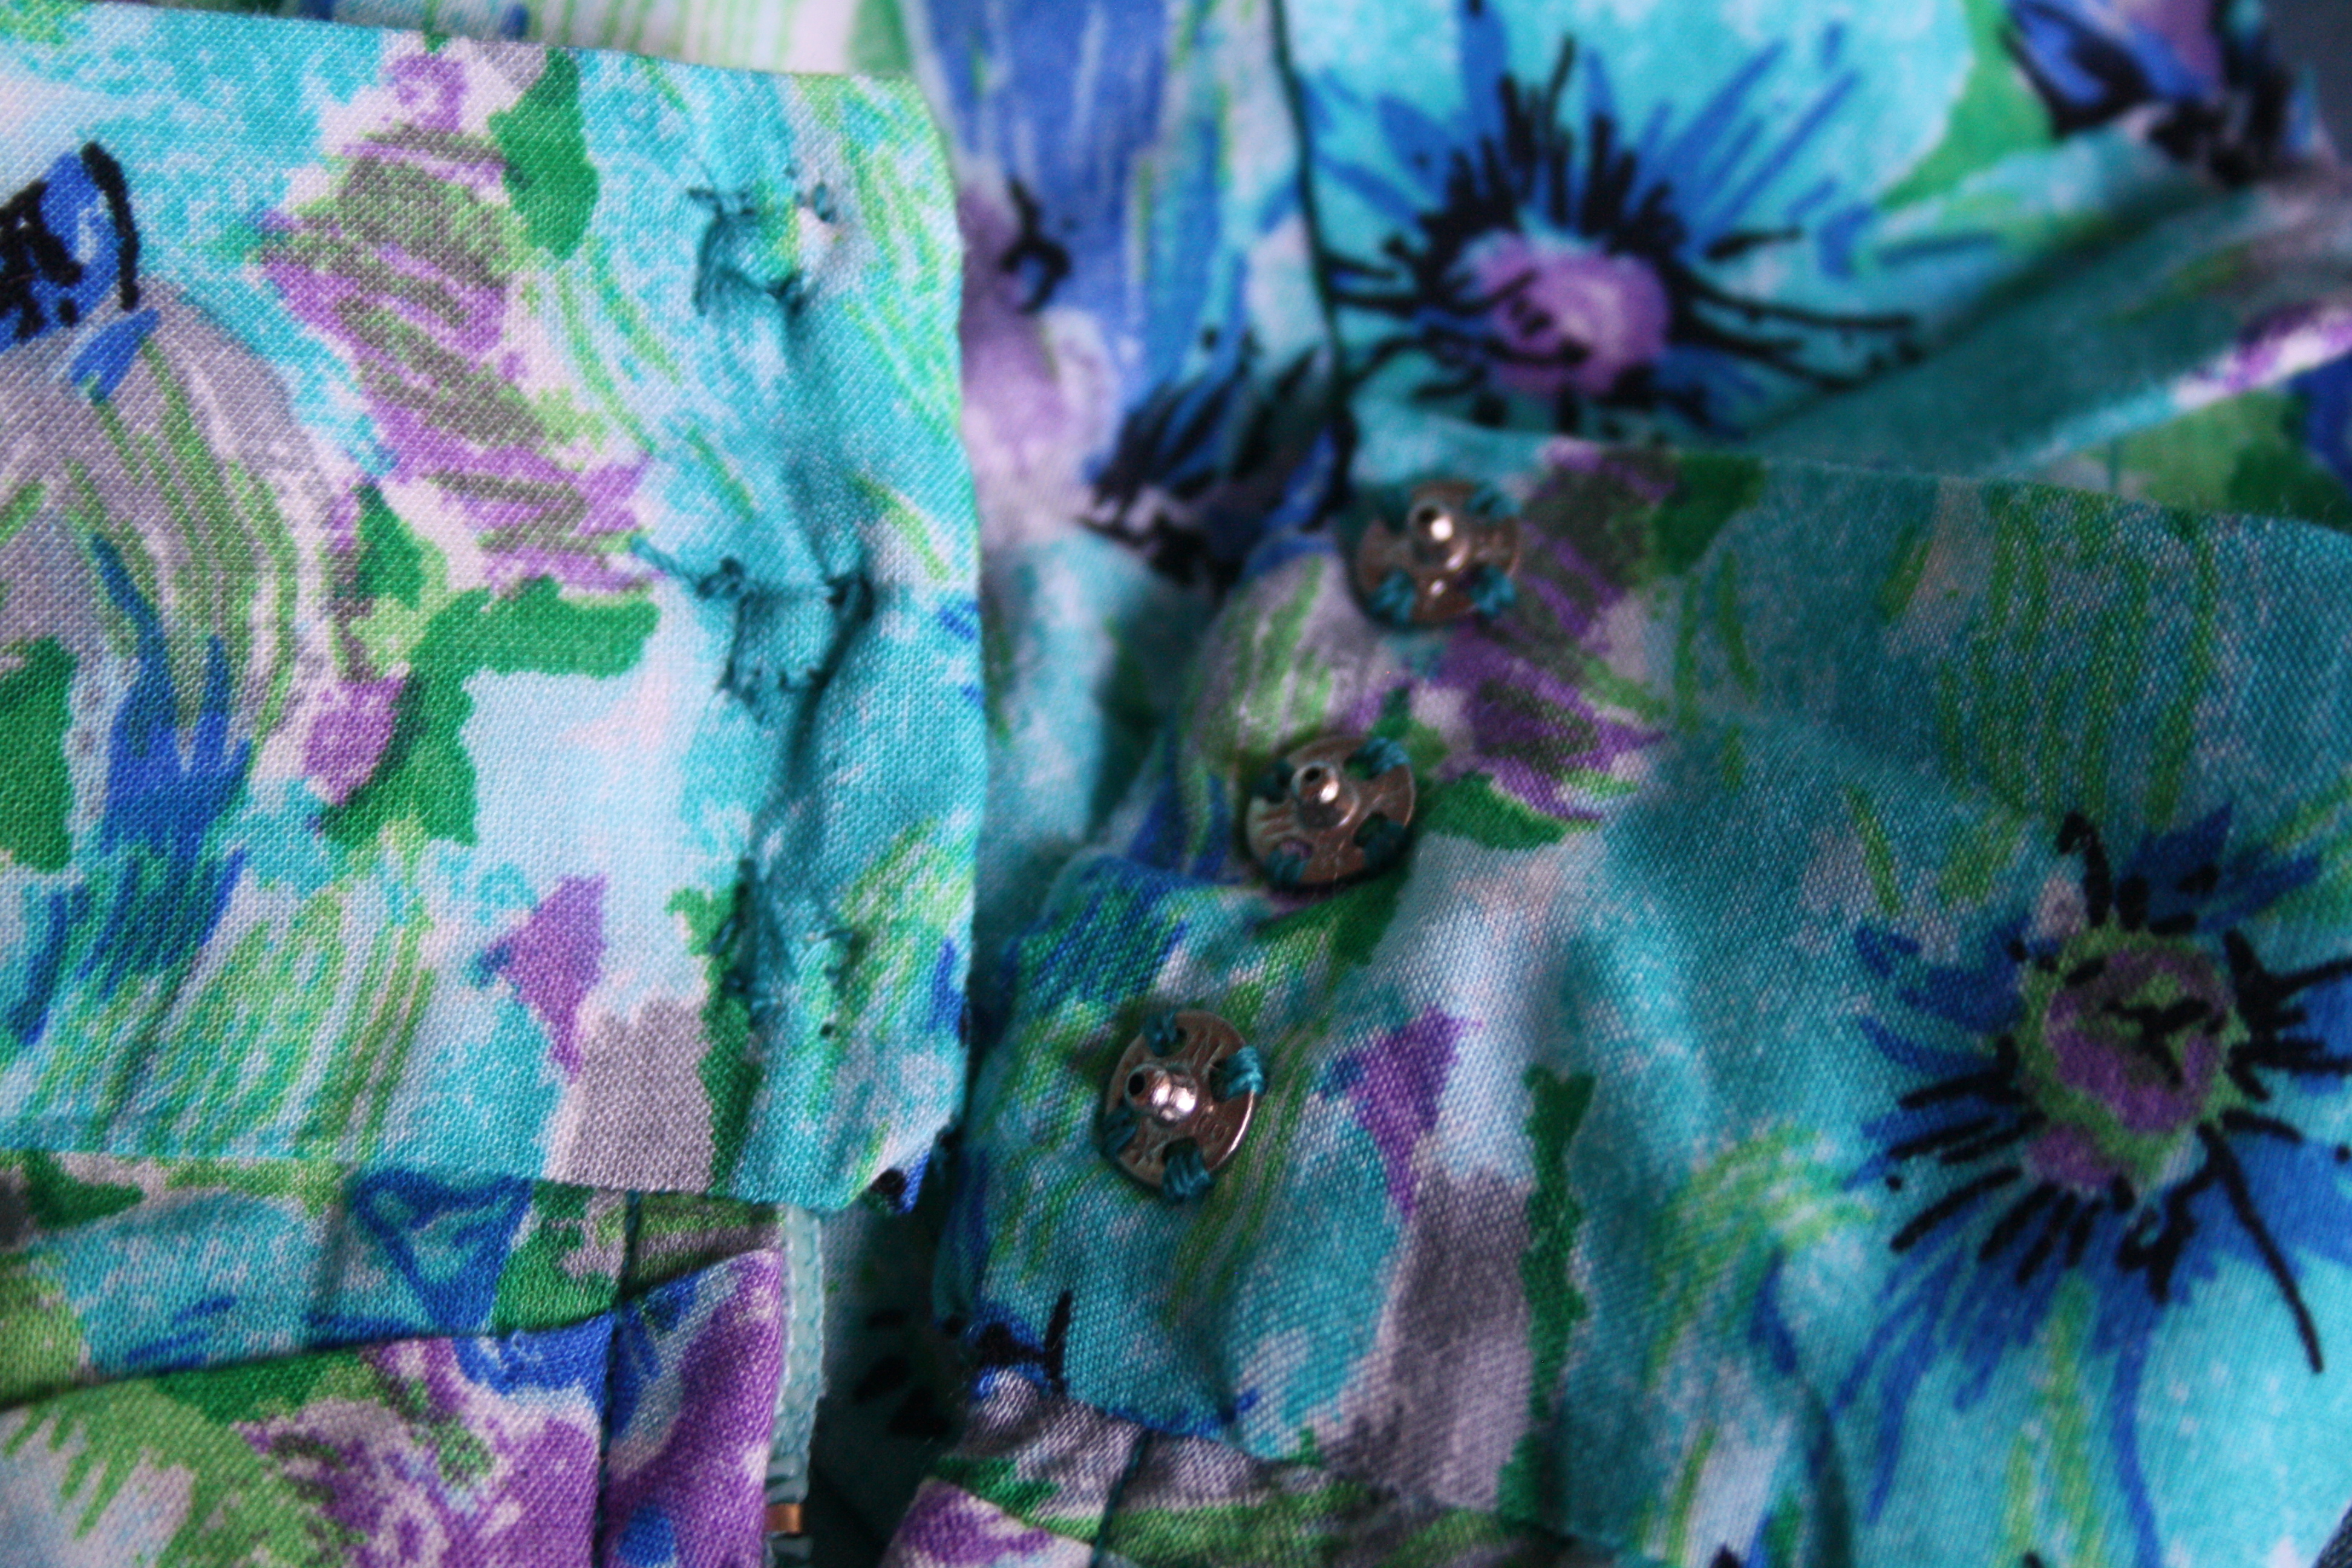
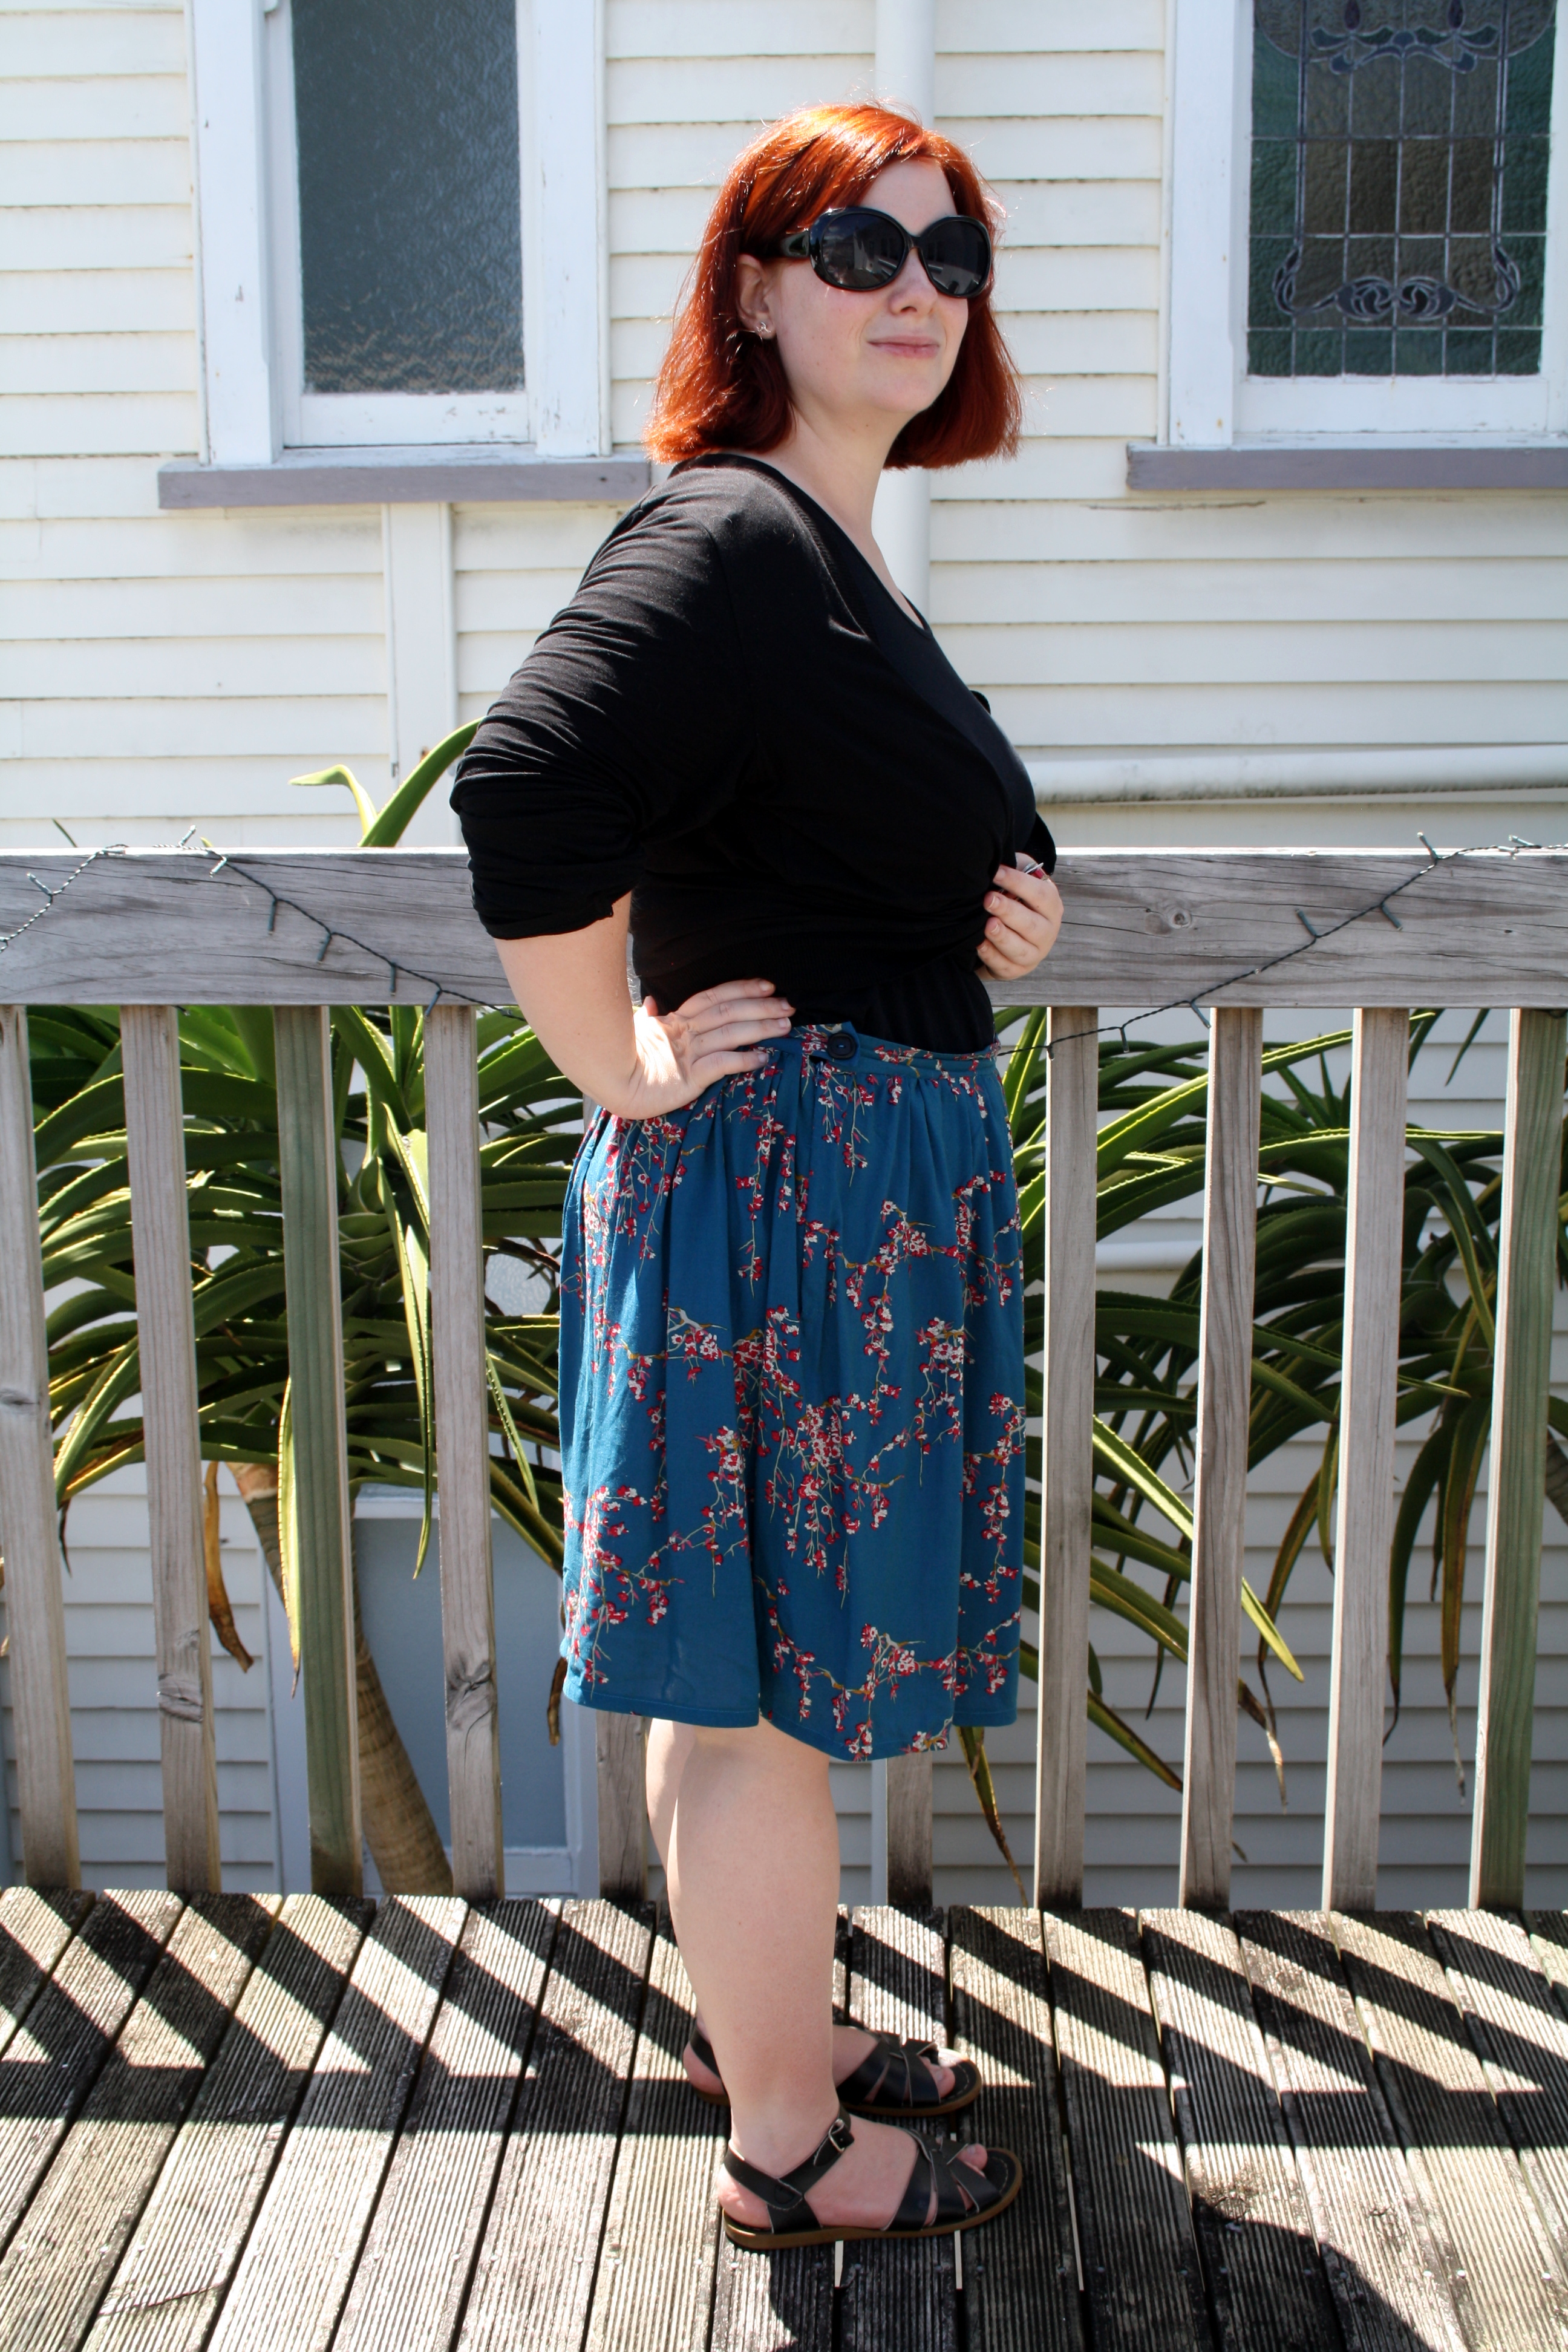
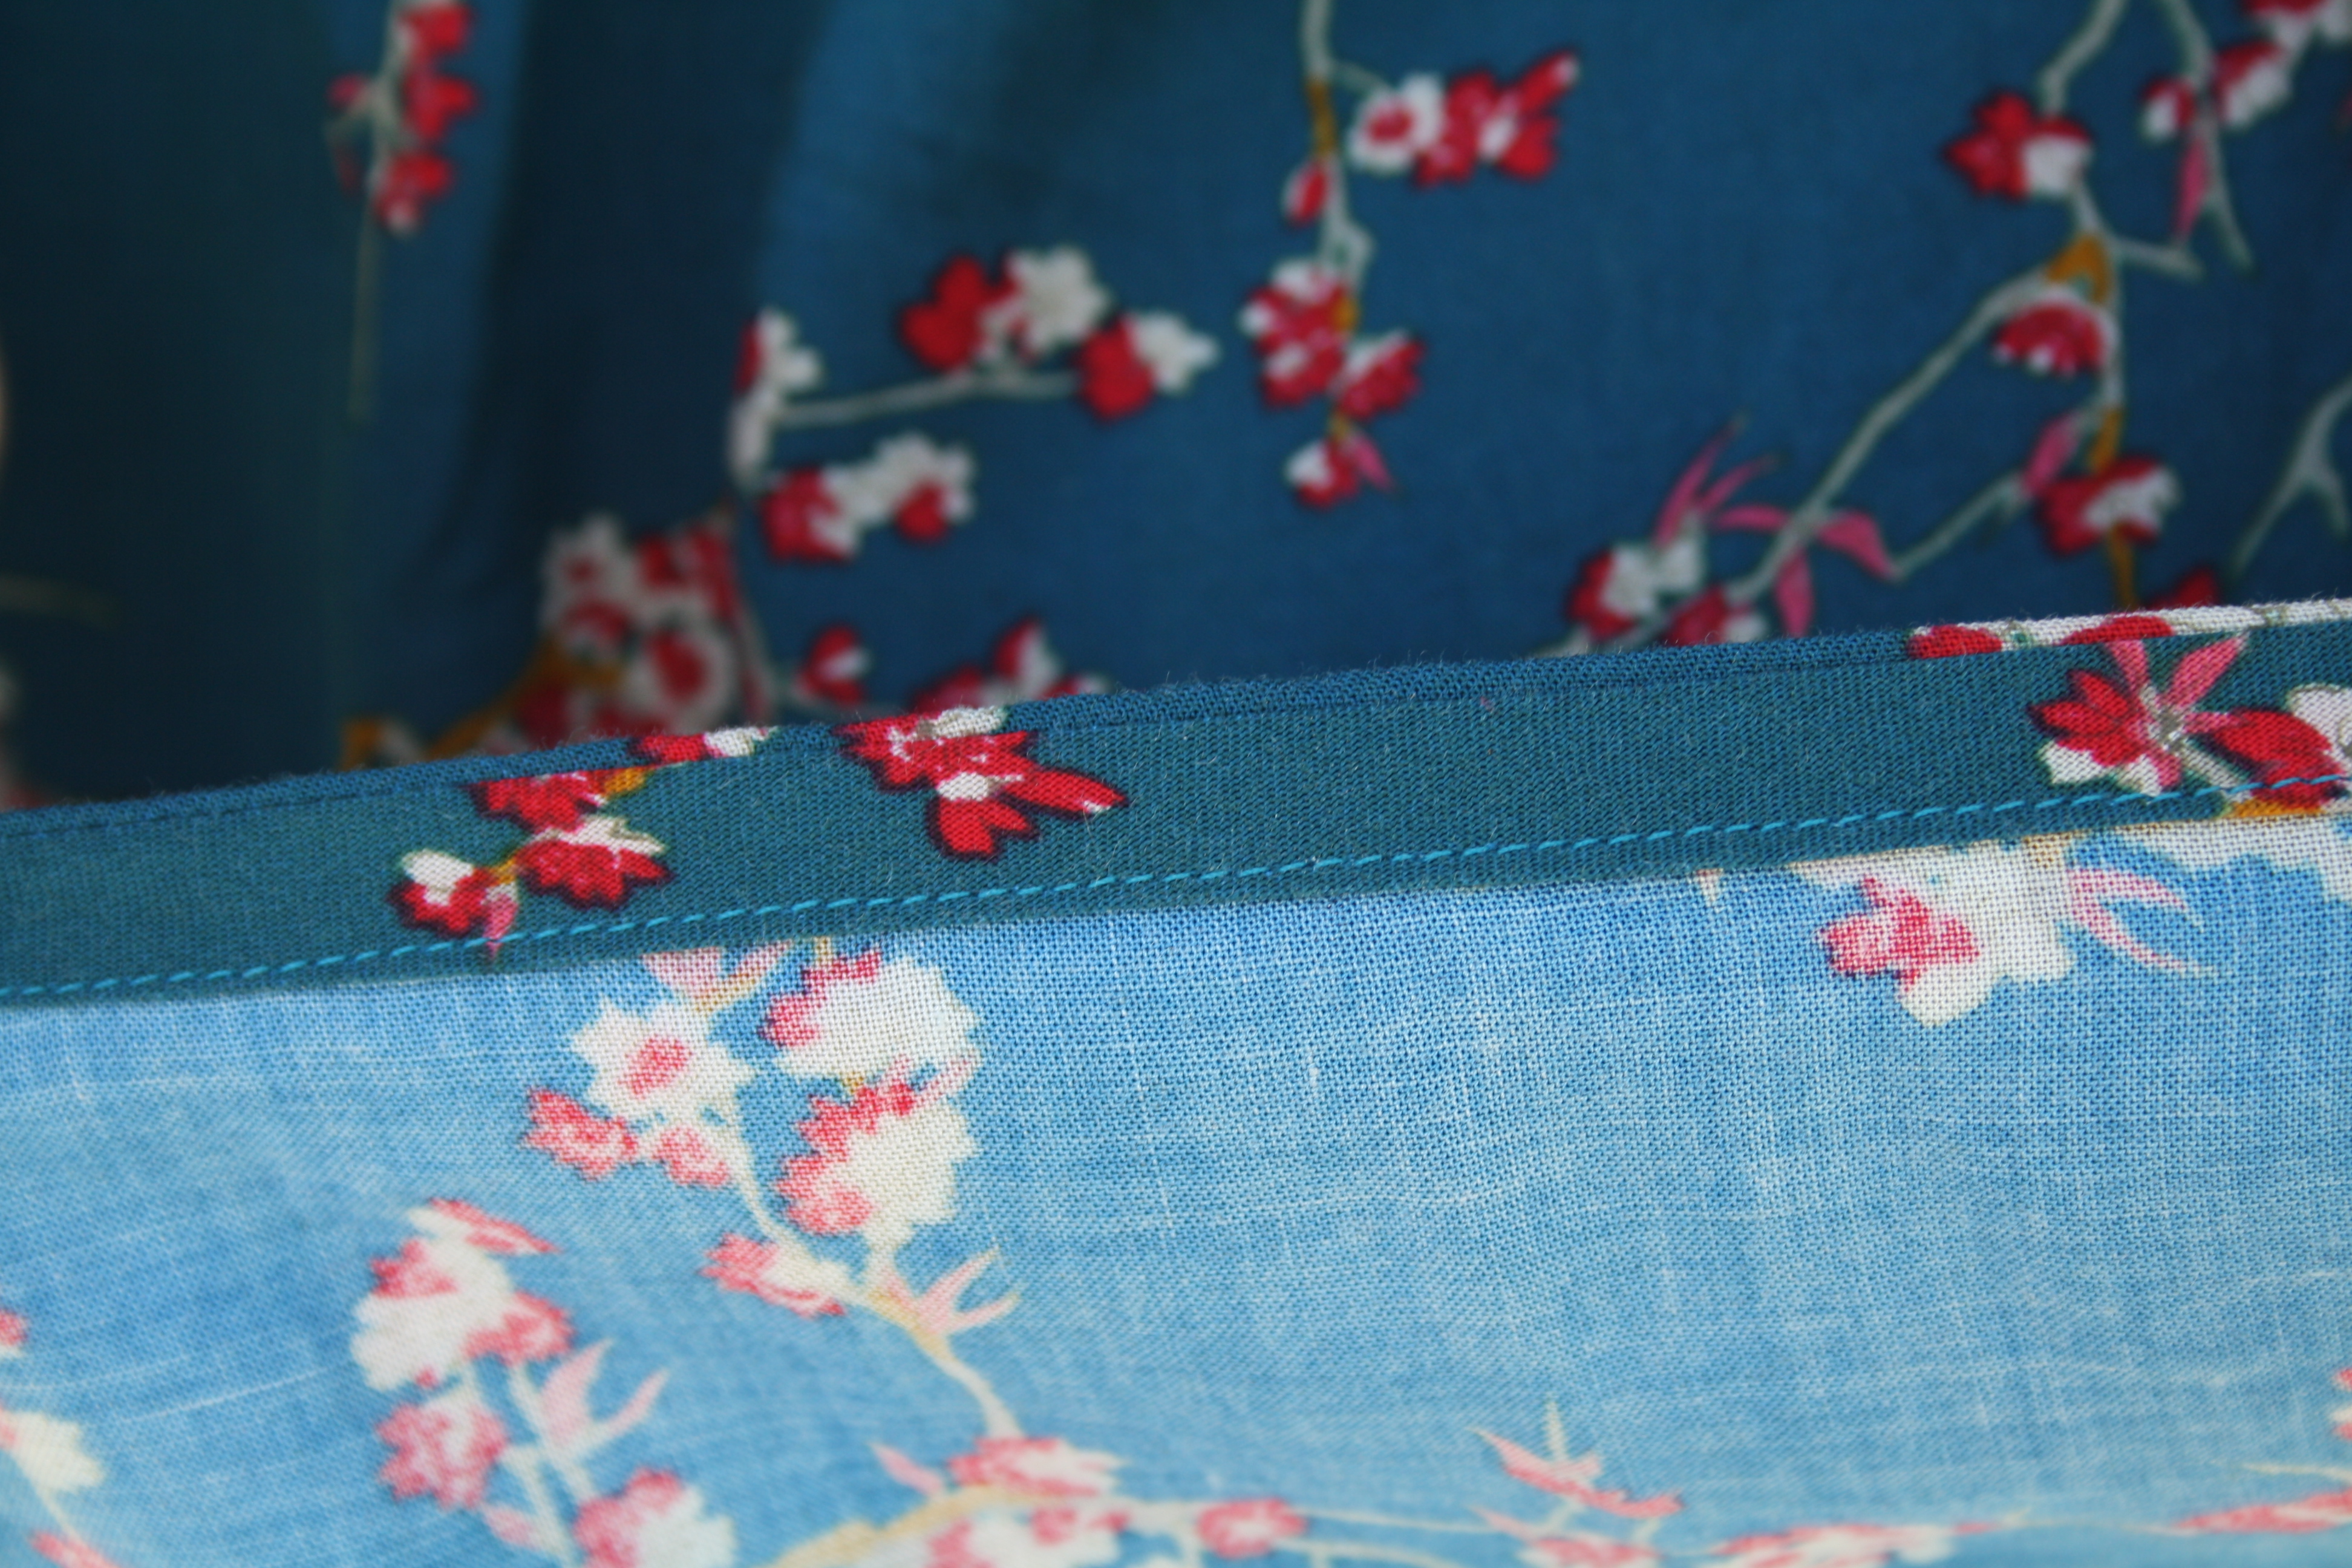
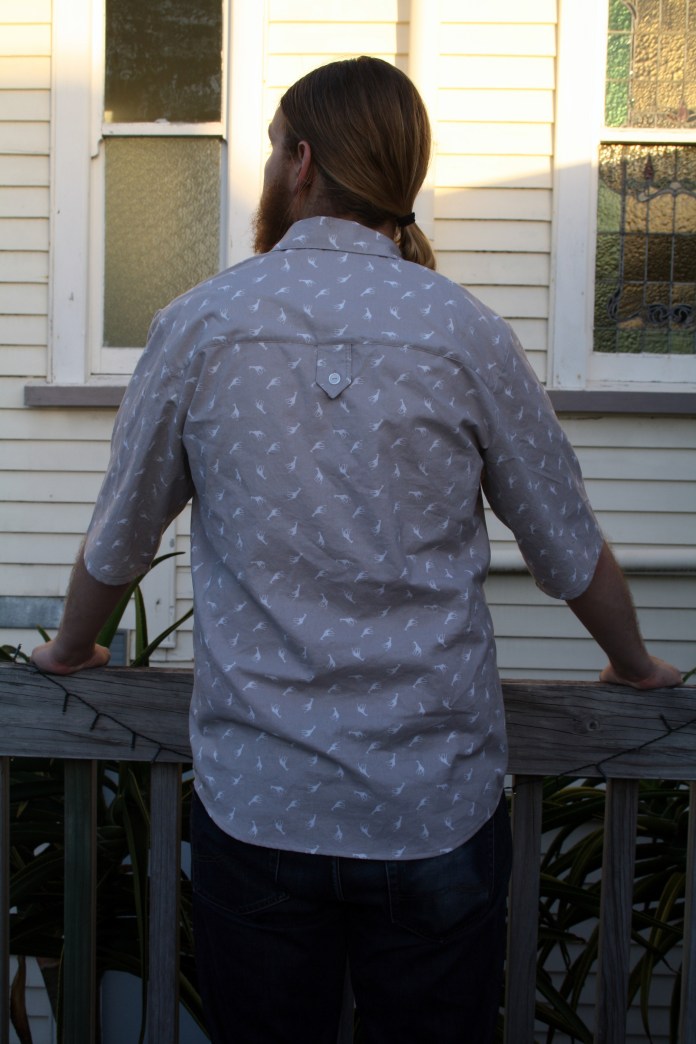
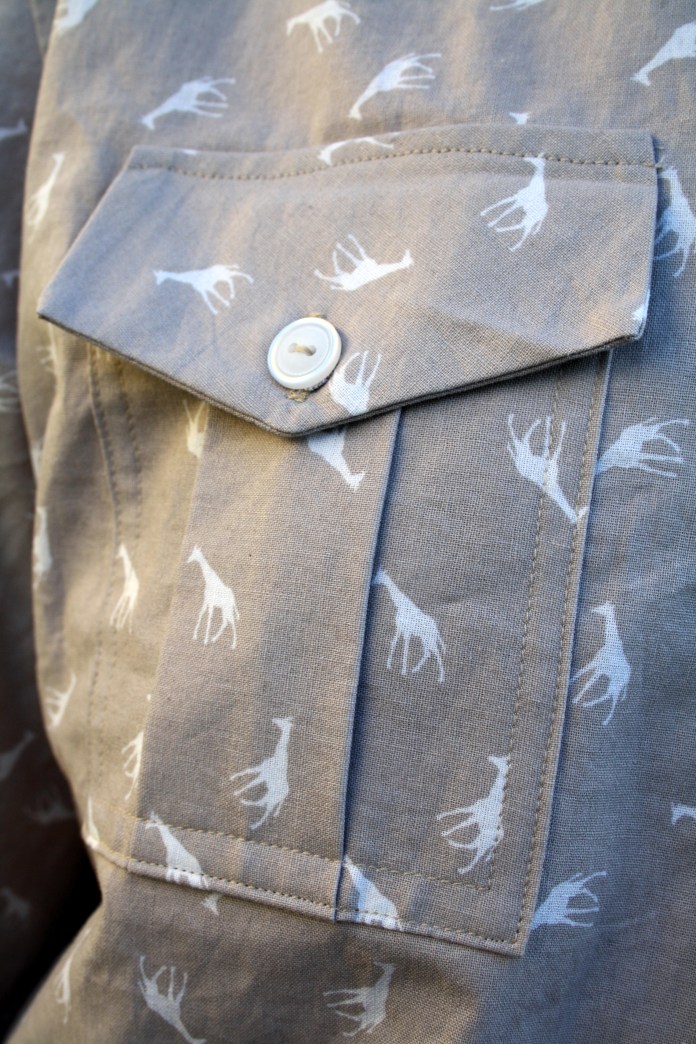
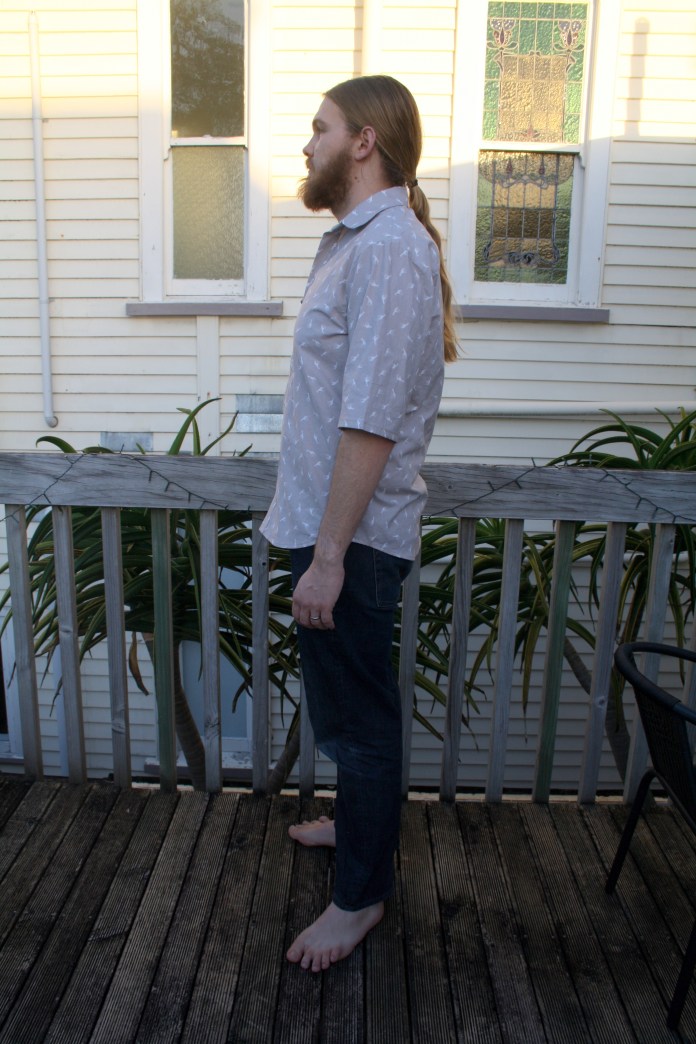
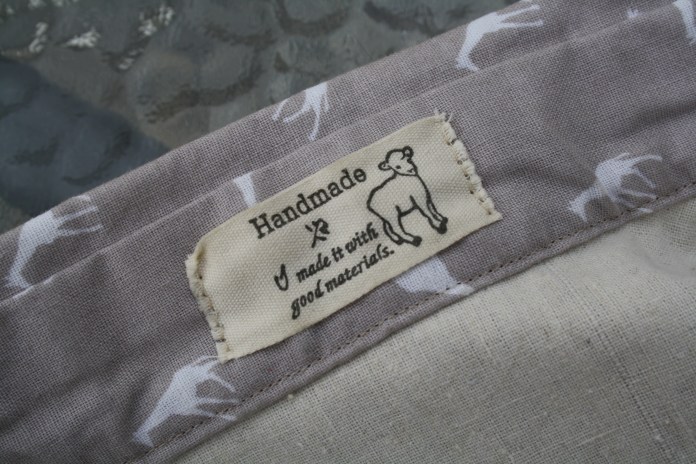
It’s a very simple silhouette – a bit kimono-esque. The sleeve/yoke pieces are joined together to make the entire top of the dress, there is no shoulder seam, and they’re just rectangles. The first front seam hits across my high bust, the second somewhere across my upper back/shoulders, and the third around my armpits. The inside is very neat, everything is overlocked, turned and stitched in place. And, in a minor miracle for me, all the notches and hems lined up everywhere. Seriously, this never happens!

img_6372

The fabric is a rayon challis (most likely) bought from a fabric bin at my local Red Cross op shop. It’s got fantastic drape, and is light and flowy – perfect for the sudden onset of warm weather Auckland is having. All that said, I’m a bit on the fence about it. I mean, it’s not flattering. At all. But it is supremely comfortable, and I feel weirdly stylish wearing it. I ventured out to my local dairy (convenience store) this afternoon in it and felt a bit confident, even. I don’t think I’ll make it again though – for starters, I think 1 muumuu in my wardrobe is enough, and I have a list of things I want to sew that just keeps growing, so no time for repeats!

img_6110

Just one of the delicious treats I ate in Japan – already wondering when I can return!

Advertisement
Standard
sewing

Sewing for the husband: Mustard Jutlands

img_5096

A while ago, Luke decided he wanted a pair of mustard pants. A bit of an odd request, but one I figured I could fulfil. Turns out getting the fabric was the biggest hurdle – at the time he decided this (a good few months ago now) I could not find any mustard denim in NZ. I tried all my local stores, Trademe, and the very few online NZ fabric shops. I even tried some Aussie stores, but no luck. I found this a little baffling, as the number of people I saw wandering about in mustard pants suggested to me it was quite an “on trend” colour! Eventually I found exactly what I wanted at Ditto Fabrics, located in the UK. I ordered some samples and was very pleased with how they looked and felt, so I bit the bullet and ordered. It was £8.99 a metre, and I got matching thread, too. I ended up using Youshop to get it here, as despite the efforts of a very nice man at Ditto named Gill, it was just too expensive to get it shipped directly from them. It still wasn’t cheap – I think all up with shipping costs and exchange rates, this fabric was around $80. I think good denim is worth paying for, though, so I wasn’t too upset. I got a matching zip from Miss Maude’s, and the buttons and rivets (not used) came from there, too. Turns out mustard zips aren’t easy to find either, so I was thrilled when she started carrying denim notions!

img_5101

The pattern I ended up using was the Jutland Pants from Thread Theory. I’ve made them before for Luke in cargo short form, but I’ve never made them as pants. It’s probably clear by now I’m not *that* fond of Thread Theory patterns, so I was keen to try a different pattern at first. I made a test version of the FOP 07 jeans, after seeing the amazing ones Very Purple Person made her husband. I was a bit worried as Japanese people tend to be slim and their sewing patterns small, but the measurements for the very largest size seemed like they would work. The pattern is in Japanese, however I figured I’ve made pants before and have some knowledge of Japanese, how hard could it be? The answer is, harder than you’d expect, but manageable. The fly gave me the biggest issues as it’s drafted differently to the Thread Theory pants or the Ginger Jeans, for instance, but after some research I found it’s actually drafter the “proper way” and I was able to find a video to help me work it out. At any rate, I made them using some cheap black denim and they were okay, but they had issues – the butt was saggy and way too roomy, the coin pocket was sewn into the pocket facing curve and didn’t fit Luke’s flashlight, and the denim shrank (despite prewashing) and they became too short. I also attempted to install rivets in them (my first time) and nearly threw the jeans, hammer and rivets into the bin. What ones I did manage to install came off in the first wash anyway. And yes, I did do practice ones – it seems the margin for error is very small with those little things.

img_5108

So I used the Jutland Pants in a size 36 that I’d used previously for the shorts, and I placed the front and back pattern pieces against the FOP pattern, and made some adjustments. I slimmed the legs down to 32, because Luke preferred the slimmer leg of the FOP jeans. I also shorted the crotch curve a little for the same reason. I actually took some length off the leg, because even though Luke is 194cm, they were too long. I baste fit the jeans together and had him try them on, and then took 5cm off the waist/hips. With all the changing of the sizes, I wasn’t quite sure which dart placement to use so I left them at the size 36 position, and the back pockets too. I think they look fine. The denim is not stretchy, and Luke’s measurements fit the 36 on the Thread Theory size chart almost perfectly, so I don’t know why they were too loose. I feel like I cannot rely on the Thread Theory size charts at all, as I had an issue with their latest pattern too, the Fairfield Shirt, where I carefully measured him and picked a size and it was too small (this is something they have apparently corrected though, as I wasn’t the only one to complain).

img_5106

The Jutland Pants don’t come with a coin pocket, so I’ve made my own that I use, copied from a pair of Luke’s RTW jeans. It fits his flashlight perfectly! I went with tonal topstitching everywhere on these pants, because a) I’m still not that great at it, b) my machine hates topstitching thread and c) Luke preferred the look of it on these pants. I just used the same thread I used everywhere else, no special thread or stitch length. I also didn’t decorate the back pockets with any kind of design at Luke’s request.

img_5110

Antique nickel button from Miss Maude’s – wish I’d taken a little bit more care to line up the waistband across the fly! Always room for improvement…

img_5111

Guts. Speaking of improvement, I sewed the fly shield on the wrong side. I was using a combination of the Thread Theory instructions and the Ginger Jeans instructions and somehow got confused. It doesn’t really matter too much, but I wish I didn’t always stuff something up in every project! I bound the waistband with my own bias binding made from an Art Gallery cotton, and I used proper pocketing for the pockets, which I bought from the fantastic Hawes & Freer. Luke is especially thrilled with the pocketing, he says it feels luxurious. And you can see the lovely matching zip, too! Luke loves these pants a whole lot, and he said they’re the most professional thing I’ve made yet, which is a pretty big feather in my cap!

Next up is another pair for Luke in dark denim (when I get around to buying some) and some Ginger Jeans for me. What are you all sewing at the moment?

Standard
sewing

Scribble Flower Named Kielo Dress

img_5038

Hello hello, how’re we all doing? Another inadvertent break from blogging, but I’m back with a new dress – the Named Kielo wrap dress. I’ve been aware of this pattern for ages, but I didn’t think it would suit me, so I didn’t pay much attention to it. But after a few failed projects that I *did* think would suit me and ended up being swiftly donated, I threw caution to the winds and decided to go in a different direction. And you know, I’m so glad I did, because I love this dress!

img_5042

I hesitated over what size to make – my measurements put me at a size 44 in the bust, but my fabric was quite stretchy and I wanted a flattering fit, so I went with a 42 in the end. Speaking of the fabric, I really struggle finding nice knits in NZ, but I liked this scribbly flower one I found on Trademe because it’s not your typical floral. It’s polyester, but it does drape nicely and that was my main concern. Unfortunately it’s also a little sheer, so I have to wear tights and a camisole underneath (or a slip, if I owned one) for modesty.

img_5044

I didn’t want a maxi dress, so I cut a whole heap off the length. I don’t even know how much, even if I’d wanted a maxi dress I would have had to cut heaps off as it’s drafted for tall people and I’m 155cm. I also cut length off the sleeves, as I wanted them elbow length rather than full length. I sewed the entire thing on my overlocker, because I got a new one that I can actually use! I was using some janky old Babylock previously that was a bitch to thread and frequently snapped threads and other business, so I sold it and bought a Brother 1034D second hand (which came with an instructional VHS!) that I love. I paused when it came to finishing the neckline and the hems though, as it’s quite a drapy knit and not very stable. I didn’t want it to stretch out, and I was out of that fusible knit tape everyone thinks is so great. I came across a blog post somewhere about making your own out of fusible interfacing cut on the bias, so I overlocked all the raw edges and applied the interfacing to the hem, turned it under and tried sewing it with a twin needle, but just as I was thinking it was going well, my machine had a fit and refused to deal with it any longer. I tried rethreading it several times, but nothing worked, so I unpicked it all and peeled off the interfacing and just left it as an overlocked hem – the same with the sleeves. I kind of like it, honestly, so I’m leaving it that way.

I just made a binding for the neck from self-fabric, and made it 3/4 of the length of the neckline and attached it with my overlocker, gently stretching it the whole way. I’m very happy with that finish!

img_5046

I think my style is changing a bit. Before this I tried making another Colette Moneta out of a purple jersey from The Fabric Store, but I forgot how wide the neckline is on that dress and hated it the minute I put it on, and it was way too purple. Before that I made a Sewaholic Granville shirt from a grey linen with contrast orange birds, and I hated that too because it looked stupid and didn’t flatter my figure at all. It can be hard to find motivation to keep sewing when everything turns out badly and you start to wonder if you can even sew properly or make trustworthy decisions about your wardrobe, so thank goodness for this dress – a much needed win.

img_5035

It’s perfect for hugging the neighbour’s cat, too!

Standard
clothing, sewing

Cherry Pie wool skirt

Hey ho, it’s been a wee while, hasn’t it? Never mind though, I’m back with a finished skirt that’s only been a work in progress for 4 years!

IMG_4688

When I was living in Berkeley, back in the days when I still used Pinterest, a stylish friend of mine pinned a skirt by a French clothing designer that I fell head over heels for. It was a circle skirt, made of woollen fabric, with two velvet bows on the front. It was also about €300 and not anywhere near my size, not that I would have bought it anyway. So I set about making my own. I bought some red Melton wool from fabric.com, and used the Circle Skirt App by By Hand London to make the pattern. I “pre-washed” the wool by taking it to the laundromat and tumble drying it with a damp towel – not having my own washing machine in the States was infinitely annoying when it came to pre-washing fabric! I cut out the skirt and the waistband, and then it got set aside and suddenly we were moving to New Zealand!

IMG_4689

(I pressed it, I promise – it got crumpled in the moving process and is being stubborn about unwrinkling)

Of course, I had to bring my unfinished skirt with me, so I packed it into a ziplock bag in my suitcase and once I got a sewing machine here in Auckland, I took it out again and assessed. I wanted to interface the waistband, but I was unsure what to use, so I went to the local fabric shop and they sold me some quite expensive interfacing that worked beautifully, and in fact I only used the last of it up recently! I wish I knew what kind it was but the fabric store employee was unfriendly and I just wanted to leave, so I didn’t ask. It was very soft, and grey in colour, and fusible. After that, I attached the waistband and inserted a lapped zip from my newly acquired op shop stash.

IMG_4762

For the hem, I knew I wanted it full and swingy. I had bought horsehair braid from the now-defunct online shop run by Sunni from A Fashionable Stitch and knew I wanted to use that. I used Gertie’s tutorial on how to attach it and shape the hem, and after folding it up I did a catch-stitch by hand to secure it.

IMG_4763

And then, I was stumped. I had bought some velvet ribbon to try and mimic the original skirt, but it was only velvet on one side and I couldn’t figure out a way of forming the bow where none of the non-velvet side was showing. The skirt ended up getting put to the side again after I got a job, and for a while I thought about it and toyed with the idea of embroidering something around the hem. For two years.

IMG_4692

I wish you couldn’t see the outline of my top under the skirt – the photographer should tell you such things!

Finally, last Monday was Luke’s birthday, and he wanted to take some photos of me (among other things), and I wanted to look nice. I came across the skirt again, and decided to try it on. I wasn’t even sure if it would fit – I hadn’t ever tried it on! Thankfully, it did – but it didn’t have a button. Ever resourceful, I found a brooch Luke’s mum had given me a while back and used that to pin the waistband closed – you can see it in the side-on shot above.

Oh, and the top I’m wearing? I made that, too! It’s the Ensis Tee by Papercut Patterns, made out of black merino from The Fabric Store for our Iceland trip last year. A black long-sleeved top is a must for me, and this one is really comfy. I have fabric to make a few more, just need to find the time!

Standard
sewing

Silky Asaka for MIL

As we all know, it was Mother’s Day recently in the southern hemisphere, and for the first time in about 5 years, Luke and I were actually in a position to see our mothers on the day! I figured the occasion deserved something a little better than flowers or chocolates, so I decided to make each of our mothers a handmade garment as a gift.

For my mother, I chose the Oslo cardigan from Seamwork. Unfortunately, I have no photos to show you because I was working on it right up until the night before our flight to Australia, and my mother is extremely photo-shy, and wouldn’t allow me to take any pictures of her wearing it. I’ll tell you, though, that it was in a black boiled wool knit with handmade buttonholes (because my machine refused to even contemplate stitching them for me) and bronze walnut buttons, and she absolutely loved it and it fit perfectly.

For my mother-in-law, Kim, I decided on the Asaka robe from Named, which I bought a year or so ago and hadn’t used yet. I wanted something pretty, and also something that was forgiving when it comes to fitting, as I wasn’t sure of Kim’s actual measurements and didn’t want to spoil the surprise by asking. I cut out a size 44 with no adjustments and traced them off, as this was sadly just before their announcement that they had converted it into their new layered sizing PDF format 😦

20160515_103326Kim was more than happy to pose for blog photos!

20160515_103334

20160515_103351

The fabric I used I have been hoarding for quite some time. I bought it in an op shop in Hahndorf, a lovely little Germanic town in the Adelaide Hills – it was on a bolt, and it was only $5! I liked the pattern, so I bought it. When I got it home and unrolled it, there was about 10 metres of it there…and it was by John Kaldor! What a bargain! It’s very light and silky, but not see-through. I’m not sure if it’s a silk blend or what it is, as I haven’t done a burn test, but it feels delightful on the skin so I knew it would be perfect for this robe. I prewashed it in warm water in the machine and it held up just fine (I didn’t want to give Kim something she would have to hand wash all the time).

Construction was fairly straightforward. I French seamed everything I could so there were no raw edges visible, and I hand stitched the collar down on the inside for a clean, neat finish. That took forever, but it was well worth it! I also used a starch stabiliser to stop the fabric from shifting to make sure everything was neat and straight, particularly for the belt and the sleeve vents. Then I just washed the completed garment at the end to remove any traces of starch, and it was good to go!

20160515_103407

Kim really loves it, and it fits her perfectly, so I’m pretty happy it turned out so well, and I was able to give both our mothers gifts they love and will hopefully use for a long time to come!

Standard
sewing

My 2016 Vintage Pledge

I watched last year’s Vintage Sewing Pledge unfold with interest, but didn’t get involved because I was too busy, and because I became aware of it a little too late in the year. Not that I’m exactly onto it early this year, but I figure I still have time.

So, here’s me joining the Vintage Pledge for 2016. I, Kirsty from Tea & Rainbows, pledge to make at least six vintage garments this year, possibly 7.

Ambitious? Yes. But I have a sewing plan this year, and all of these patterns feature on it, so we’ll see how I go!

I have quite a lot of vintage sewing patterns. I’ve pared them down over the years, but almost every time I go to an op shop, I walk away with another one! I rarely sew with them though, so I’m hoping this pledge will spur me on to get some of them made up!


IMG_4218

First up we have McCall’s 2054, a trench coat from 1969. I’m planning on making view A into a rain coat, with this waterproof bird-print fabric from The Fabric Store. I’m pretty excited about it!

IMG_4219

Next up, Simplicity 6446 from 1966. I think this one is super cute with the little tie collar! Especially loving the polka-dot one to the far right. I’ll probably make this with longer sleeves.

IMG_4220

This one is my most recent acquisition, from a rather odd junk shop down the road from me that’s only open on Sundays. Simplicity 6912, also from 1966. The only thing that worries me is it’s a teen pattern, but I’m hoping I can just grade up without too much trouble as it’s a very simple pattern.

IMG_4221

How gorgeous is this one? Vogue 9976, from 1960. A wrap-back blouse and skirt that looks really elegant and easy to wear. And I need more separates in my wardrobe!

IMG_4222

Simplicity 3559 is a reproduction of an original 60s Simplicity pattern (I’m pretty sure this is allowed, but correct me if I’m wrong) that I think is simple and cute. I like the teal version with the bow!

IMG_4225

I’ve already cut this one out – it’s originally from 1969, and is now in the Autumn/Winter Burda Vintage magazine. I’m not doing mine in chiffon though – I’m hoping to use a border print cotton I got in Mood a while back, but if not, I have other options.

Are you joining the Vintage Pledge this year?

Standard
sewing

Tropical Summer Gabriola

Front Untucked

So, I made a maxi skirt. To be more precise, I made the Gabriola skirt by Sewaholic. I don’t know when or where I bought it, but I had the paper pattern – which is now out of stock on their website. This was quite the queue jumper, to be honest. I’d found the pattern during a reorganisation of my sewing space, and a few days later I was in Geoff’s Emporium and found this lovely, summery rayon fabric for $7 a metre. Since this skirt is a huge fabric hog (4.8 metres for version A at 115cm wide fabric), the price was right! As it turned out, I easily had 1.5m of fabric left, despite making the largest size. Slightly annoying, but I guess I’ll make a top or something out of the rest.

Side Untucked

I made a size 16. This was a mistake. My waist measurement, on a good day, hovers around 88cm. Since the size 14 finished measurement was exactly 88cm, I thought by making the 16 I’d give myself room to breathe, eat and be comfortable. Instead, I ended up having to take the waist in by 6cm, in the form of 4 1.5cm darts. It was huge. And even now, it’s looser than I would ideally like. I cut the length at the smallest size, because I am short (154cm), and I still needed to take it up by 6 inches. I was going to do this at the lengthen/shorten line, but it didn’t look quite right to me and luckily Mel and Nikki advised against it, and I took it from the bottom, to preserve the hip shaping.

Back Tucked

Making the skirt was pretty straightforward. The fabric didn’t shift too much, and it pressed nicely. I did French seams wherever possible for neat insides, and pinked the ones where I thought French seaming wouldn’t have worked very well. Well, I say it was straightforward – until I got to the zipper, that is. I had the perfect colour zipper in my stash (I have a huge vintage zip collection of all colours and sizes), but inserting it was like pulling teeth. I interfaced the zipper opening, I basted it in first…and it still took me 4 tries before I was satisfied with it. And even now, I’m not sure satisfied is the right word. More like resigned. I didn’t realise until I got to that step that the zip didn’t go all the way up to the top of the waistband. I hate hooks and eyes, so that didn’t thrill me. I ended up using some small nickel snaps I had from god knows where.

Closure

I let it hang for about 4 days before I hemmed it – I didn’t plan for it to be that long, but life got in the way. I ended up cutting another 2 inches off the bottom before finally hemming it the recommended amount. Luke kindly got on his knees and helped me pin it – I didn’t enjoy any of the hemming process, it’s a huge hem and I was worried the whole time it was going to be wonky. I did use hot pink bias binding though, because why not?

Hem

Can I confess that I’m not really loving the skirt? I don’t know how to wear it! I imagined I would wear it with a tucked-in top, but it turns out I hate the way that looks (you can see what I mean at the bottom of this post). It’s so much brighter than anything I usually wear, and while I love how flowy and light it feels when I’m wearing it, I feel like I have no suitable tops to pair with it. I’m wondering if a looser fitting top, tucked in, would look okay. I’m desperate for open to suggestions.

Funny

When twirling photos go bad…

Standard
sewing

McCall’s 9125

Do you ever finish sewing something, try it on and just feel…blah about it? This is one of those.

IMG_3915

This skirt is McCall’s 9125, a vintage pattern for a skirt or culottes, jacket and shirt. I am having trouble finding a picture of the pattern online to show you, but the envelope says it’s from 1967. To be honest, this is the kind of skirt that doesn’t even need a pattern – it’s literally two rectangles, gathered and sewn onto a tabbed waistband. But hey, I had the pattern and it’s actually the perfect length for me. This is my second time making it – I don’t think I’ve blogged the first one, only Instagrammed it a while back. I do wear the first one on occasion – it has chartreuse foxes on it, after all – but I’m just not feeling this one.

IMG_3917

The fabric is a rayon challis from Backstreet Bargains (I think) that I’ve had for a while. I love the teal colour, and it’s so flowy and soft. I thought it would work well for this pattern, but now I’m not so sure. It does feel summery to wear, but I don’t feel like it’s very flattering?

IMG_3919

Especially not from the back…geez. Excuse the odd poses, I was wearing a longish cardigan and instead of taking it off, I just hitched it up and held it there. It has a handpicked lapped zipper, done following the instructions on an old vintage zip, and it has a snap fastening at the waistband with a decorative button on the tab.

IMG_3922

It even has self-made matching bias tape on the hem! Why did I go to so much trouble for a skirt I had my doubts about? Who knows. At least it’s well made. But I think I’ll be donating it, sadly, as I just don’t see myself wearing it.

Do you keep your dud makes, or do you get rid of them as soon as you can?

Standard
sewing

Sewing for the husband: Thread Theory Jutland

Whee, it’s not even the end of January and I have another finished project to blog! Look at me go.

IMG_3900

IMG_3902

Yes, it’s more sewing for Luke – this time a pair of shorts to go with his new short-sleeved shirt. After my failure with the Jedediah shorts, I was neither keen to use a Thread Theory pattern nor make shorts again. But, the weather in Auckland is humid and gross and warm, and Luke walks to work and back and was not digging it in jeans, so I relented. After trying and failing to find a suitable shorts pattern elsewhere, I gave in and bought the Thread Theory Jutland Pants pattern. The Jutland Pants are really more up Luke’s alley than the Jedediah – Luke is a no-nonsense, practical kind of guy, and these are no-nonsense, practical pants/shorts. He was especially keen on the cargo pockets! I used the instructions as a vague guide and I think they’re a bit better than the Jedediah ones. Or maybe I’ve just had more practice now. Either way, these weren’t a difficult make, just time consuming with all the topstitching and flat-felled seams.

IMG_3904

I made a quick and dirty muslin in a size 39, which is what Luke’s measurements put him at. They were MASSIVE on him, and so after pinning and re-measuring, I went down to a 36. In actuality, I think he’s probably a 37, but that size doesn’t exist on the pattern. It’s a bit odd there’s a 3″ difference between the sizes, really. I could have blended between the sizes, but Luke was impatient for shorts and so I didn’t bother. Between that and festive eating, when Luke tried on the finished shorts, they fit…just. With a helping of muffins over the side. No matter though, because one of our goals this year is to eat healthily and be more active, and I’m pleased to say that after some effort in that department, they fit him quite well! He does say the pockets are a tiiiny bit snug (and you can see kind of a weird fold where the pocket meets the side seam where the pocket lining bunches up if he doesn’t straighten it out), so when I make another pair (because of course he wants another pair) I will make them just a tad larger through the hips.

IMG_3906

The Jutland Pants don’t have any indication of where to cut them off for shorts (that I could see) so Luke indicated to me where he wanted them to sit, and we did it that way. I then carefully moved the cargo pocket markings up the requisite amount to fit them onto the shorts – I could not find anyone else in the sewing blogging world who had done the shorts with the cargo pockets, and believe me I tried, so I was a bit worried maybe it couldn’t be done for some reason, but they turned out great! They look uneven in the photo above, but they’re not – it’s just the way Luke was standing/the way the shorts are sitting with his belt. I did patch pockets on the back, and somehow fudged up the instructions for sewing, folding and turning with the tops of them, but I actually like the way they turned out – a design feature, if you will 😉 He declined any kind of decorative stitching on the pockets. All the seams are flat felled except the crotch seam, which is double stitched and then bound with store-bought grey bias binding, and the waistband, which is finished the way I like it – seam allowance folded in and stitched in the ditch to secure.

IMG_3908

One thing Luke requested was a coin pocket. It was pretty easy to make one – I just measured one on his existing jeans, added seam allowance, positioned it and sewed it on. Done. He wanted it deep enough to put his flashlight in (as seen above), so I added a little bit of depth to it to accommodate that. The inside of the pockets is just plain calico – Luke rejected all offerings of even slightly whimsical fabric from my stash.

IMG_3911

I’m pretty proud of the cargo pockets – I think they look pretty good! Luke chose the buttons from Masco Wools. The fabric for the shorts came from my local Red Cross op shop – they often have a basket out the front of fabric, and all lengths are $3. I brought home 5m of this blue drill fabric, so there’s enough to make some shorts for me if I so desire. Not bad for $3! It’s the perfect weight for these shorts. Zip came from my massive bag of zips from the Salvation Army I scored last year. All in all, a cheap, successful make!

Standard
sewing

Sewing for the husband: Simplicity 1544

Happy 2016, all – I’m not going to bother doing any kind of round-up of 2015’s posts, simply because I didn’t blog that much! However, one of my resolutions this year is to blog more (and sew more), so hopefully there’ll be a bit more action around these parts this year.

IMG_3861

Since I’ve gained some festive weight (despite getting the flu at the end of 2015 and losing 2.5kg in 3 days), I’ve turned to sewing for Luke recently. It’s no hardship – I actually really enjoy making clothes for him, especially as he takes an interest in fabric/styling choices! Due to it being summer in NZ at the moment, he has requested short-sleeved shirts and shorts. I have made him a pair of shorts, but due to his own festive weight gain, they are a tiny bit too snug, so I moved right on to a shirt. We both wanted to move away from the Negroni, which I’ve made for him twice before (and blogged about once) – both because of the camp collar and because of the large facings. So this is Simplicity 1544, the imaginatively named “Men’s shirt with fabric variations”.

IMG_3870

I chose view C, with the pockets of view B. There is no option for short sleeves on the pattern, so I simply measured Luke’s arm from the shoulder to his preferred sleeve length, and folded up the pattern tissue at that point (with seam allowance, of course). I cut out a size 40, after measuring his Negronis to determine how much ease he likes in a shirt, but with the length of size 42. I then added an extra 4cm to the length, because Luke is quite tall (again, I consulted the Negroni for length). I also only cut out 1 pocket, due to fabric constraints. Luke told me he thought the pocket should be on the right side of the shirt, but after wearing it, he’s changed his mind and said he prefers the left. C’est la vie.

IMG_3874

Does anyone know the purpose of the yoke button tab? Luke absolutely loathes any features on clothing that don’t have a purpose, so when he discovered the button tab, he was less than impressed! I didn’t even really think about it, I just added it because it was there and I think it looks nice, even if it doesn’t serve a purpose, but needless to say it will not be appearing on future shirts. He and I were both also disappointed to discover the pleating in the pocket is only for show – the pleat is actually sewn together down the middle and doesn’t allow the pocket to open to accommodate larger items as you’d assume it did.

IMG_3879

The fabric is one I originally bought with myself in mind, from Backstreet Bargains, but when it arrived it was more…beige than I expected, and I popped it in the stash and forgot about it. When I came across it recently, I offered it to Luke, who initially was concerned about whether or not he could pull of tiny giraffes, but I convinced him he could, and here we are. Luke is very fond of the fabric – he said he likes the texture of the weave (ooh, get him using the lingo!) and he rather likes the giraffes now he’s used to the idea. The inside of the yoke and the collar stand are both just unbleached calico, at Luke’s suggestion. He bought the buttons himself, after I discovered none of the shirt buttons in my stash actually match.

IMG_3876

I didn’t entirely follow Simplicity’s instructions, although there were methods in there I quite liked – the button bands, for instance, are attached after the shirt is hemmed, and then folded in half inside out, sewn along the bottom and turned the right way out so they’re all neatly enclosed and level with the hem. I used Andrea of four square walls’ method of attaching the shirt collar, as it’s the best I’ve found. That said, now that he’s worn it for a bit Luke said he would prefer the camp style collar of the Negroni on further shirts, as it suits the casual style of the short-sleeved shirt better. I did a faux flat-felled seam on the side seams, rather than just double stitching them as Simplicity suggest. They use the burrito method of sewing the yoke, which is always my preferred method – it gives such a good feeling of satisfaction when you turn it out, it’s like magic.

IMG_3880

The pièce de résistance – a label, carefully hand-stitched in. I bought a roll of adorable label ribbon from Daiso for $3.50, and I asked Luke to choose one for his shirt. He couldn’t go past this lamb, and it’s what I would have chosen as well. Too cute!

Standard