
Happy 2016, all – I’m not going to bother doing any kind of round-up of 2015’s posts, simply because I didn’t blog that much! However, one of my resolutions this year is to blog more (and sew more), so hopefully there’ll be a bit more action around these parts this year.
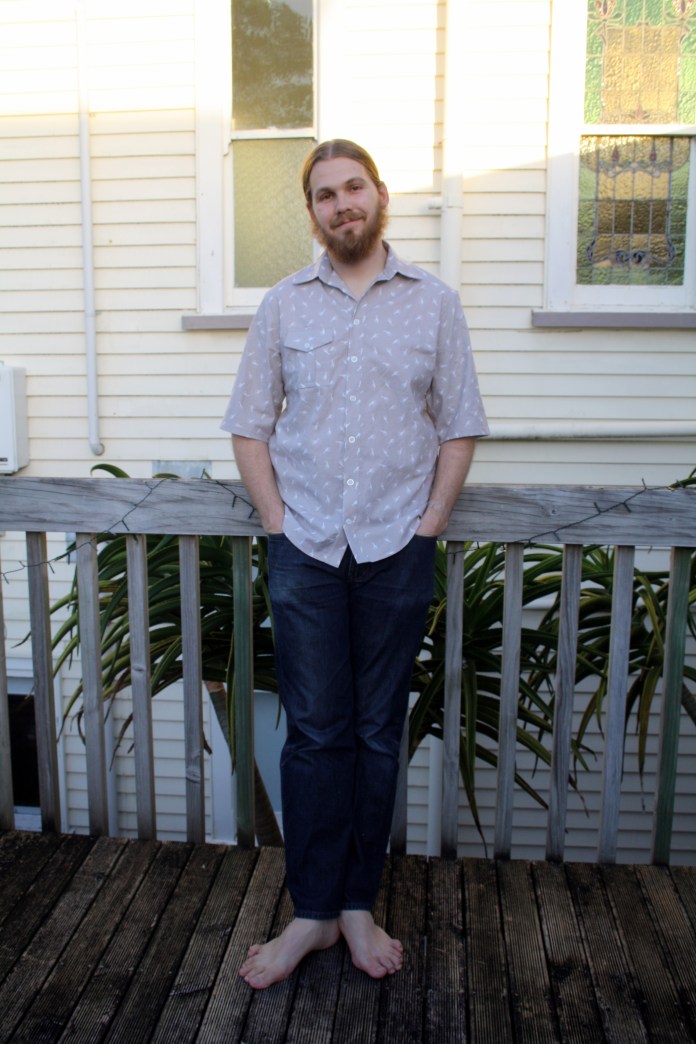
Since I’ve gained some festive weight (despite getting the flu at the end of 2015 and losing 2.5kg in 3 days), I’ve turned to sewing for Luke recently. It’s no hardship – I actually really enjoy making clothes for him, especially as he takes an interest in fabric/styling choices! Due to it being summer in NZ at the moment, he has requested short-sleeved shirts and shorts. I have made him a pair of shorts, but due to his own festive weight gain, they are a tiny bit too snug, so I moved right on to a shirt. We both wanted to move away from the Negroni, which I’ve made for him twice before (and blogged about once) – both because of the camp collar and because of the large facings. So this is Simplicity 1544, the imaginatively named “Men’s shirt with fabric variations”.
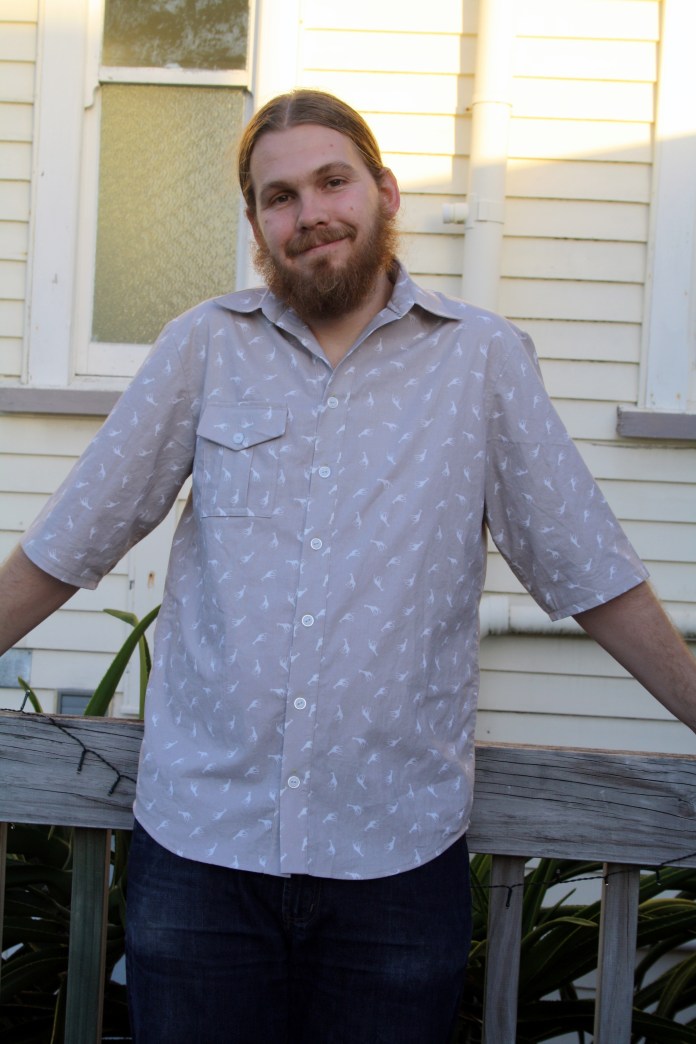
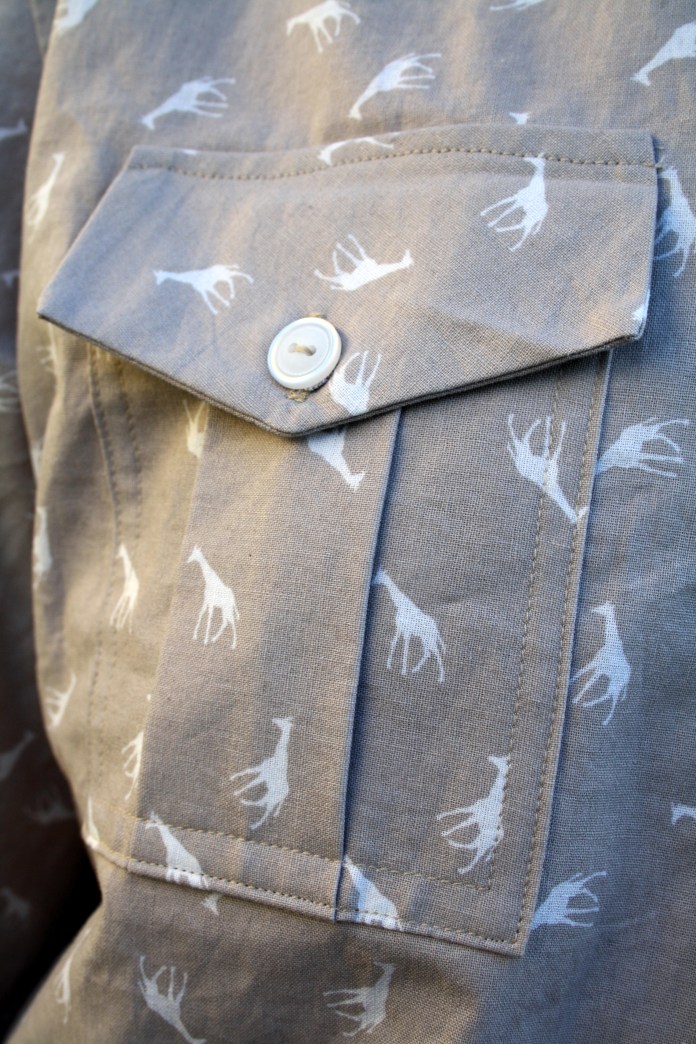
I chose view C, with the pockets of view B. There is no option for short sleeves on the pattern, so I simply measured Luke’s arm from the shoulder to his preferred sleeve length, and folded up the pattern tissue at that point (with seam allowance, of course). I cut out a size 40, after measuring his Negronis to determine how much ease he likes in a shirt, but with the length of size 42. I then added an extra 4cm to the length, because Luke is quite tall (again, I consulted the Negroni for length). I also only cut out 1 pocket, due to fabric constraints. Luke told me he thought the pocket should be on the right side of the shirt, but after wearing it, he’s changed his mind and said he prefers the left. C’est la vie.
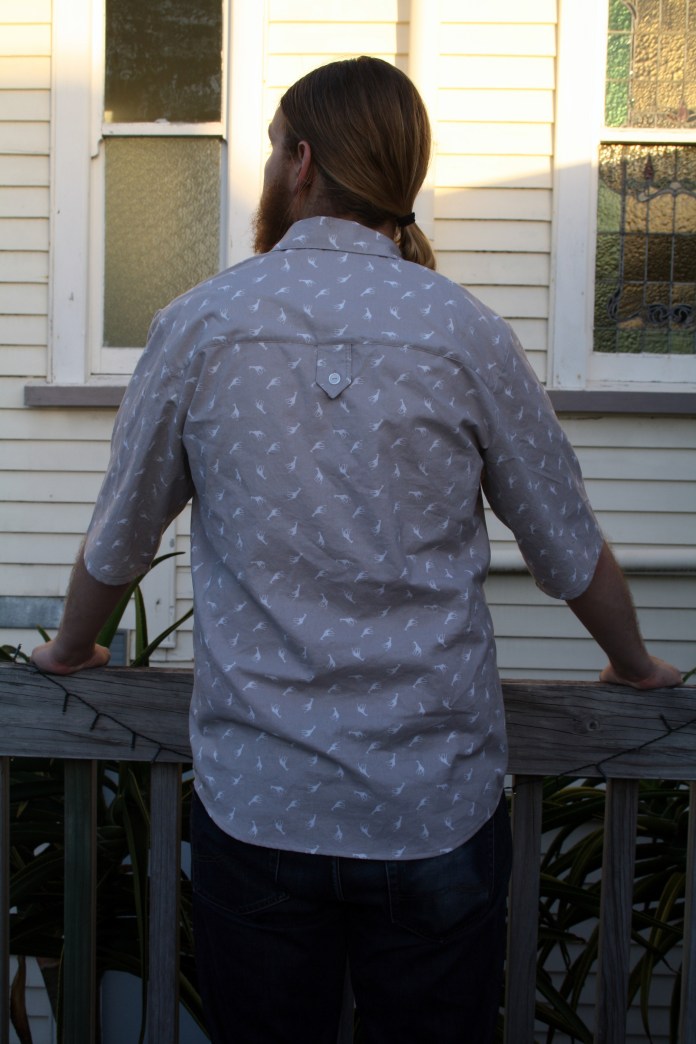
Does anyone know the purpose of the yoke button tab? Luke absolutely loathes any features on clothing that don’t have a purpose, so when he discovered the button tab, he was less than impressed! I didn’t even really think about it, I just added it because it was there and I think it looks nice, even if it doesn’t serve a purpose, but needless to say it will not be appearing on future shirts. He and I were both also disappointed to discover the pleating in the pocket is only for show – the pleat is actually sewn together down the middle and doesn’t allow the pocket to open to accommodate larger items as you’d assume it did.
The fabric is one I originally bought with myself in mind, from Backstreet Bargains, but when it arrived it was more…beige than I expected, and I popped it in the stash and forgot about it. When I came across it recently, I offered it to Luke, who initially was concerned about whether or not he could pull of tiny giraffes, but I convinced him he could, and here we are. Luke is very fond of the fabric – he said he likes the texture of the weave (ooh, get him using the lingo!) and he rather likes the giraffes now he’s used to the idea. The inside of the yoke and the collar stand are both just unbleached calico, at Luke’s suggestion. He bought the buttons himself, after I discovered none of the shirt buttons in my stash actually match.
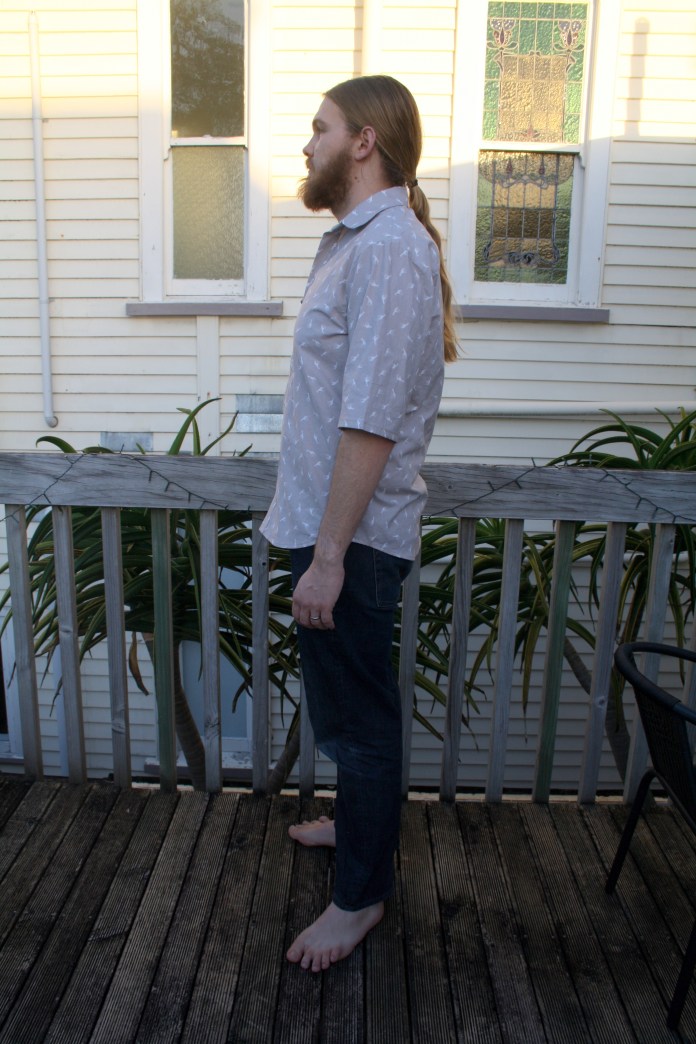
I didn’t entirely follow Simplicity’s instructions, although there were methods in there I quite liked – the button bands, for instance, are attached after the shirt is hemmed, and then folded in half inside out, sewn along the bottom and turned the right way out so they’re all neatly enclosed and level with the hem. I used Andrea of four square walls’ method of attaching the shirt collar, as it’s the best I’ve found. That said, now that he’s worn it for a bit Luke said he would prefer the camp style collar of the Negroni on further shirts, as it suits the casual style of the short-sleeved shirt better. I did a faux flat-felled seam on the side seams, rather than just double stitching them as Simplicity suggest. They use the burrito method of sewing the yoke, which is always my preferred method – it gives such a good feeling of satisfaction when you turn it out, it’s like magic.
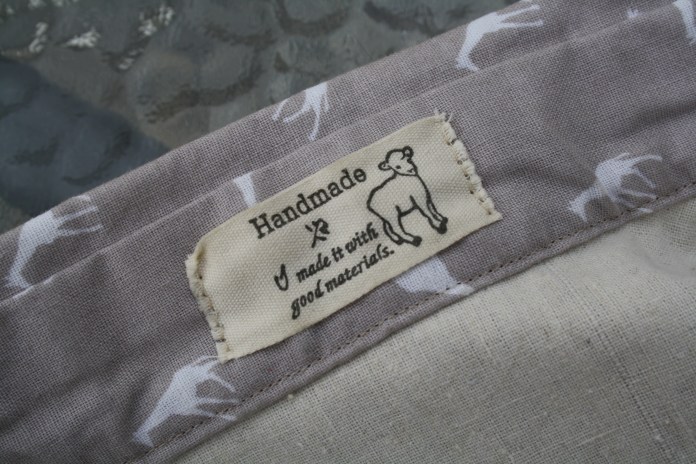
The pièce de résistance – a label, carefully hand-stitched in. I bought a roll of adorable label ribbon from Daiso for $3.50, and I asked Luke to choose one for his shirt. He couldn’t go past this lamb, and it’s what I would have chosen as well. Too cute!
