sewing

Sewing for the husband: Mustard Jutlands

img_5096

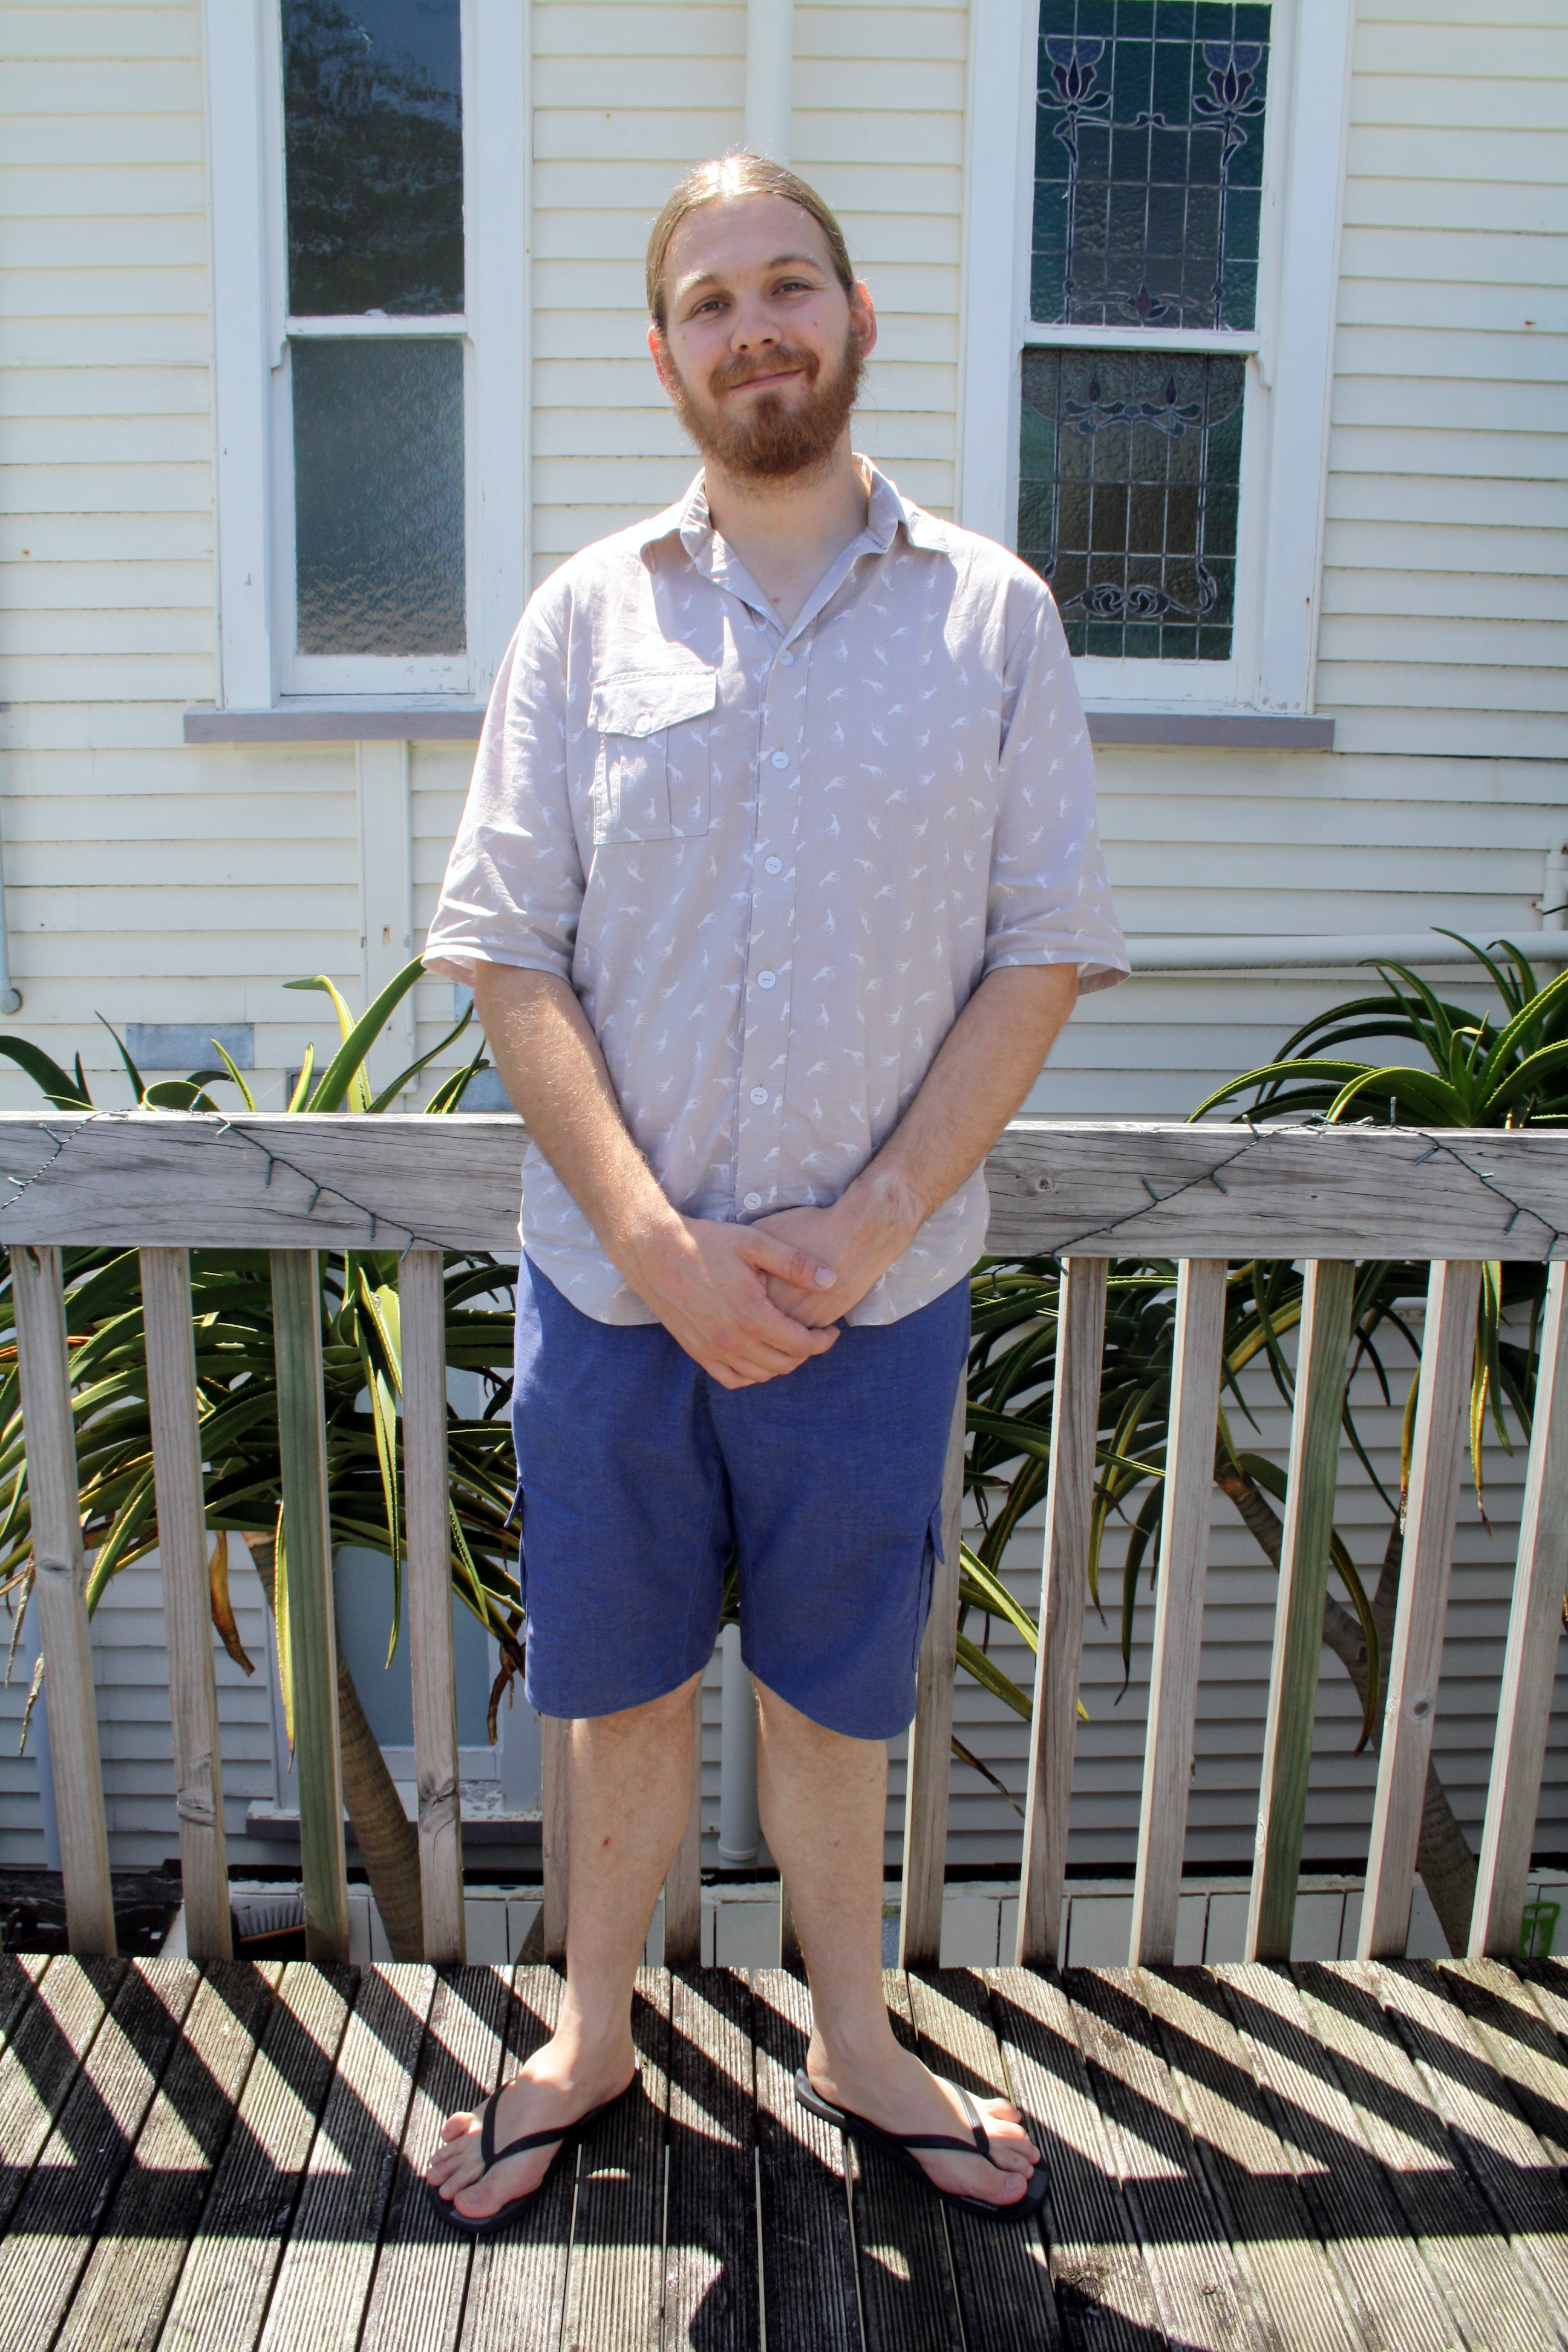
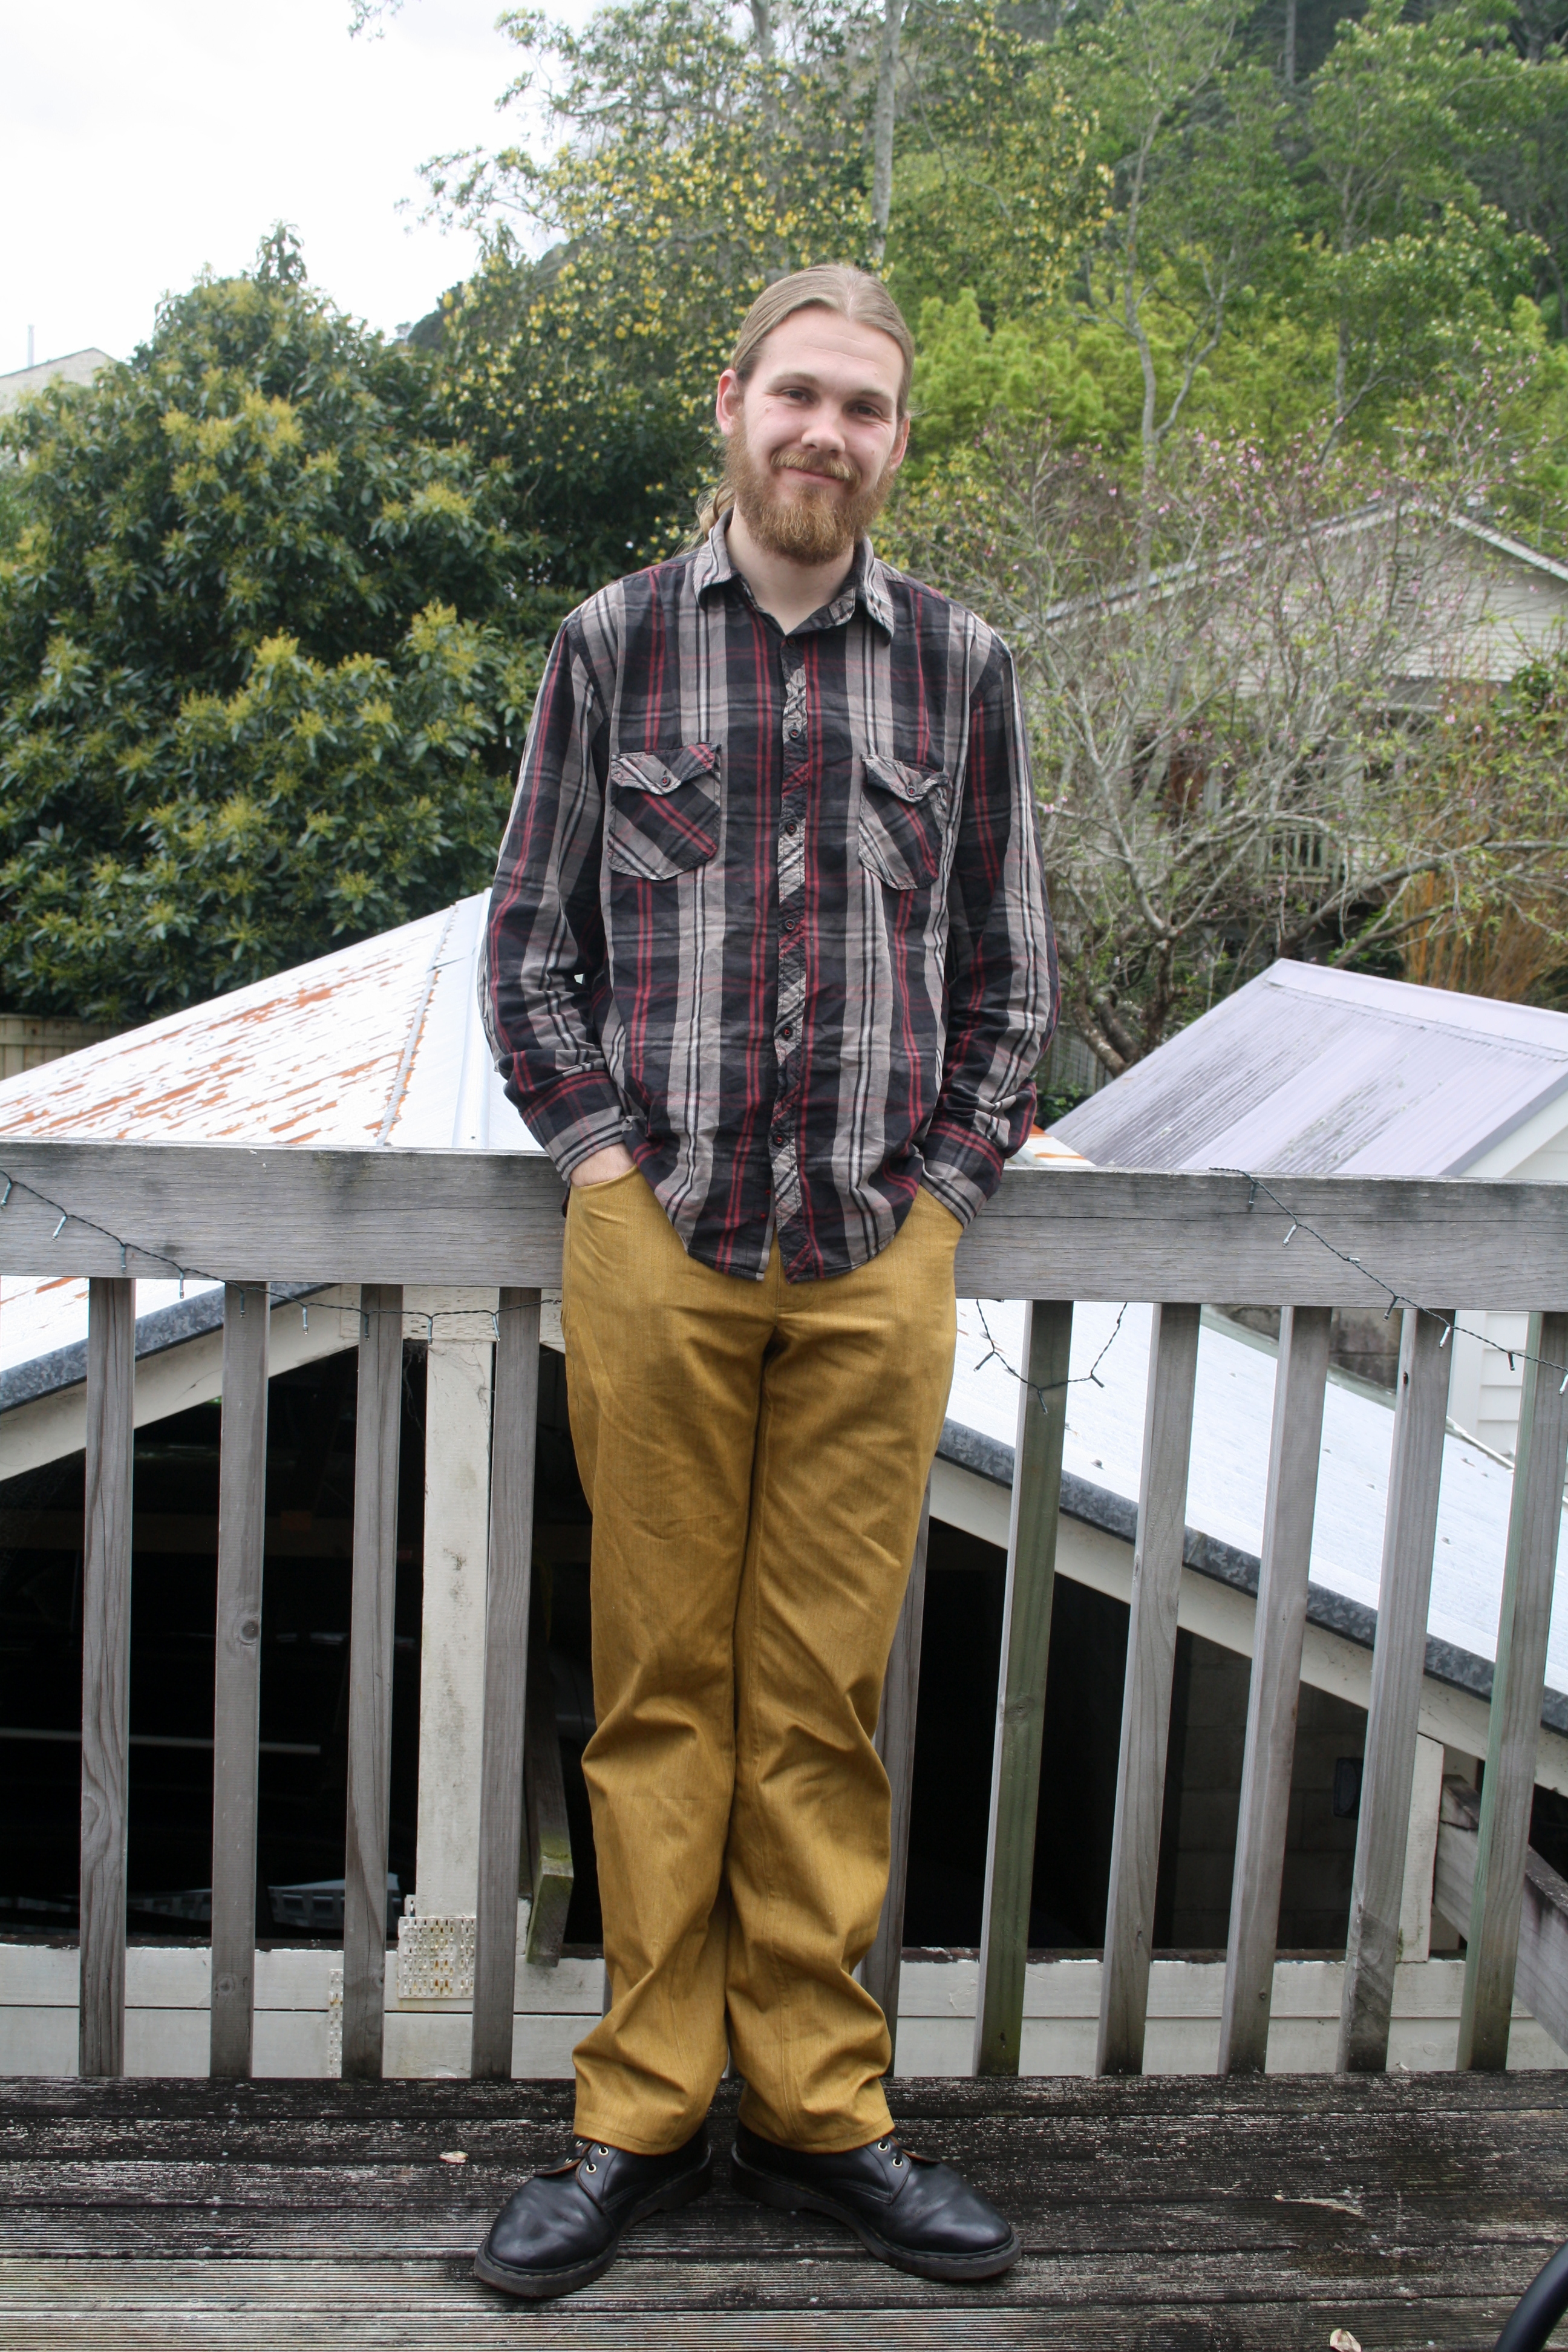
A while ago, Luke decided he wanted a pair of mustard pants. A bit of an odd request, but one I figured I could fulfil. Turns out getting the fabric was the biggest hurdle – at the time he decided this (a good few months ago now) I could not find any mustard denim in NZ. I tried all my local stores, Trademe, and the very few online NZ fabric shops. I even tried some Aussie stores, but no luck. I found this a little baffling, as the number of people I saw wandering about in mustard pants suggested to me it was quite an “on trend” colour! Eventually I found exactly what I wanted at Ditto Fabrics, located in the UK. I ordered some samples and was very pleased with how they looked and felt, so I bit the bullet and ordered. It was £8.99 a metre, and I got matching thread, too. I ended up using Youshop to get it here, as despite the efforts of a very nice man at Ditto named Gill, it was just too expensive to get it shipped directly from them. It still wasn’t cheap – I think all up with shipping costs and exchange rates, this fabric was around $80. I think good denim is worth paying for, though, so I wasn’t too upset. I got a matching zip from Miss Maude’s, and the buttons and rivets (not used) came from there, too. Turns out mustard zips aren’t easy to find either, so I was thrilled when she started carrying denim notions!

img_5101

The pattern I ended up using was the Jutland Pants from Thread Theory. I’ve made them before for Luke in cargo short form, but I’ve never made them as pants. It’s probably clear by now I’m not *that* fond of Thread Theory patterns, so I was keen to try a different pattern at first. I made a test version of the FOP 07 jeans, after seeing the amazing ones Very Purple Person made her husband. I was a bit worried as Japanese people tend to be slim and their sewing patterns small, but the measurements for the very largest size seemed like they would work. The pattern is in Japanese, however I figured I’ve made pants before and have some knowledge of Japanese, how hard could it be? The answer is, harder than you’d expect, but manageable. The fly gave me the biggest issues as it’s drafted differently to the Thread Theory pants or the Ginger Jeans, for instance, but after some research I found it’s actually drafter the “proper way” and I was able to find a video to help me work it out. At any rate, I made them using some cheap black denim and they were okay, but they had issues – the butt was saggy and way too roomy, the coin pocket was sewn into the pocket facing curve and didn’t fit Luke’s flashlight, and the denim shrank (despite prewashing) and they became too short. I also attempted to install rivets in them (my first time) and nearly threw the jeans, hammer and rivets into the bin. What ones I did manage to install came off in the first wash anyway. And yes, I did do practice ones – it seems the margin for error is very small with those little things.

img_5108

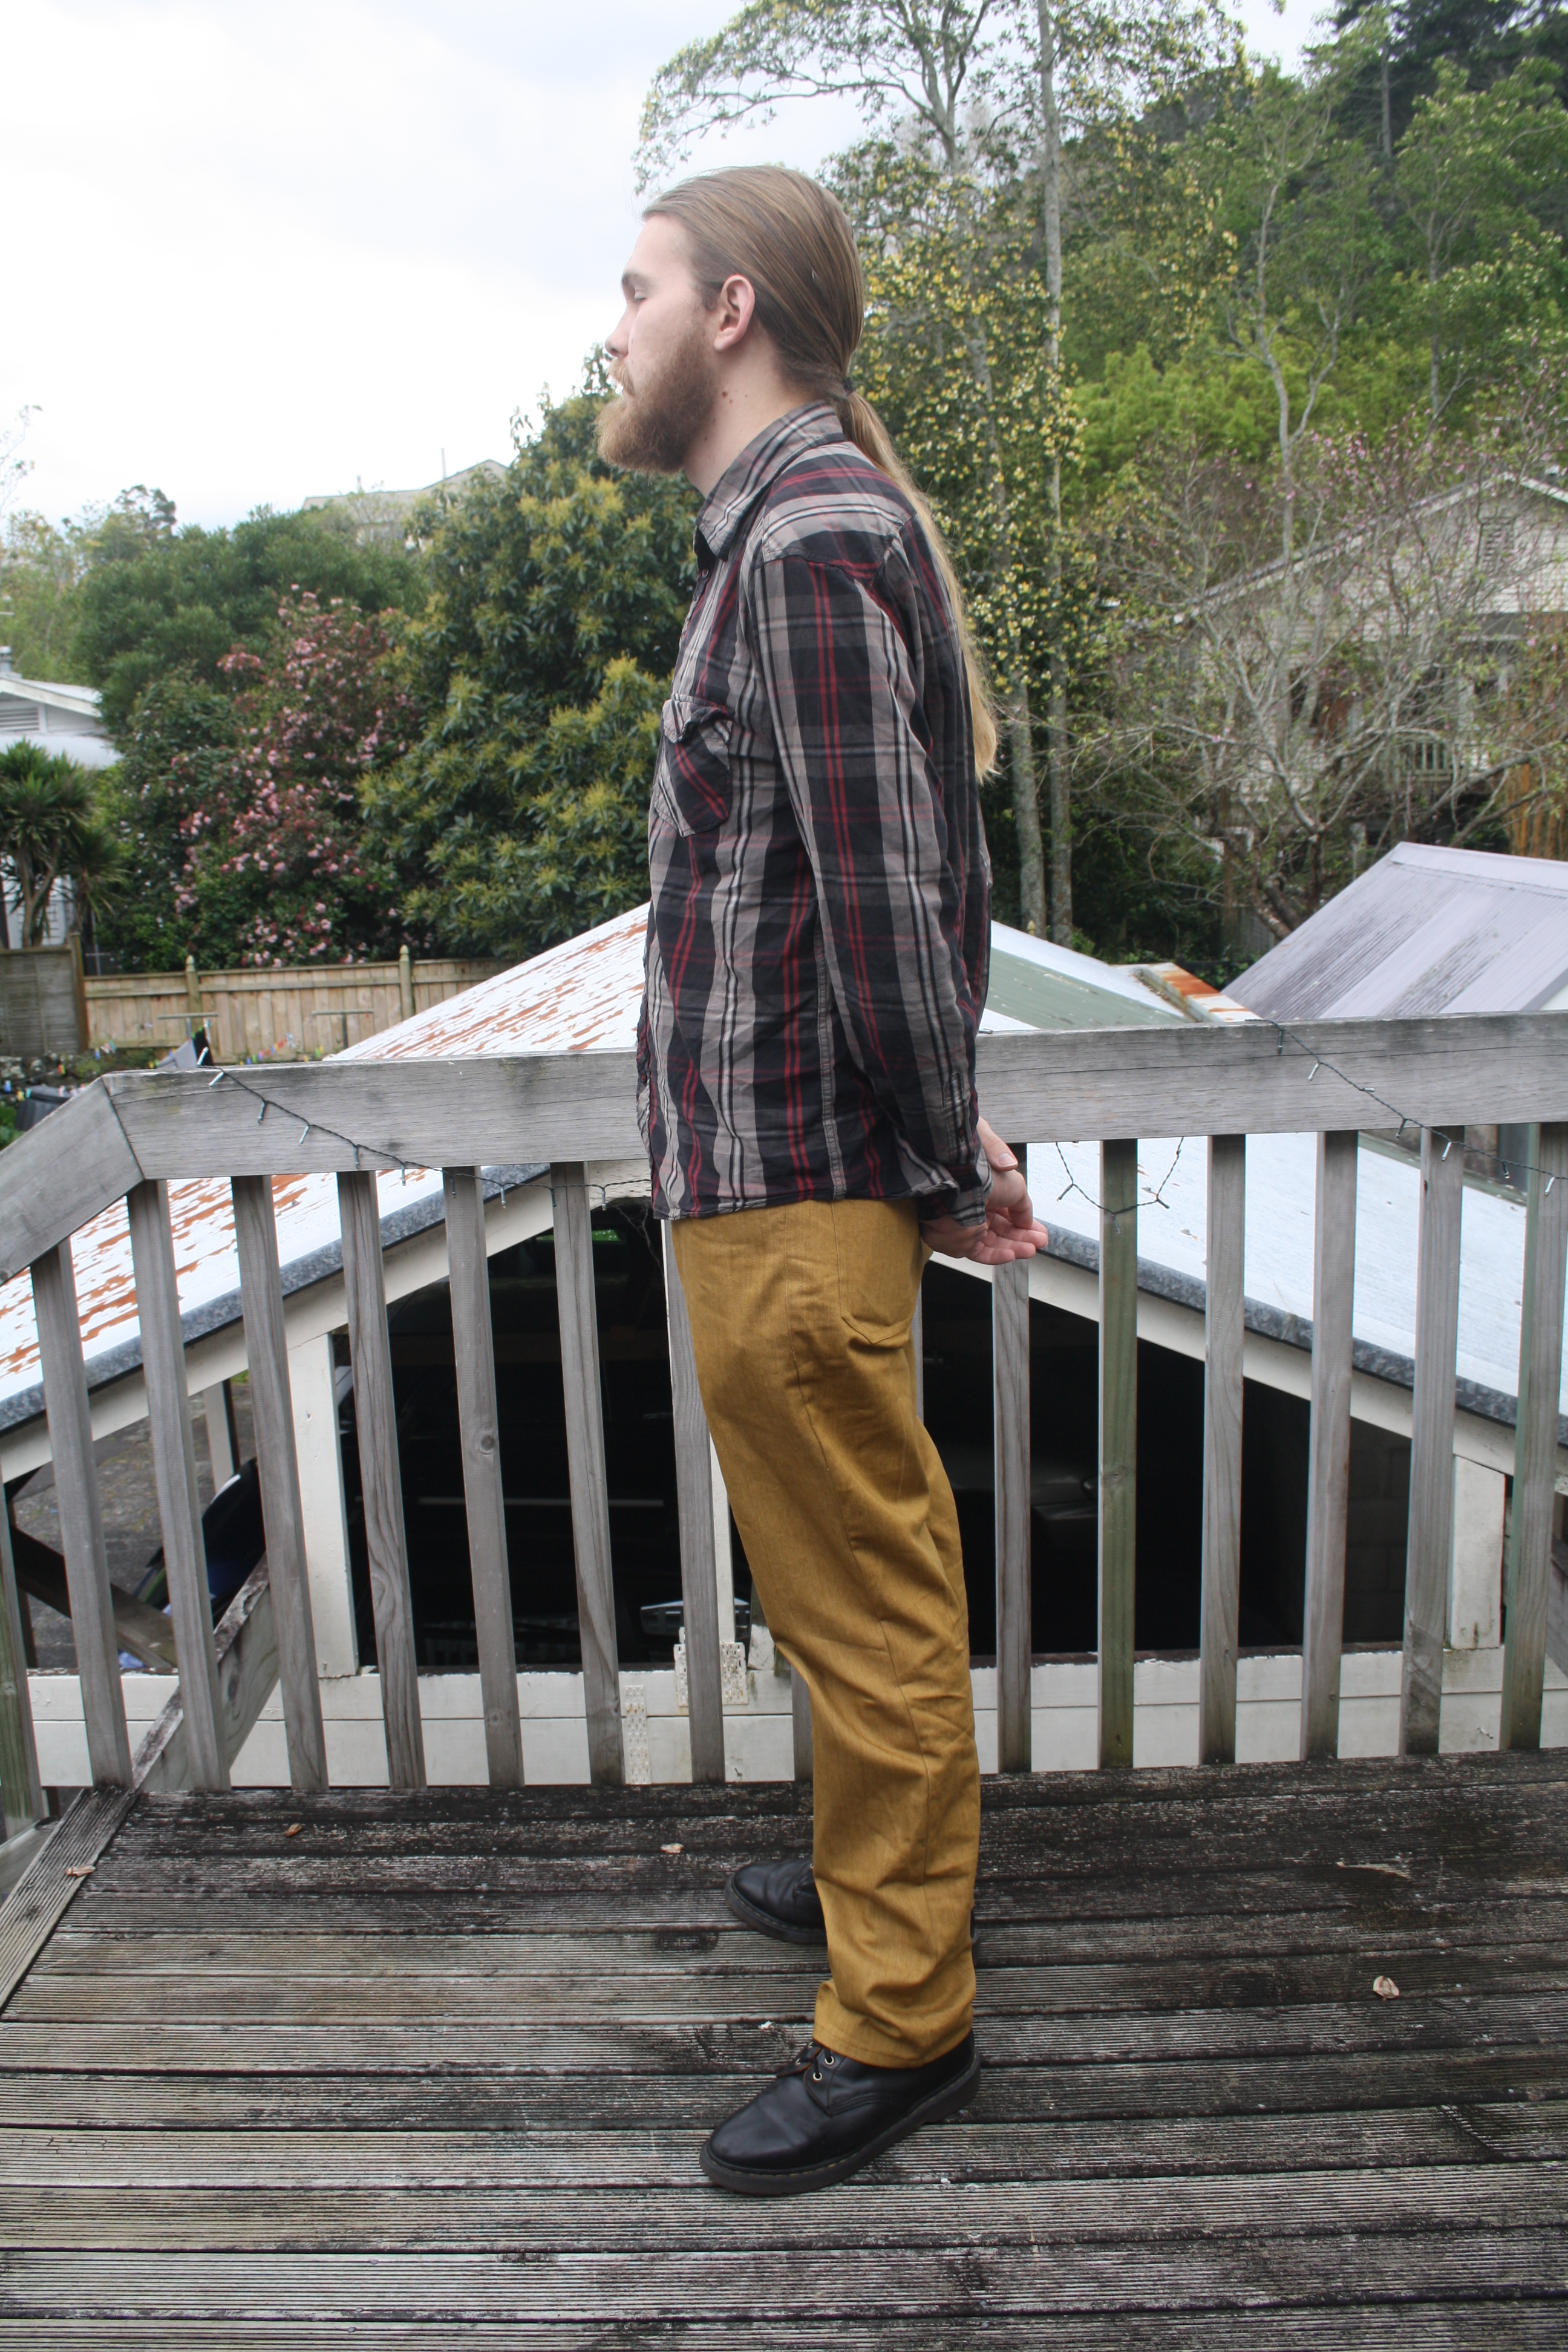
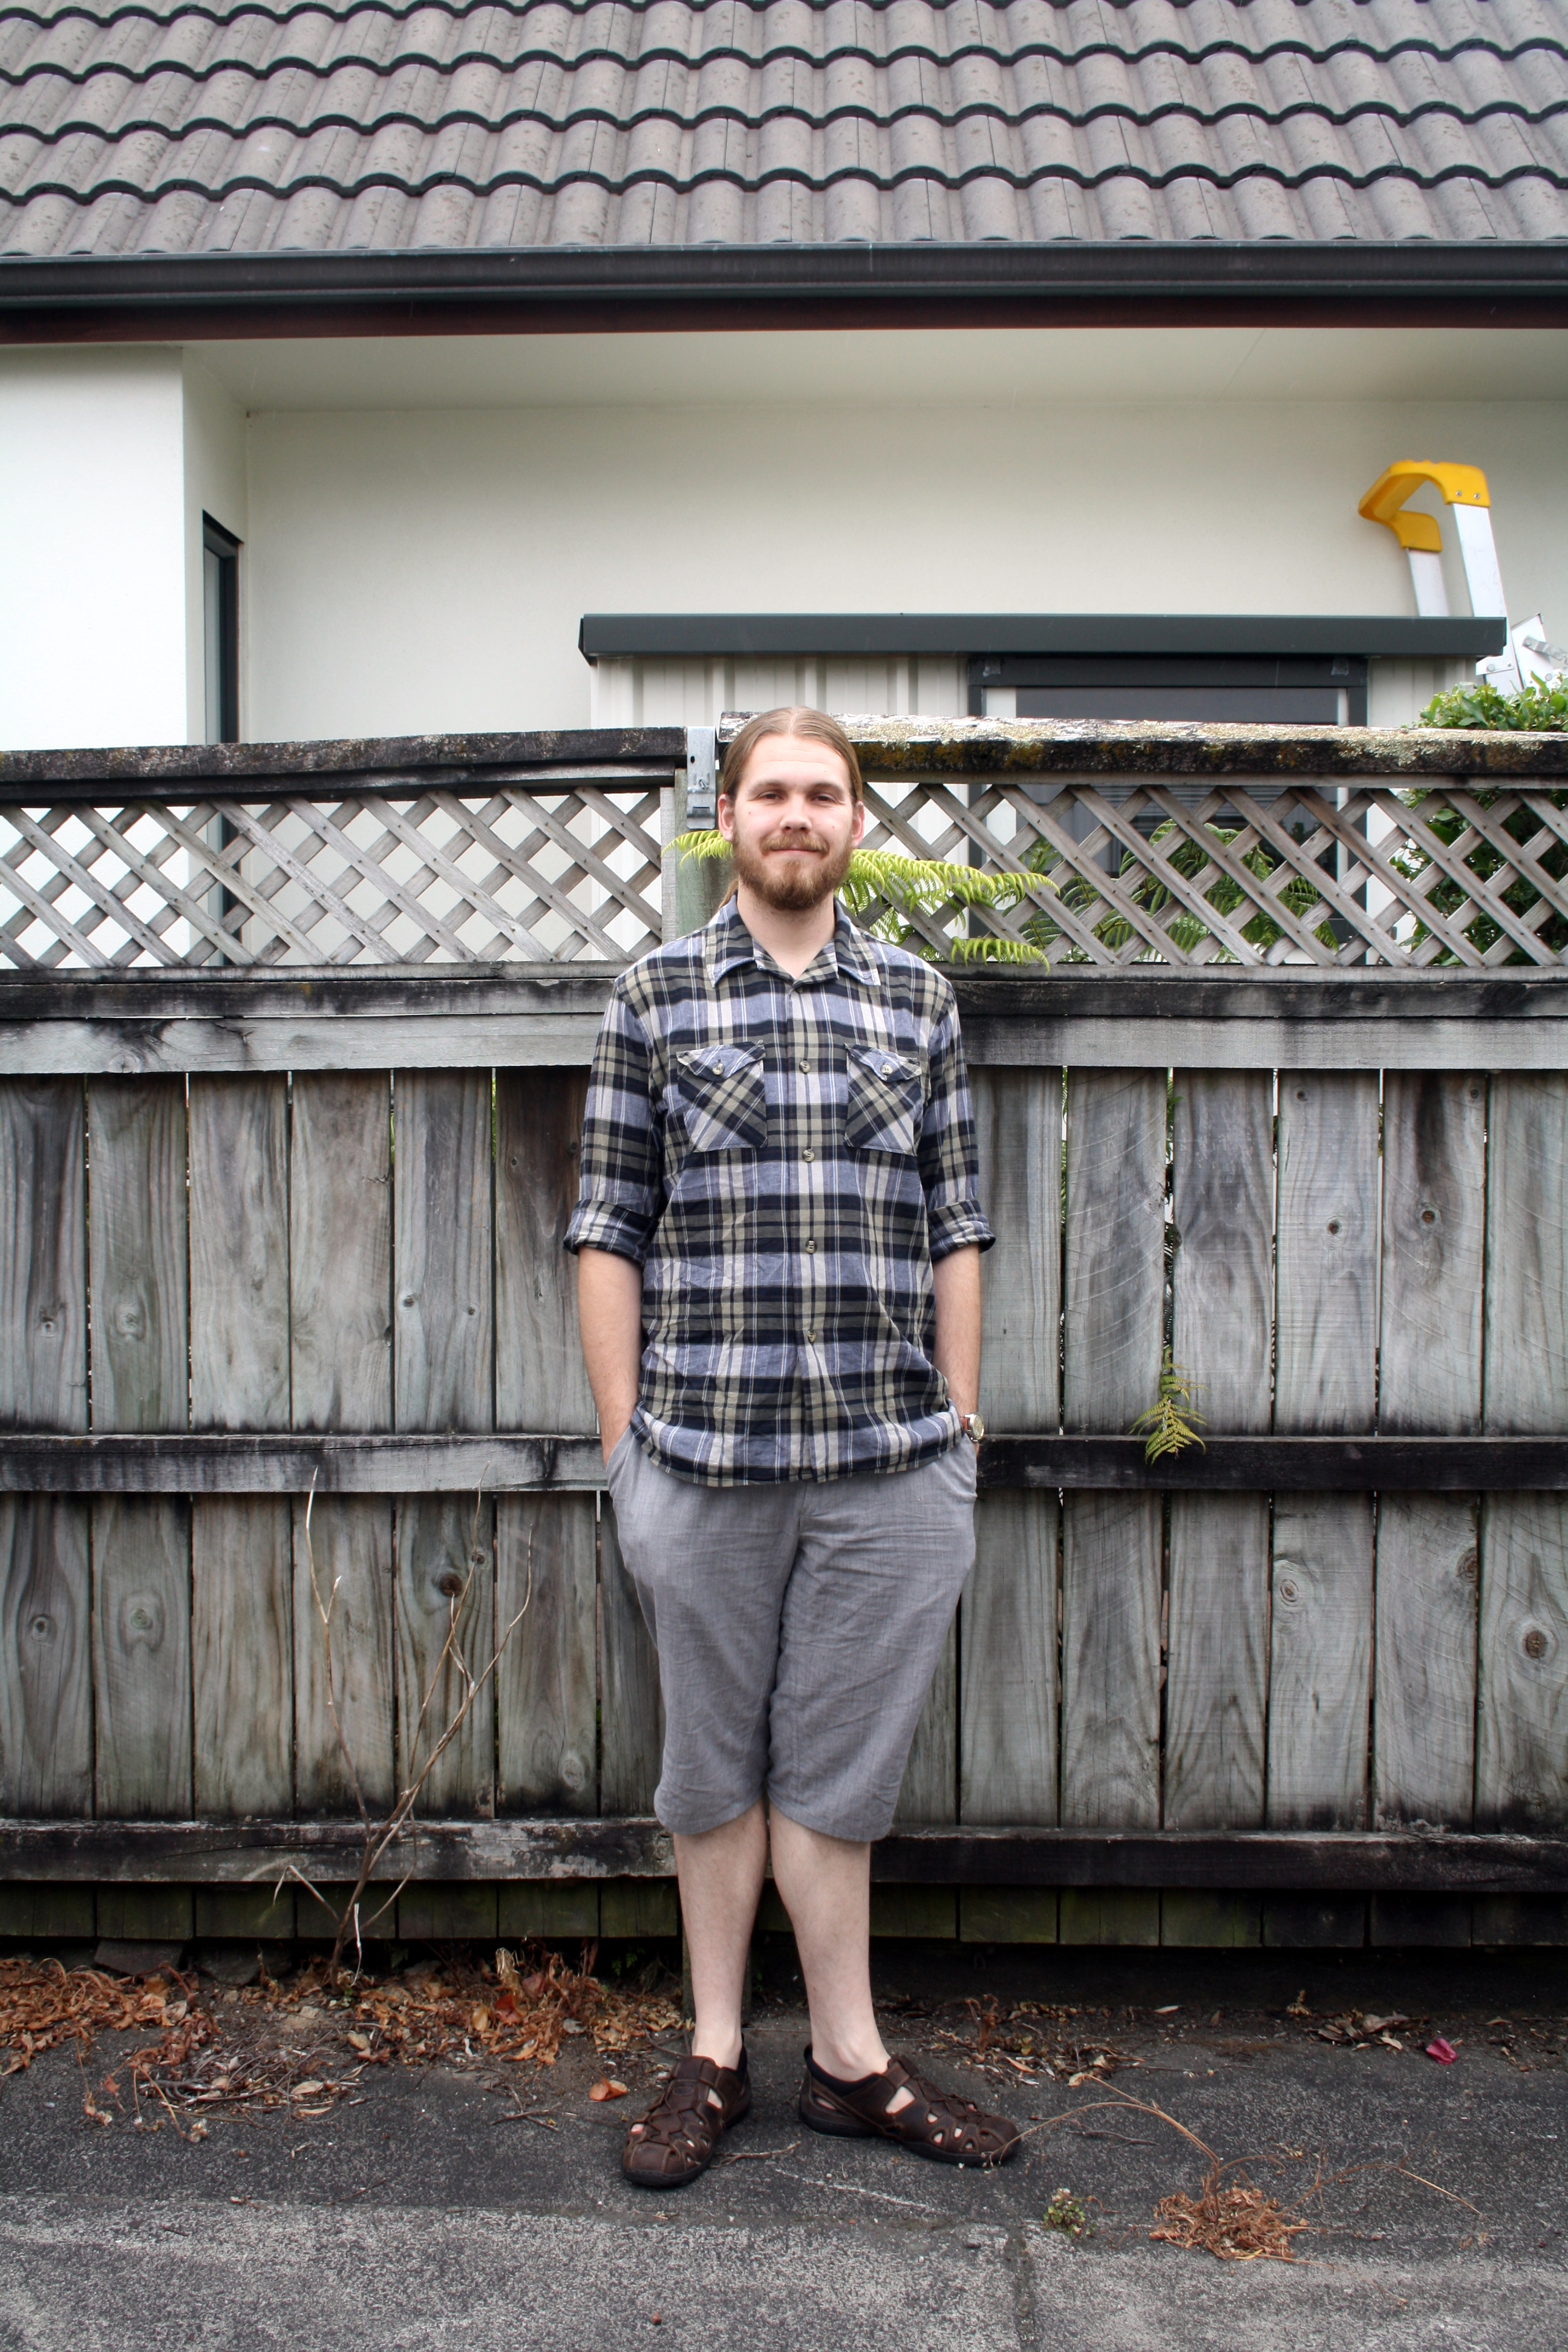
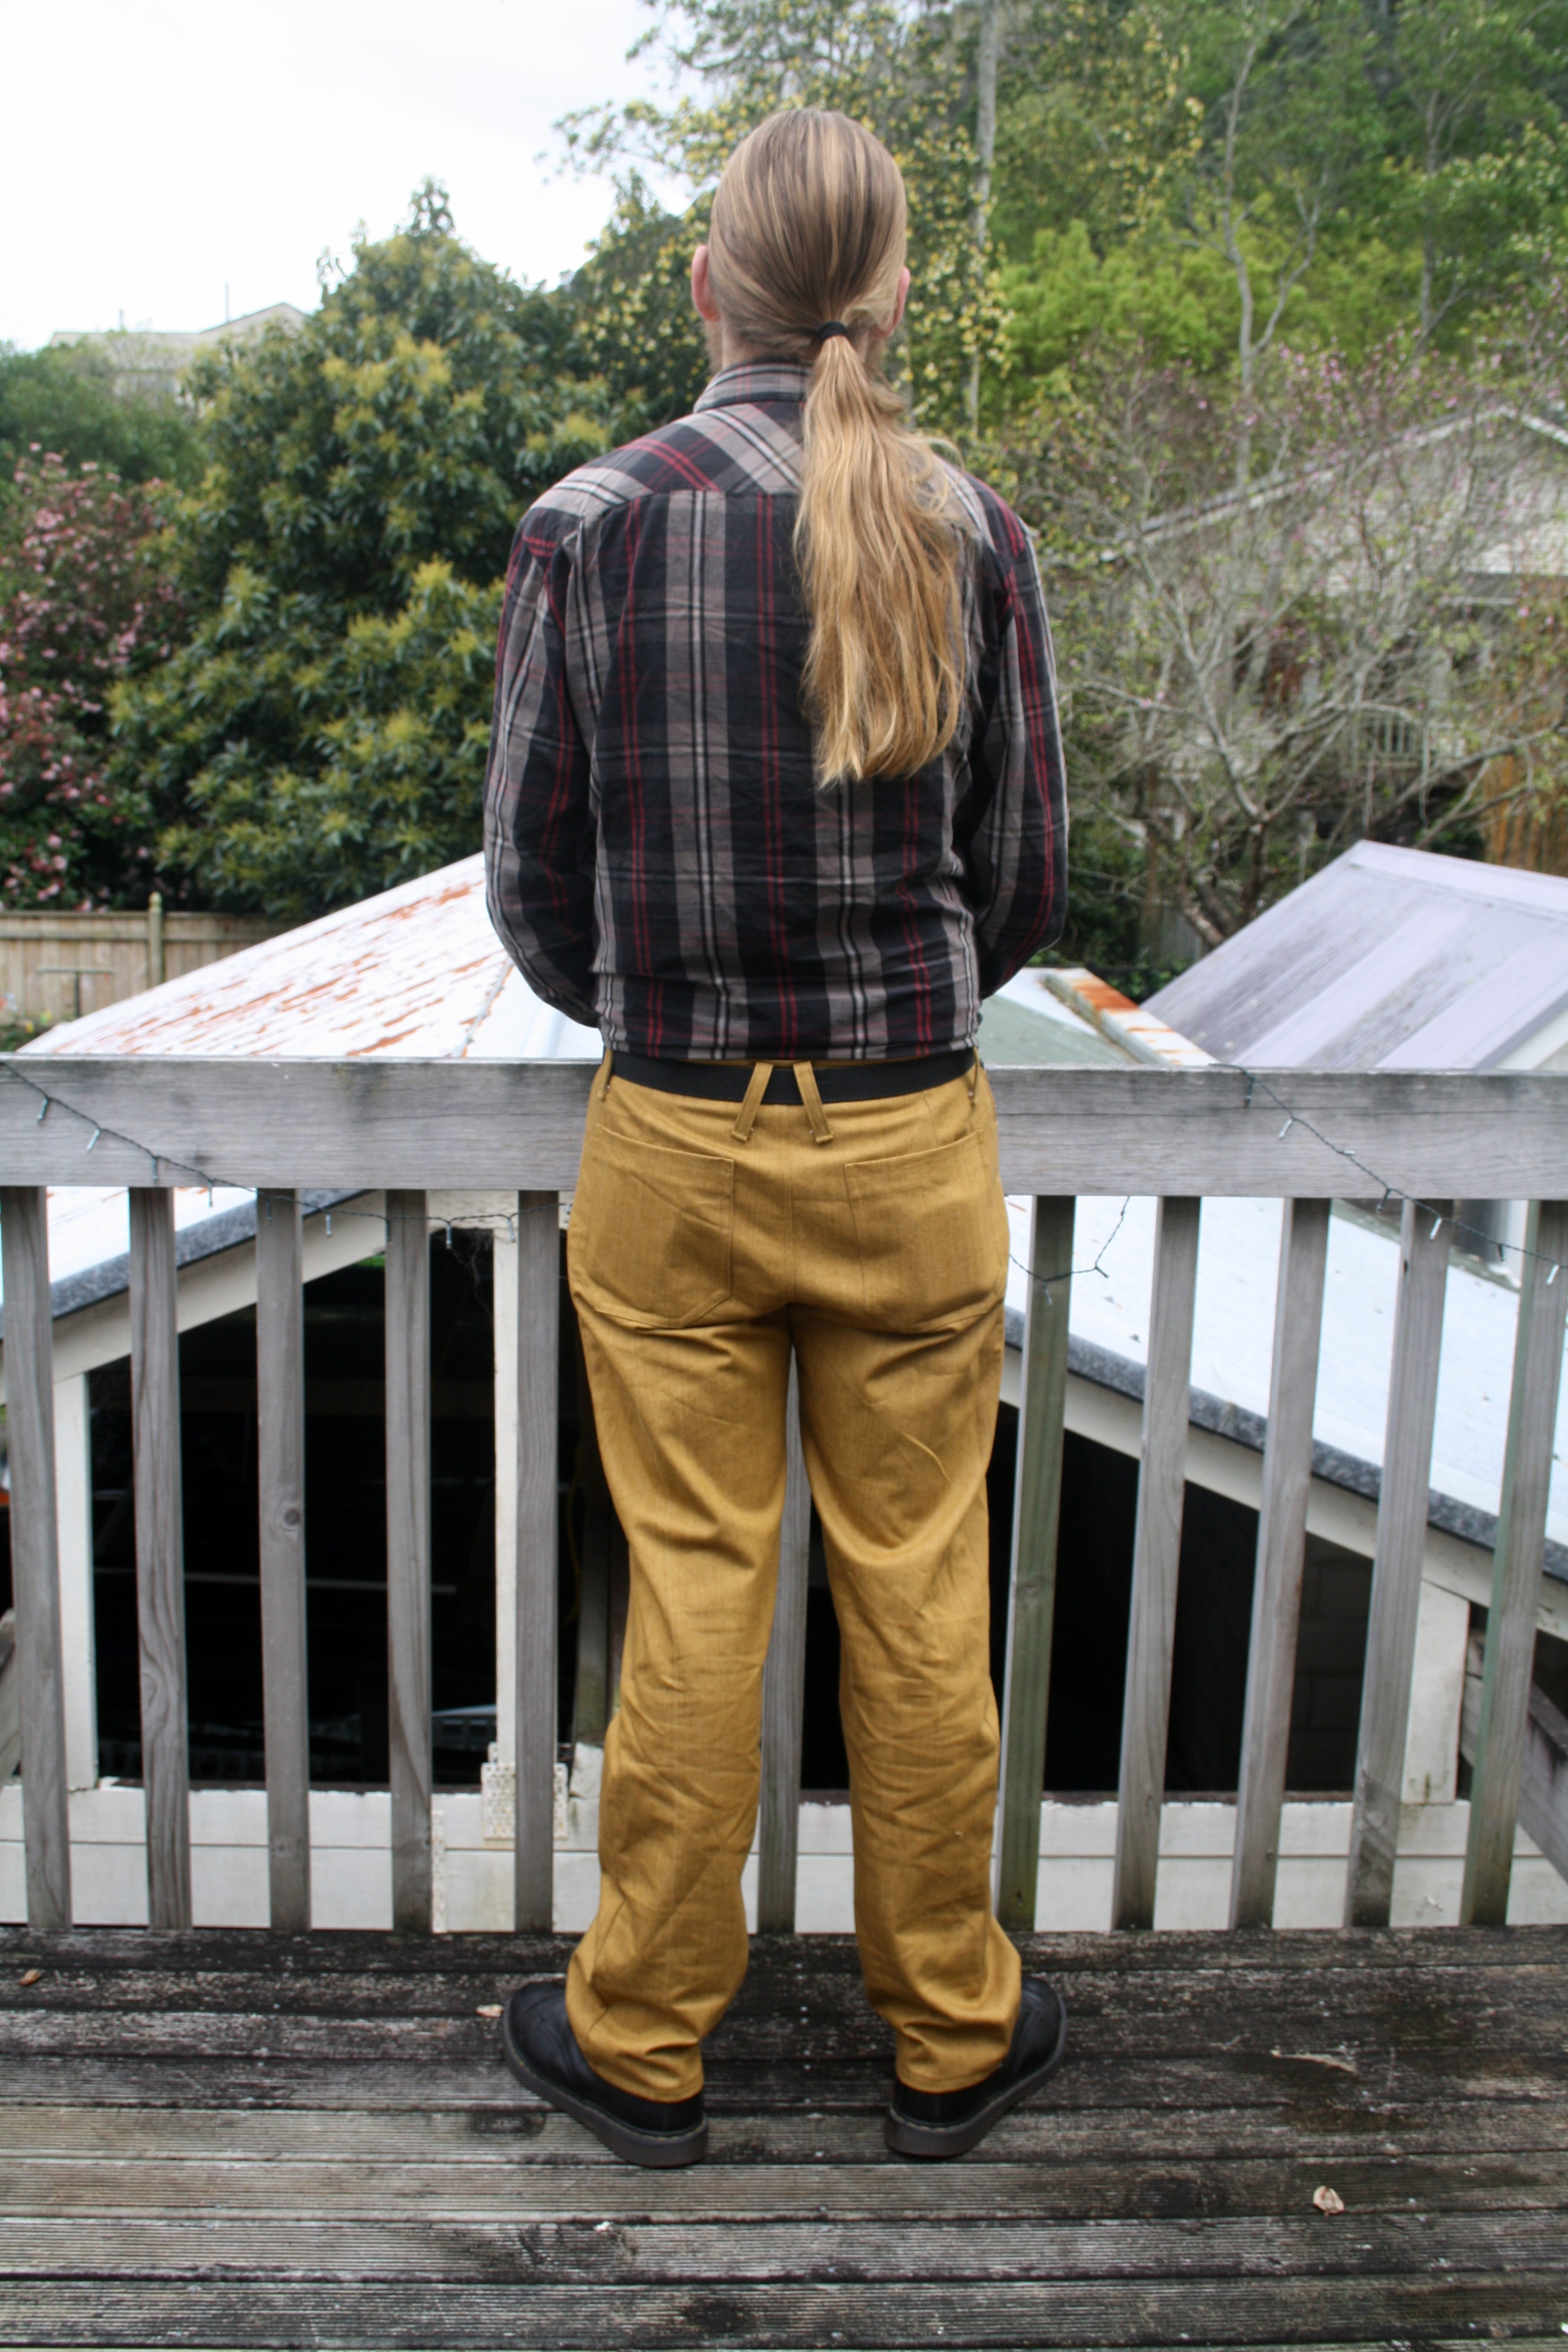
So I used the Jutland Pants in a size 36 that I’d used previously for the shorts, and I placed the front and back pattern pieces against the FOP pattern, and made some adjustments. I slimmed the legs down to 32, because Luke preferred the slimmer leg of the FOP jeans. I also shorted the crotch curve a little for the same reason. I actually took some length off the leg, because even though Luke is 194cm, they were too long. I baste fit the jeans together and had him try them on, and then took 5cm off the waist/hips. With all the changing of the sizes, I wasn’t quite sure which dart placement to use so I left them at the size 36 position, and the back pockets too. I think they look fine. The denim is not stretchy, and Luke’s measurements fit the 36 on the Thread Theory size chart almost perfectly, so I don’t know why they were too loose. I feel like I cannot rely on the Thread Theory size charts at all, as I had an issue with their latest pattern too, the Fairfield Shirt, where I carefully measured him and picked a size and it was too small (this is something they have apparently corrected though, as I wasn’t the only one to complain).

img_5106

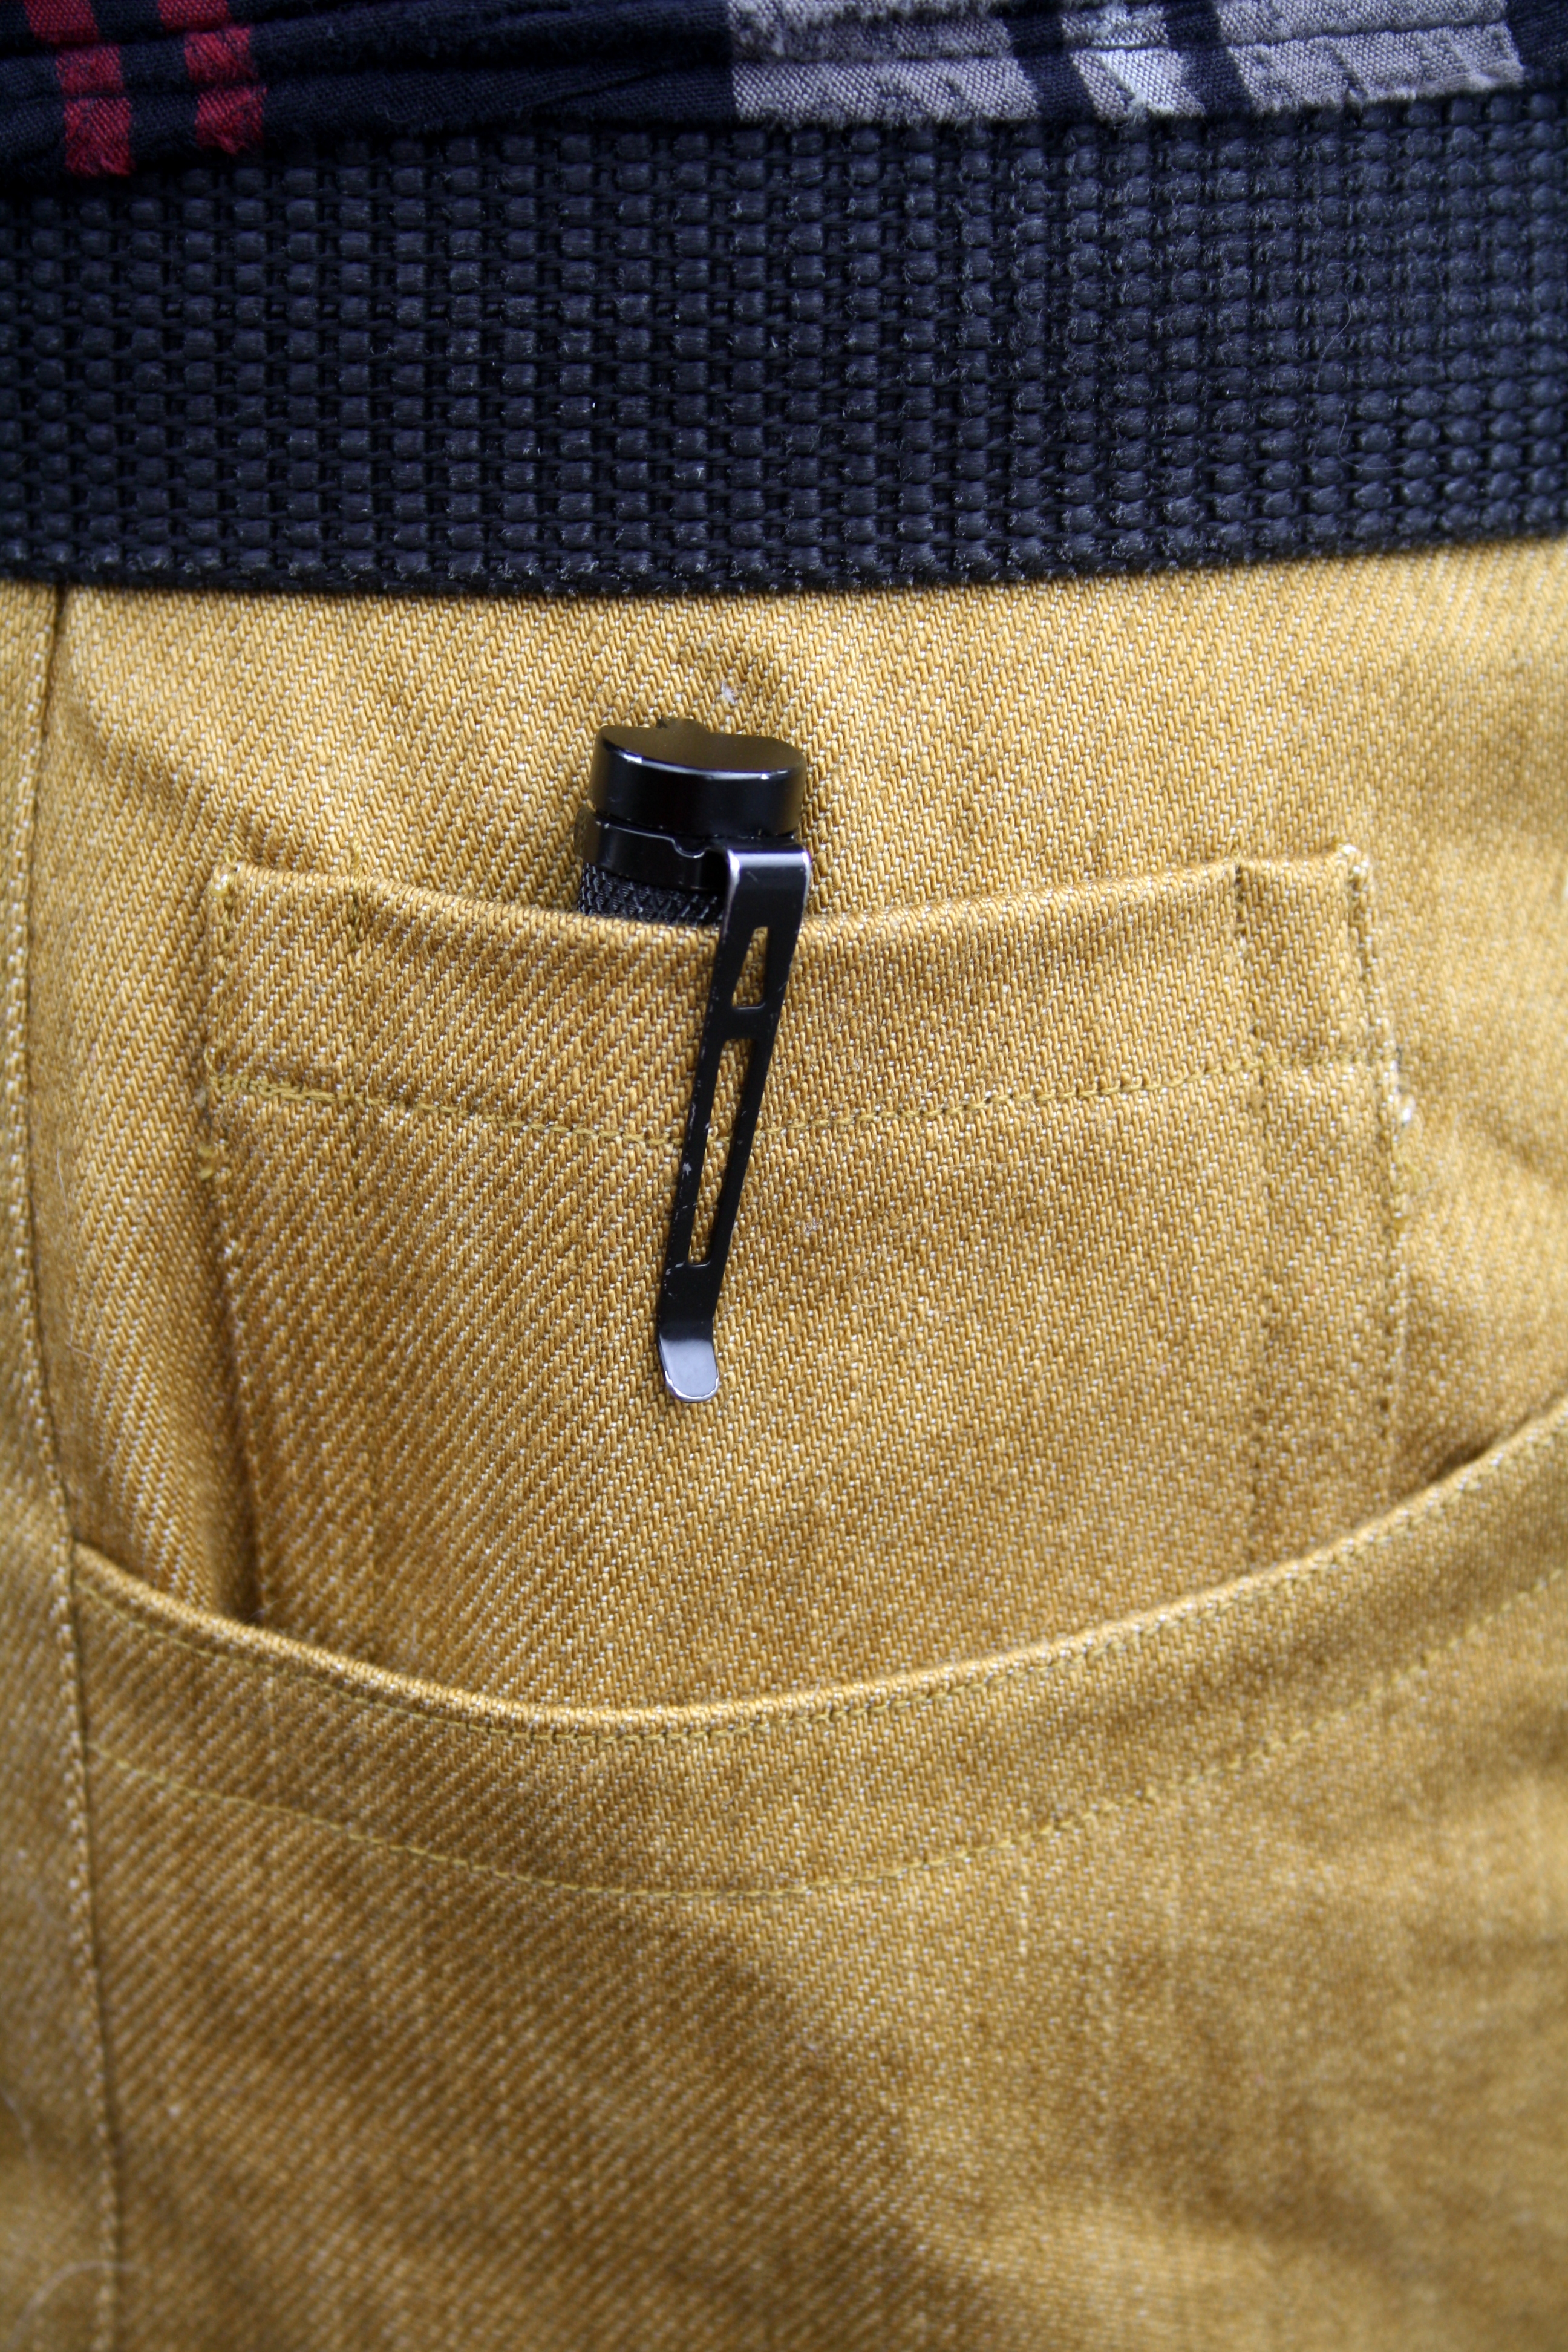
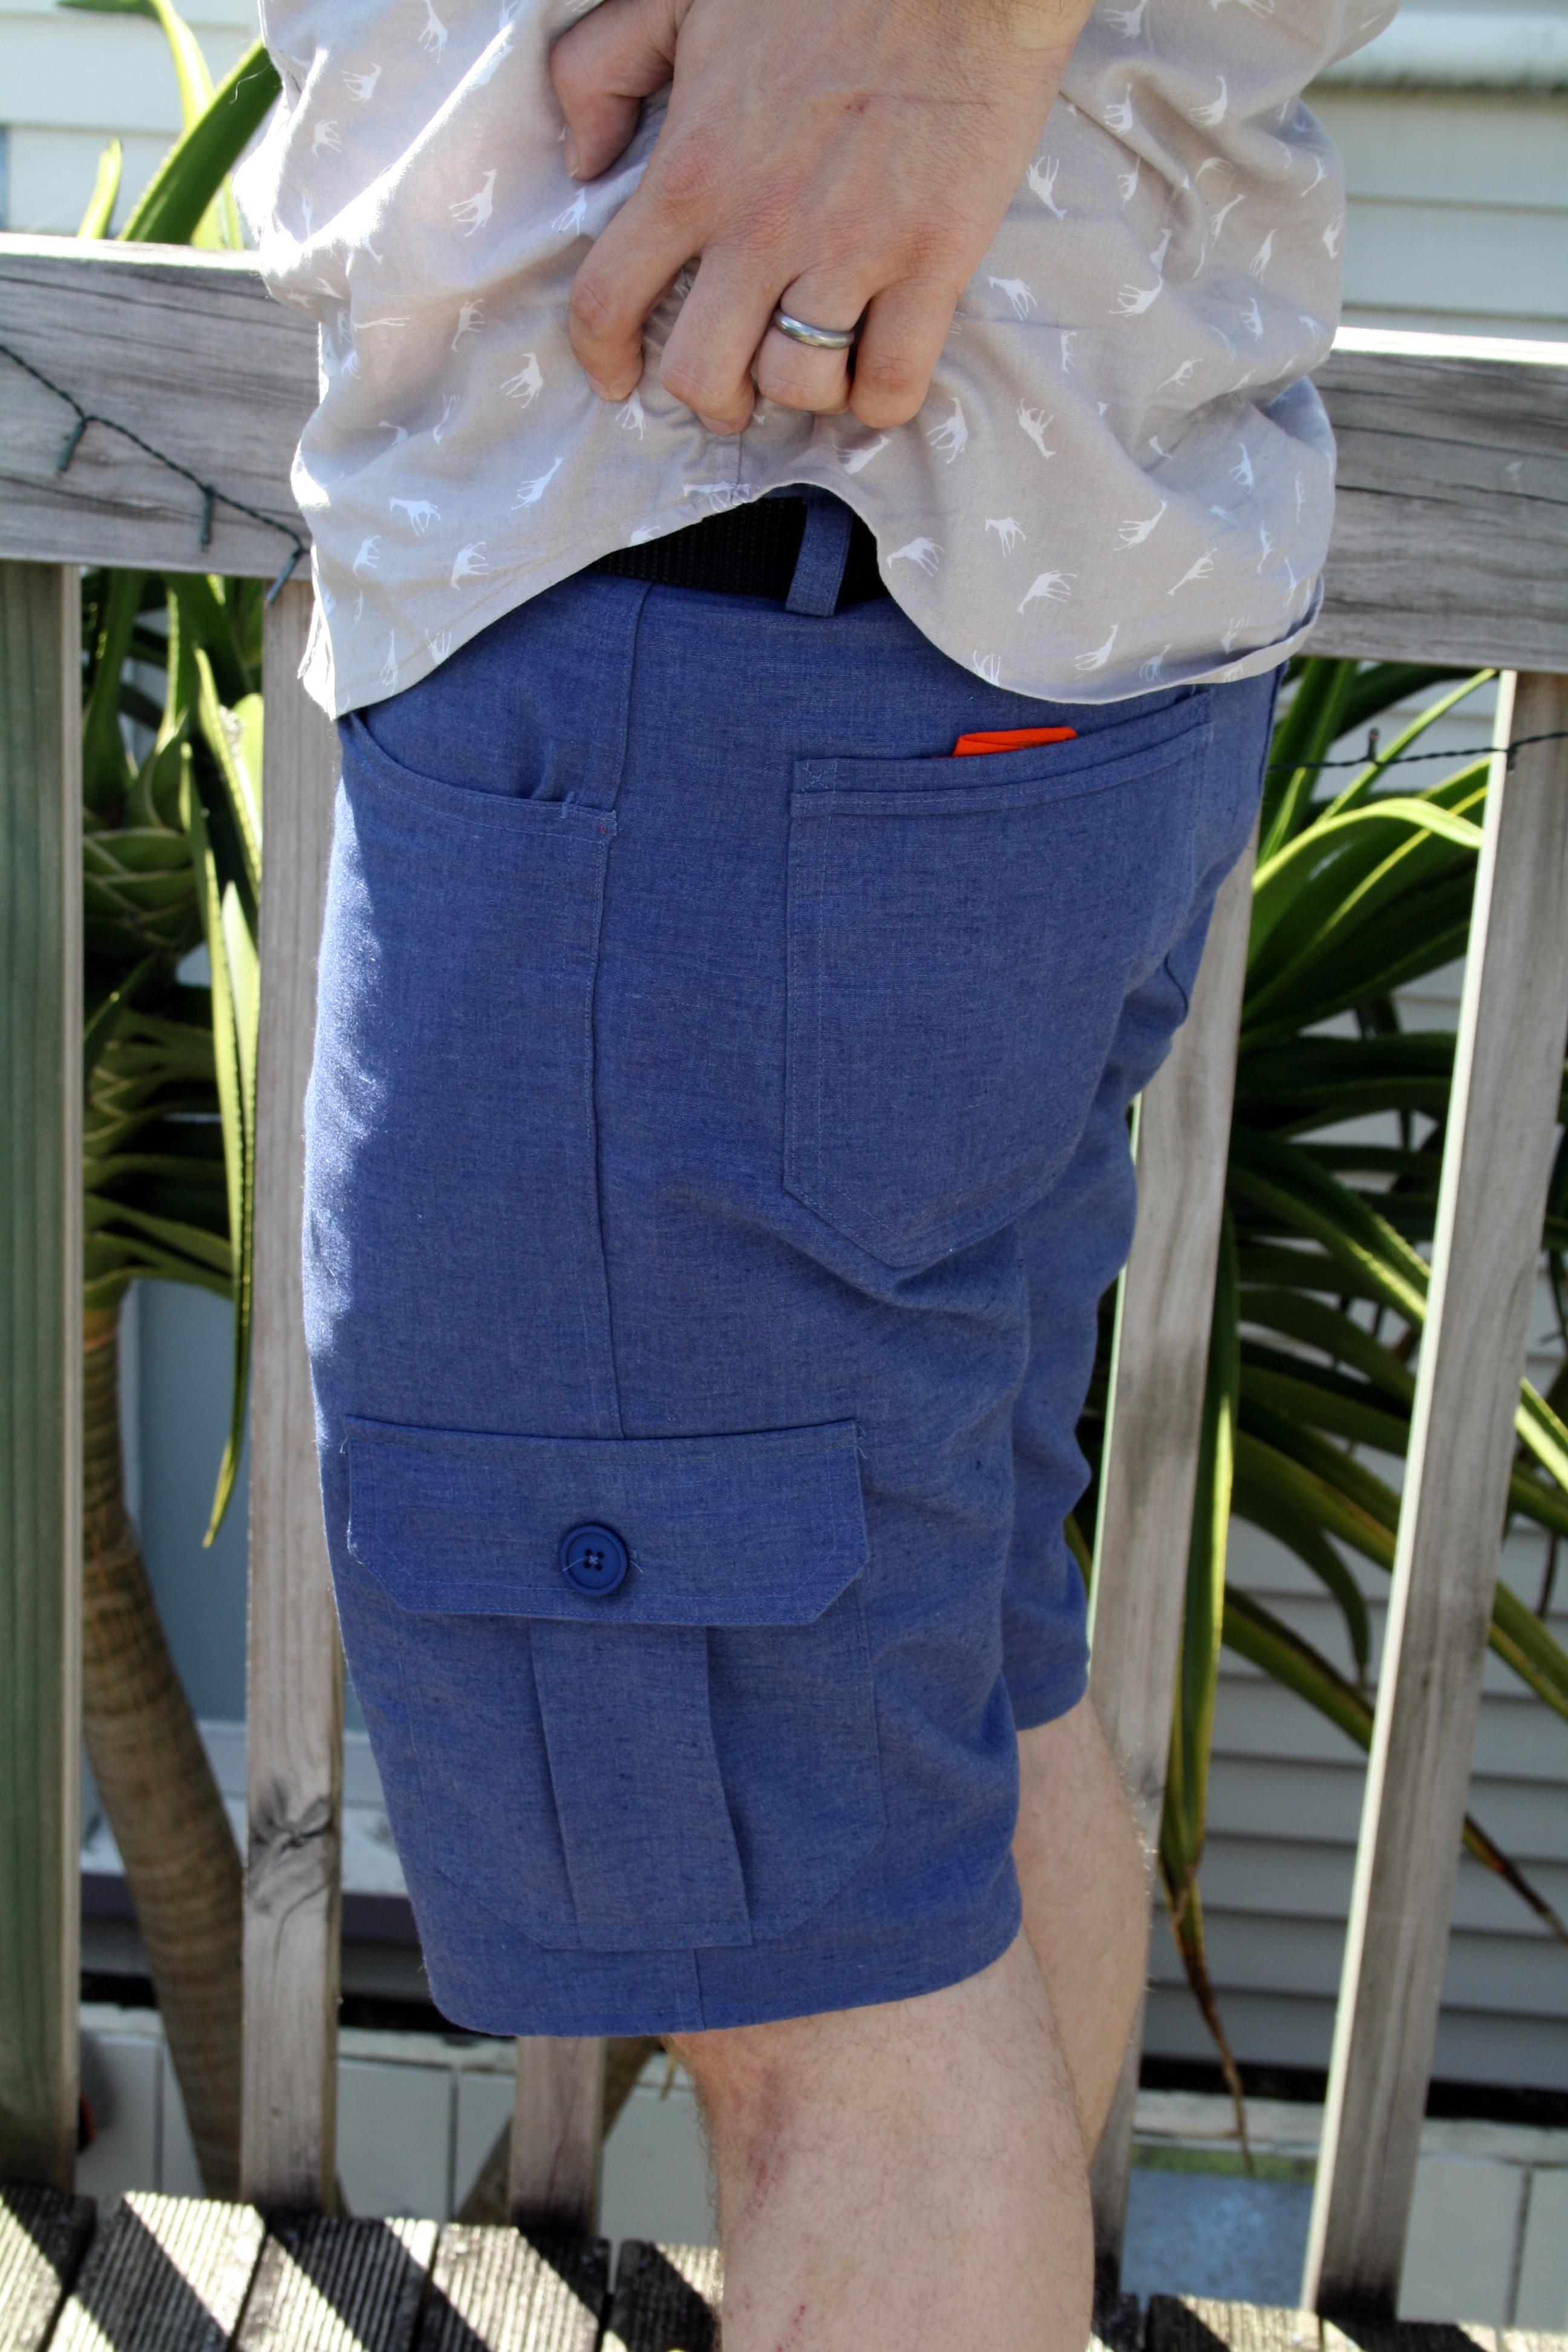
The Jutland Pants don’t come with a coin pocket, so I’ve made my own that I use, copied from a pair of Luke’s RTW jeans. It fits his flashlight perfectly! I went with tonal topstitching everywhere on these pants, because a) I’m still not that great at it, b) my machine hates topstitching thread and c) Luke preferred the look of it on these pants. I just used the same thread I used everywhere else, no special thread or stitch length. I also didn’t decorate the back pockets with any kind of design at Luke’s request.

img_5110

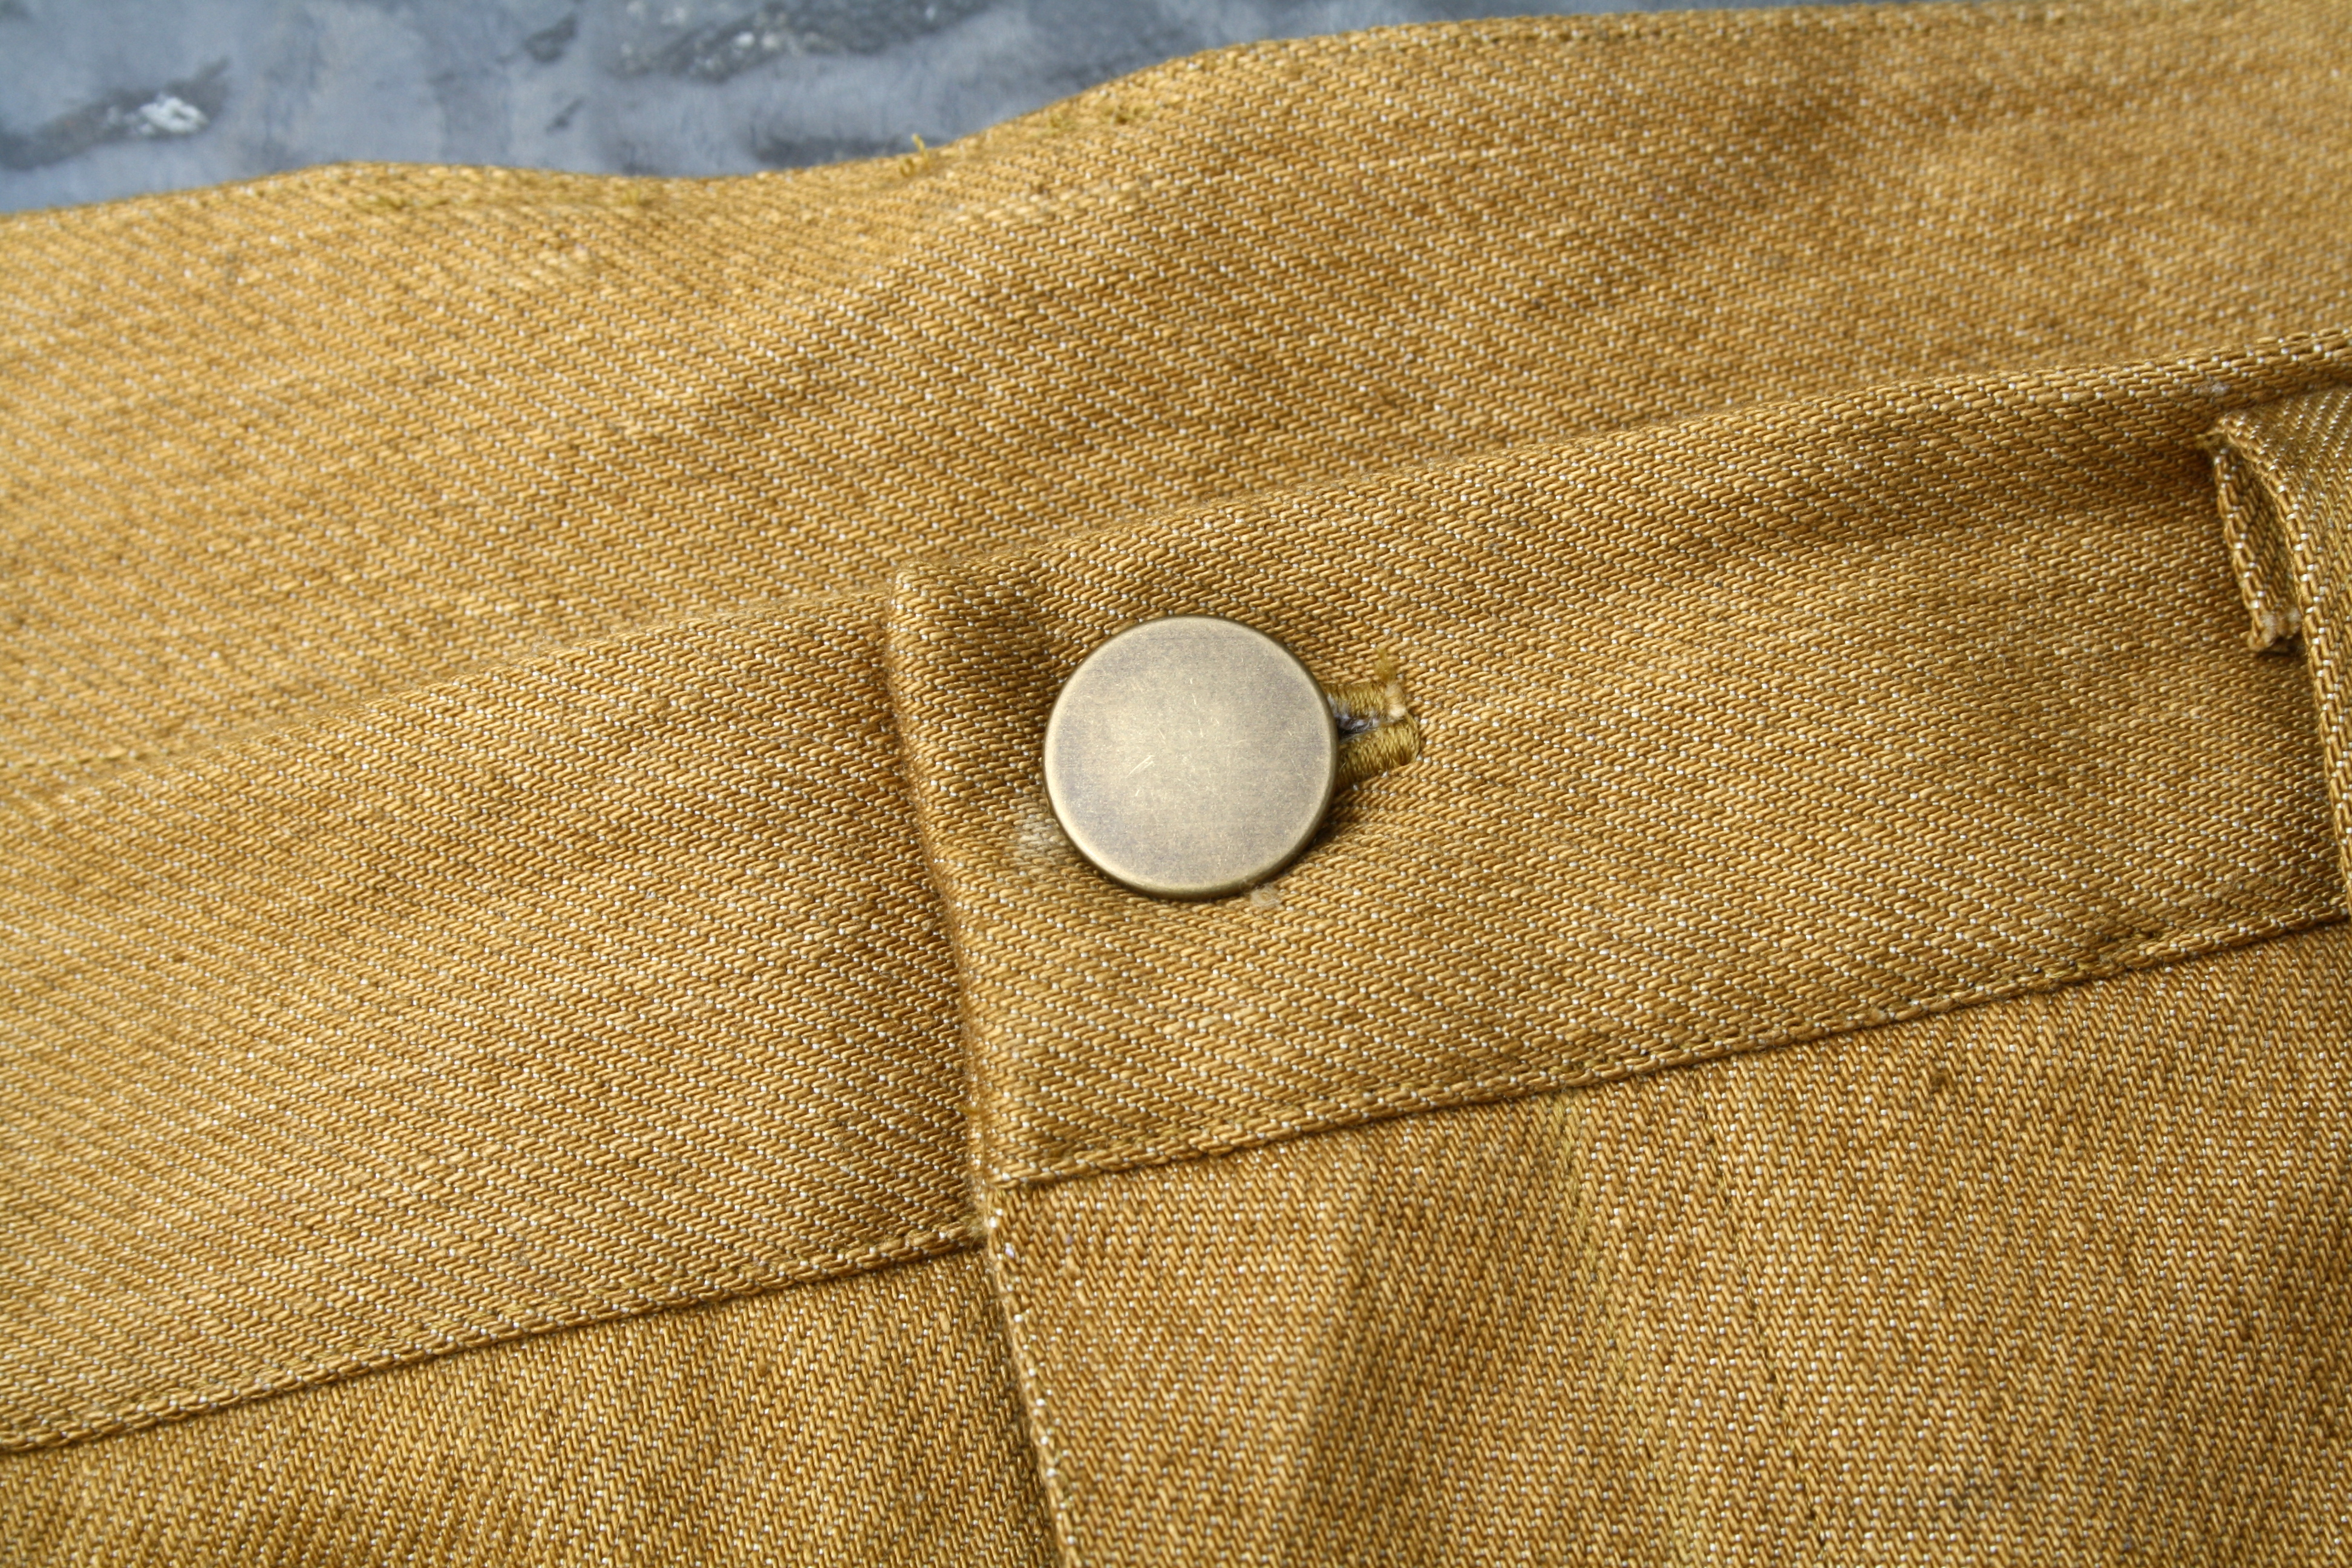
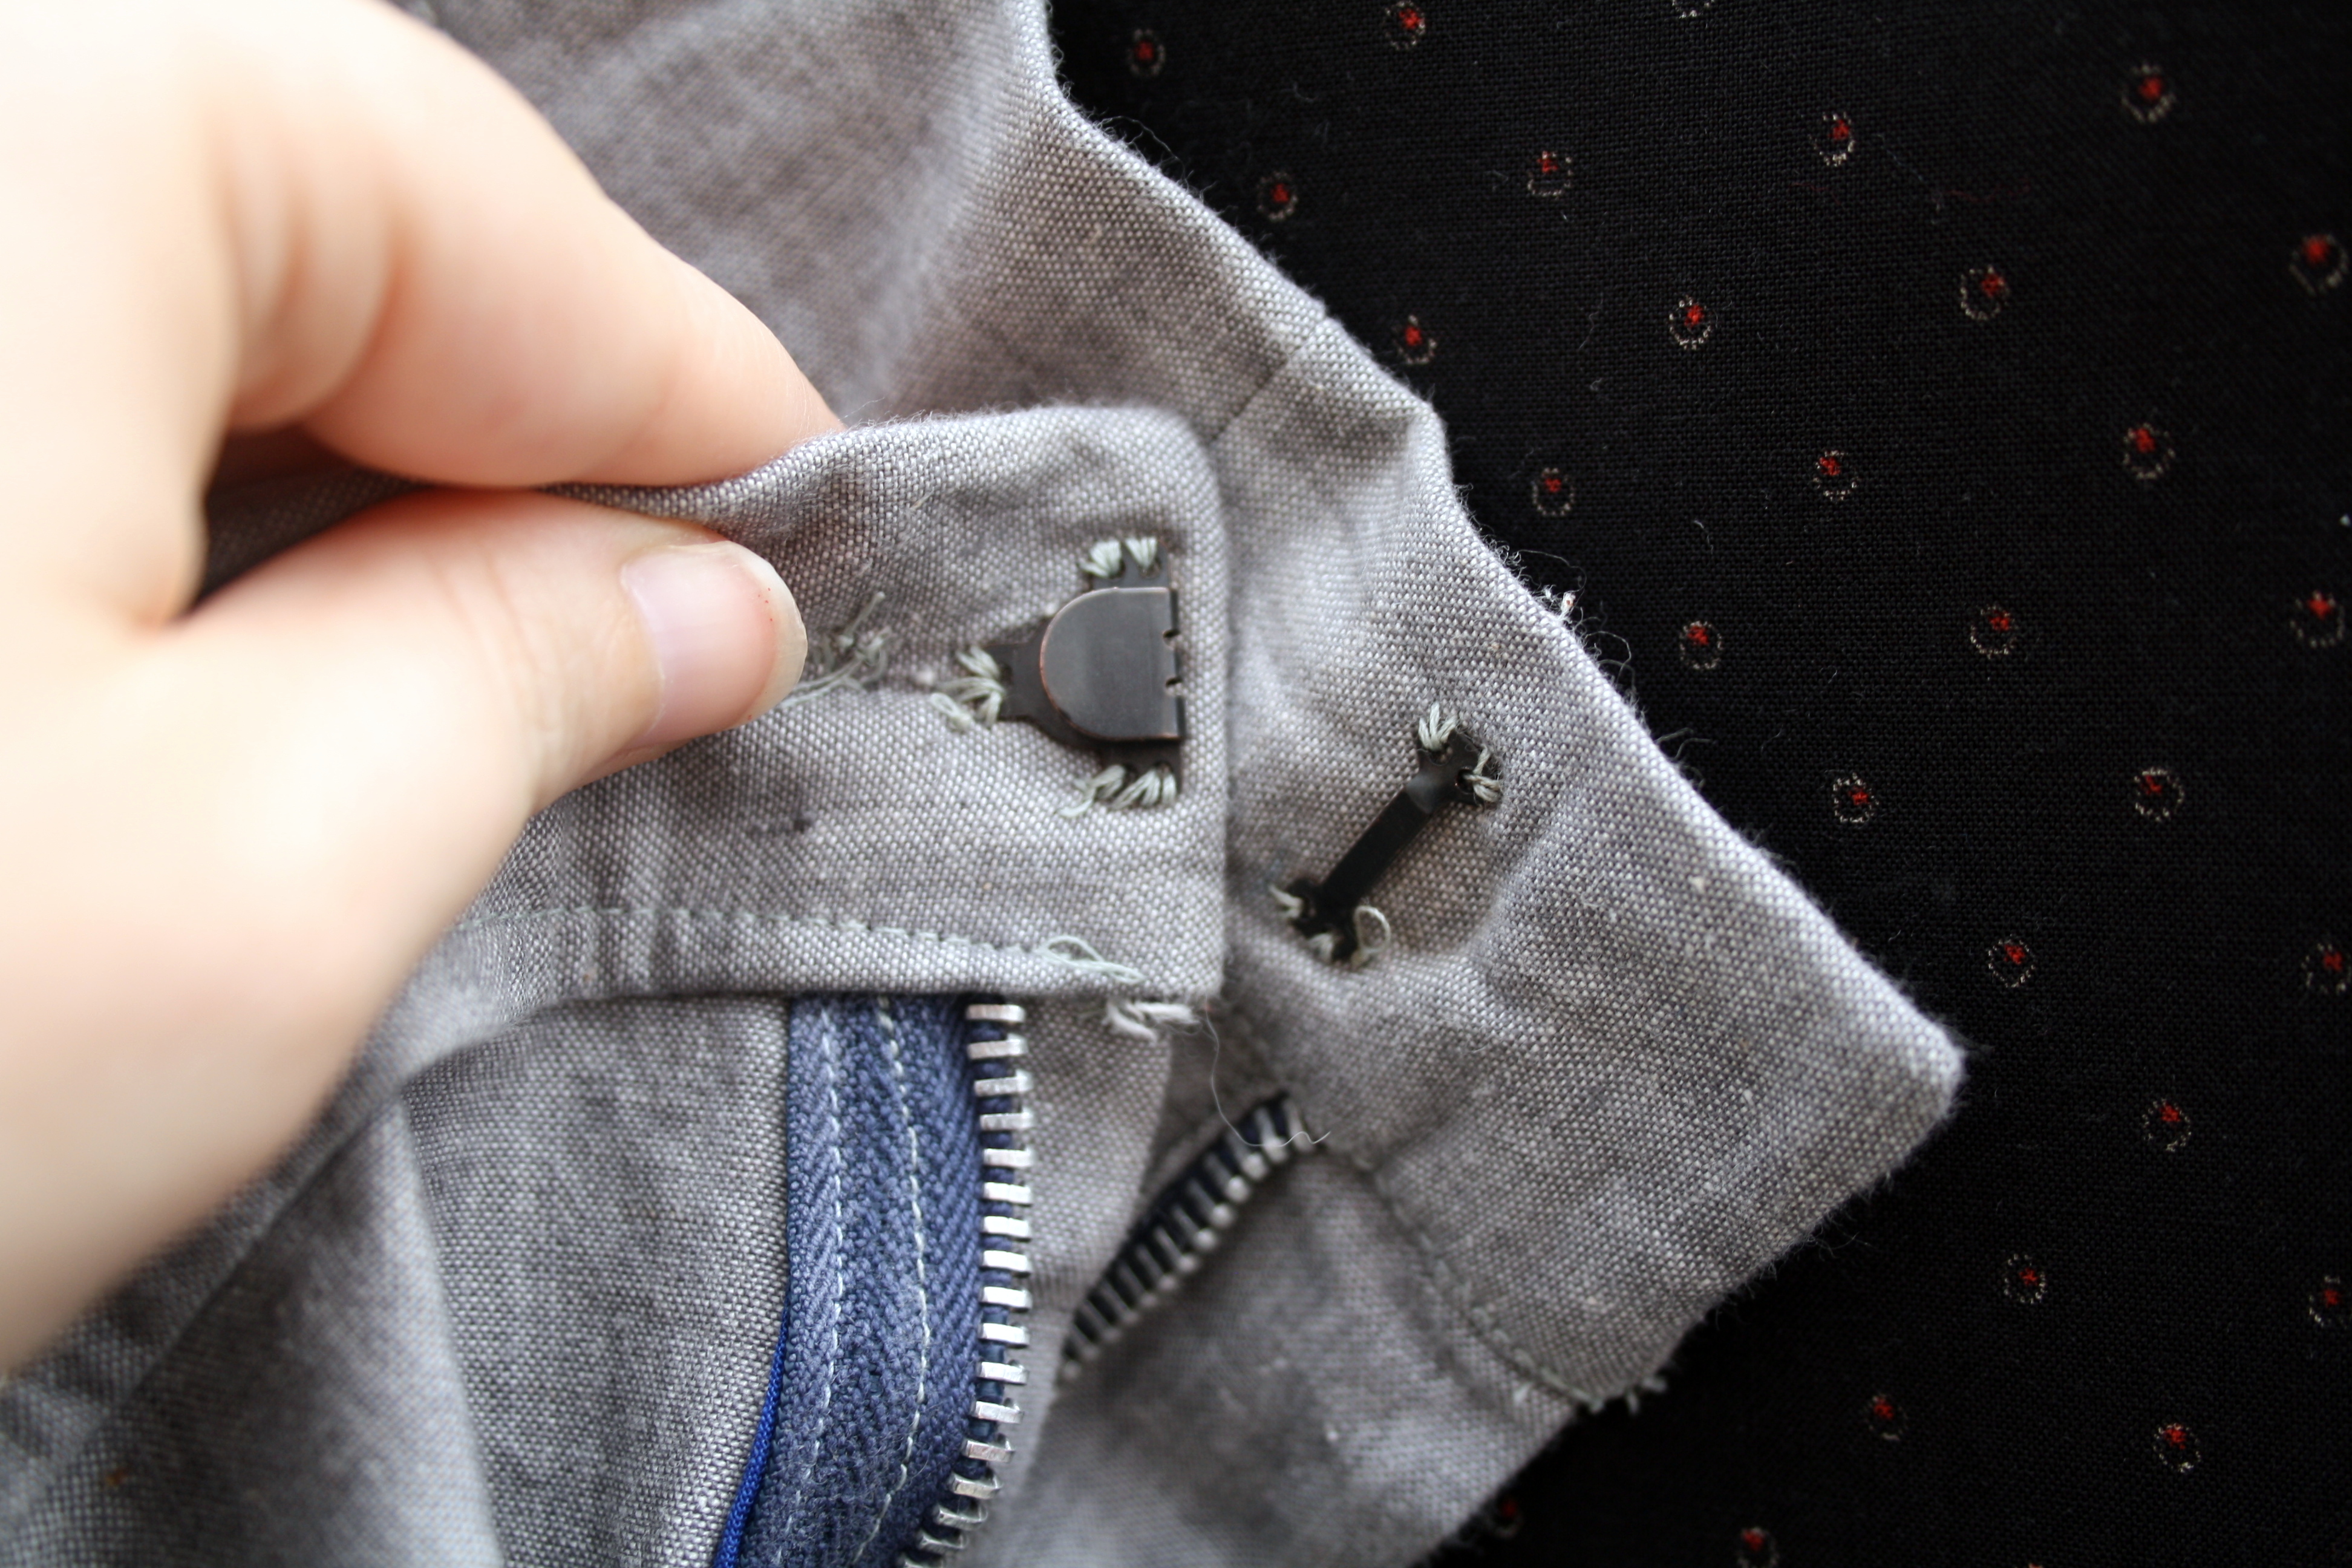
Antique nickel button from Miss Maude’s – wish I’d taken a little bit more care to line up the waistband across the fly! Always room for improvement…

img_5111

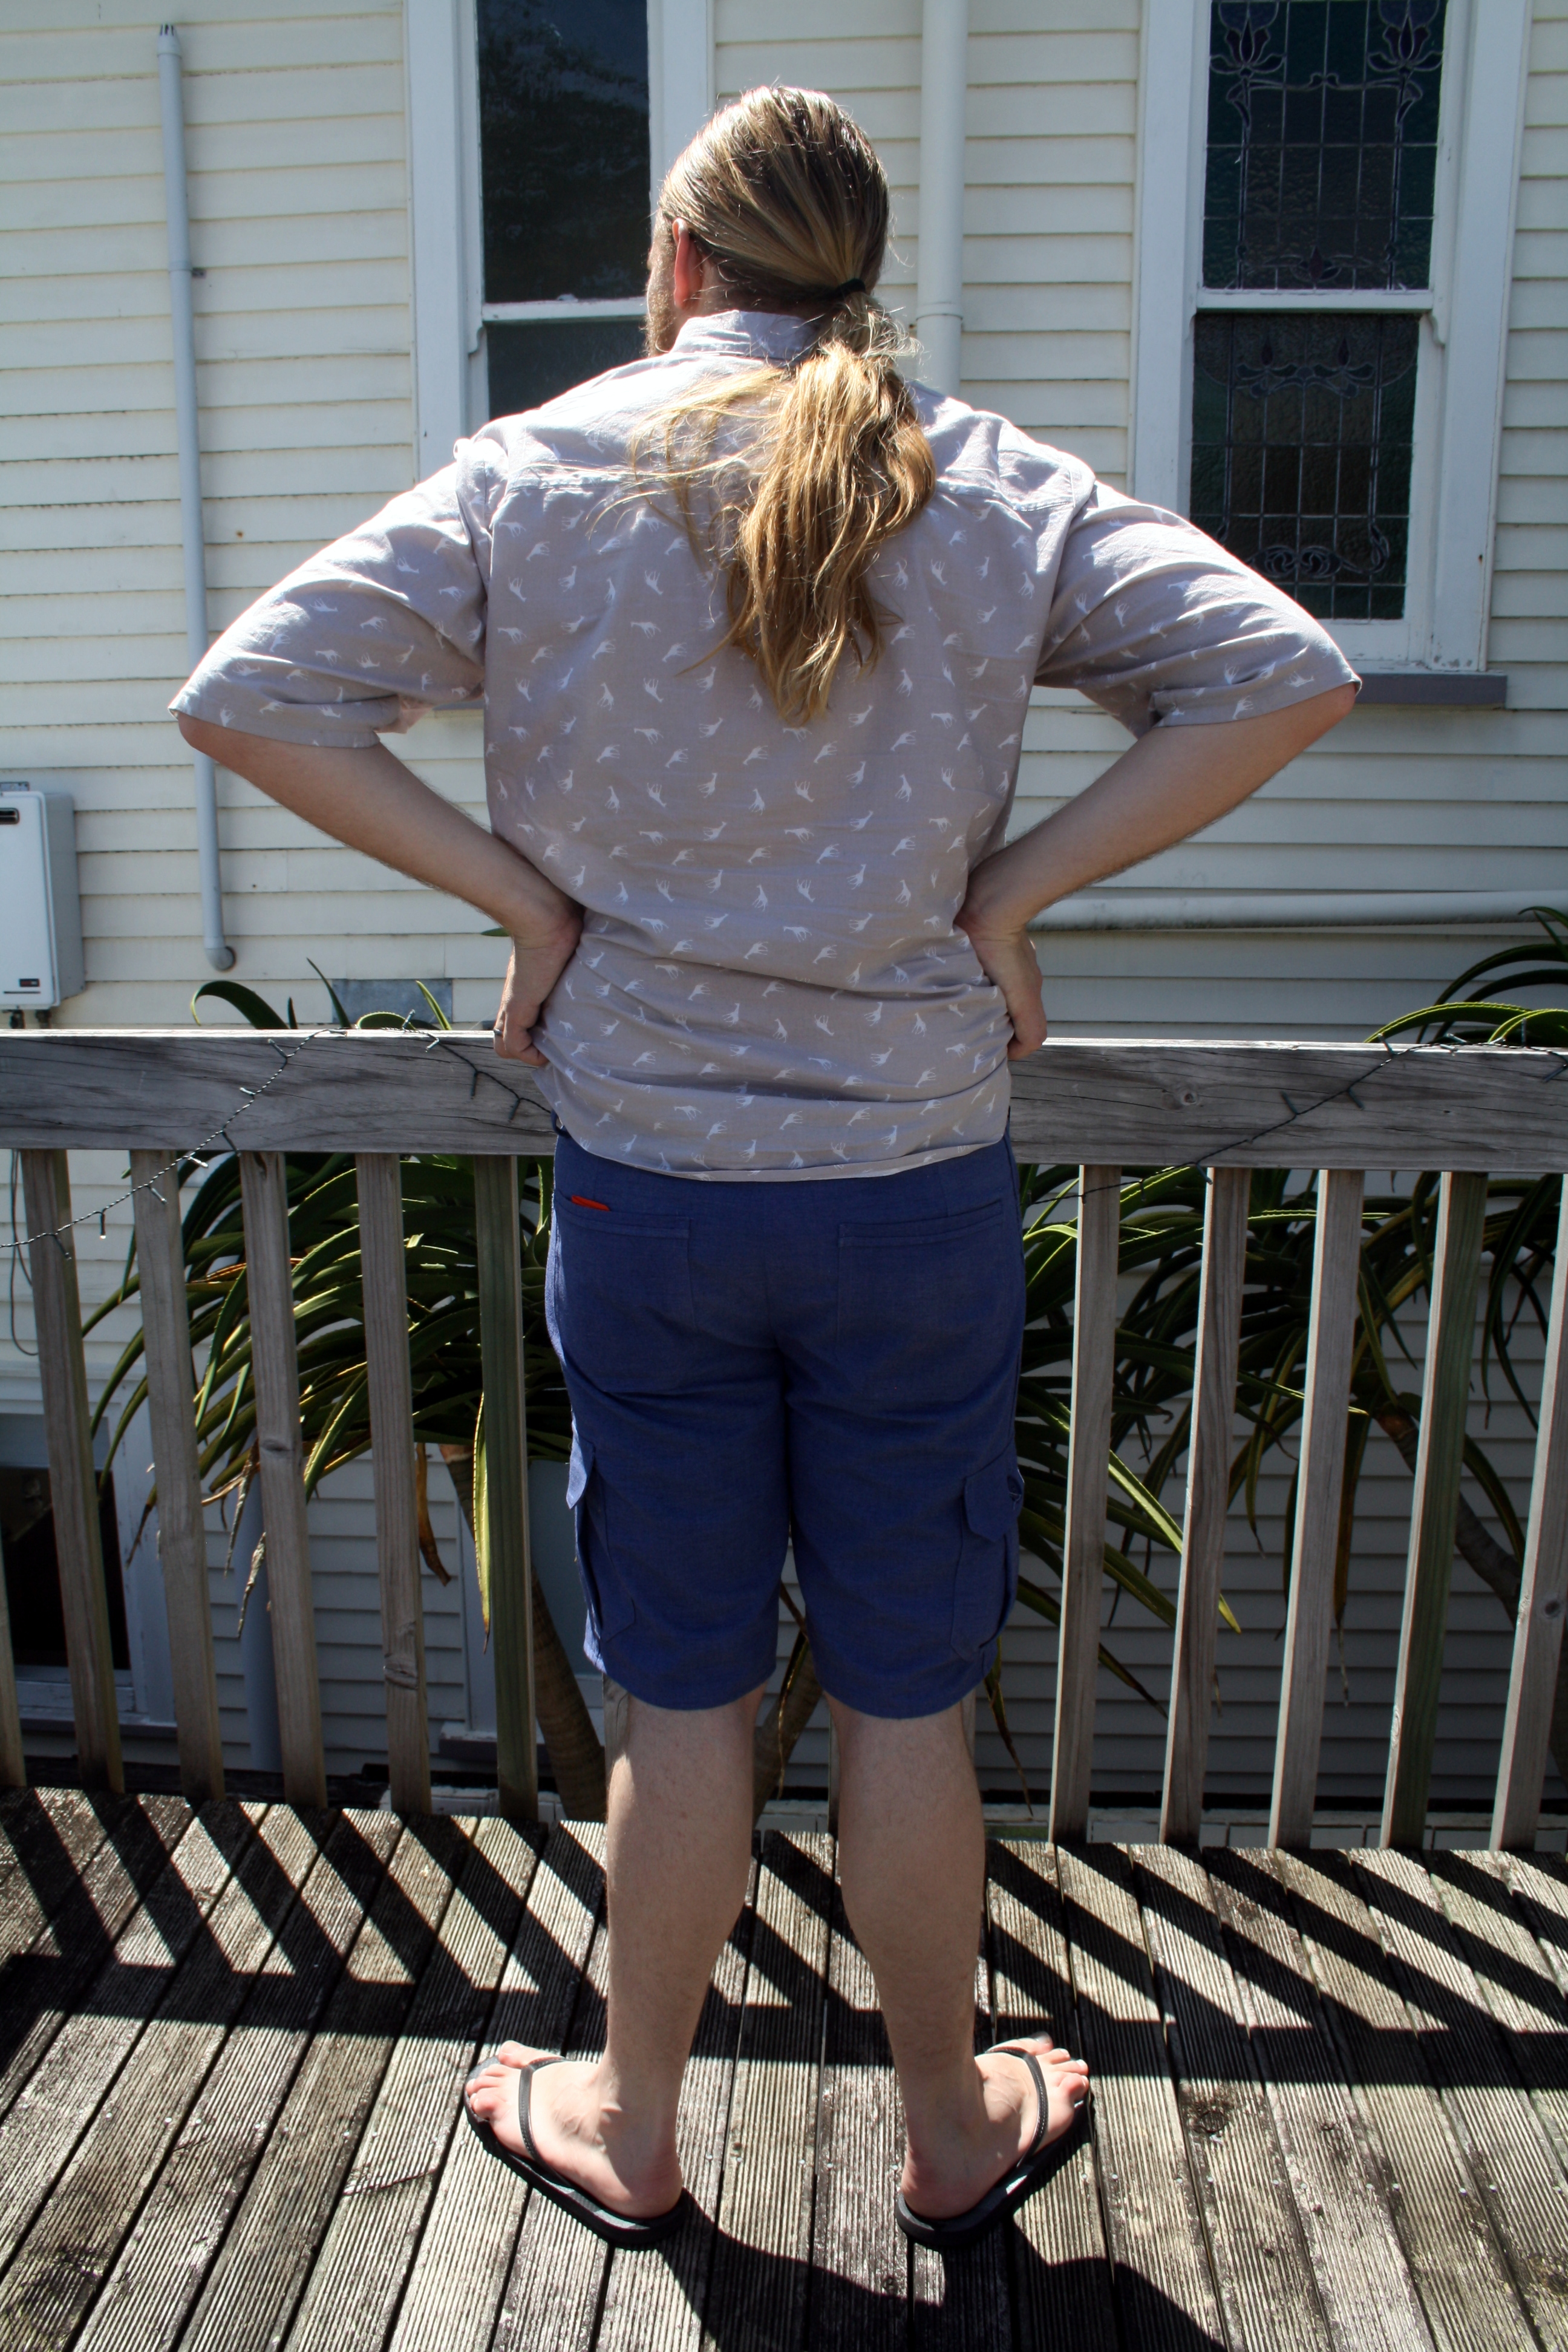
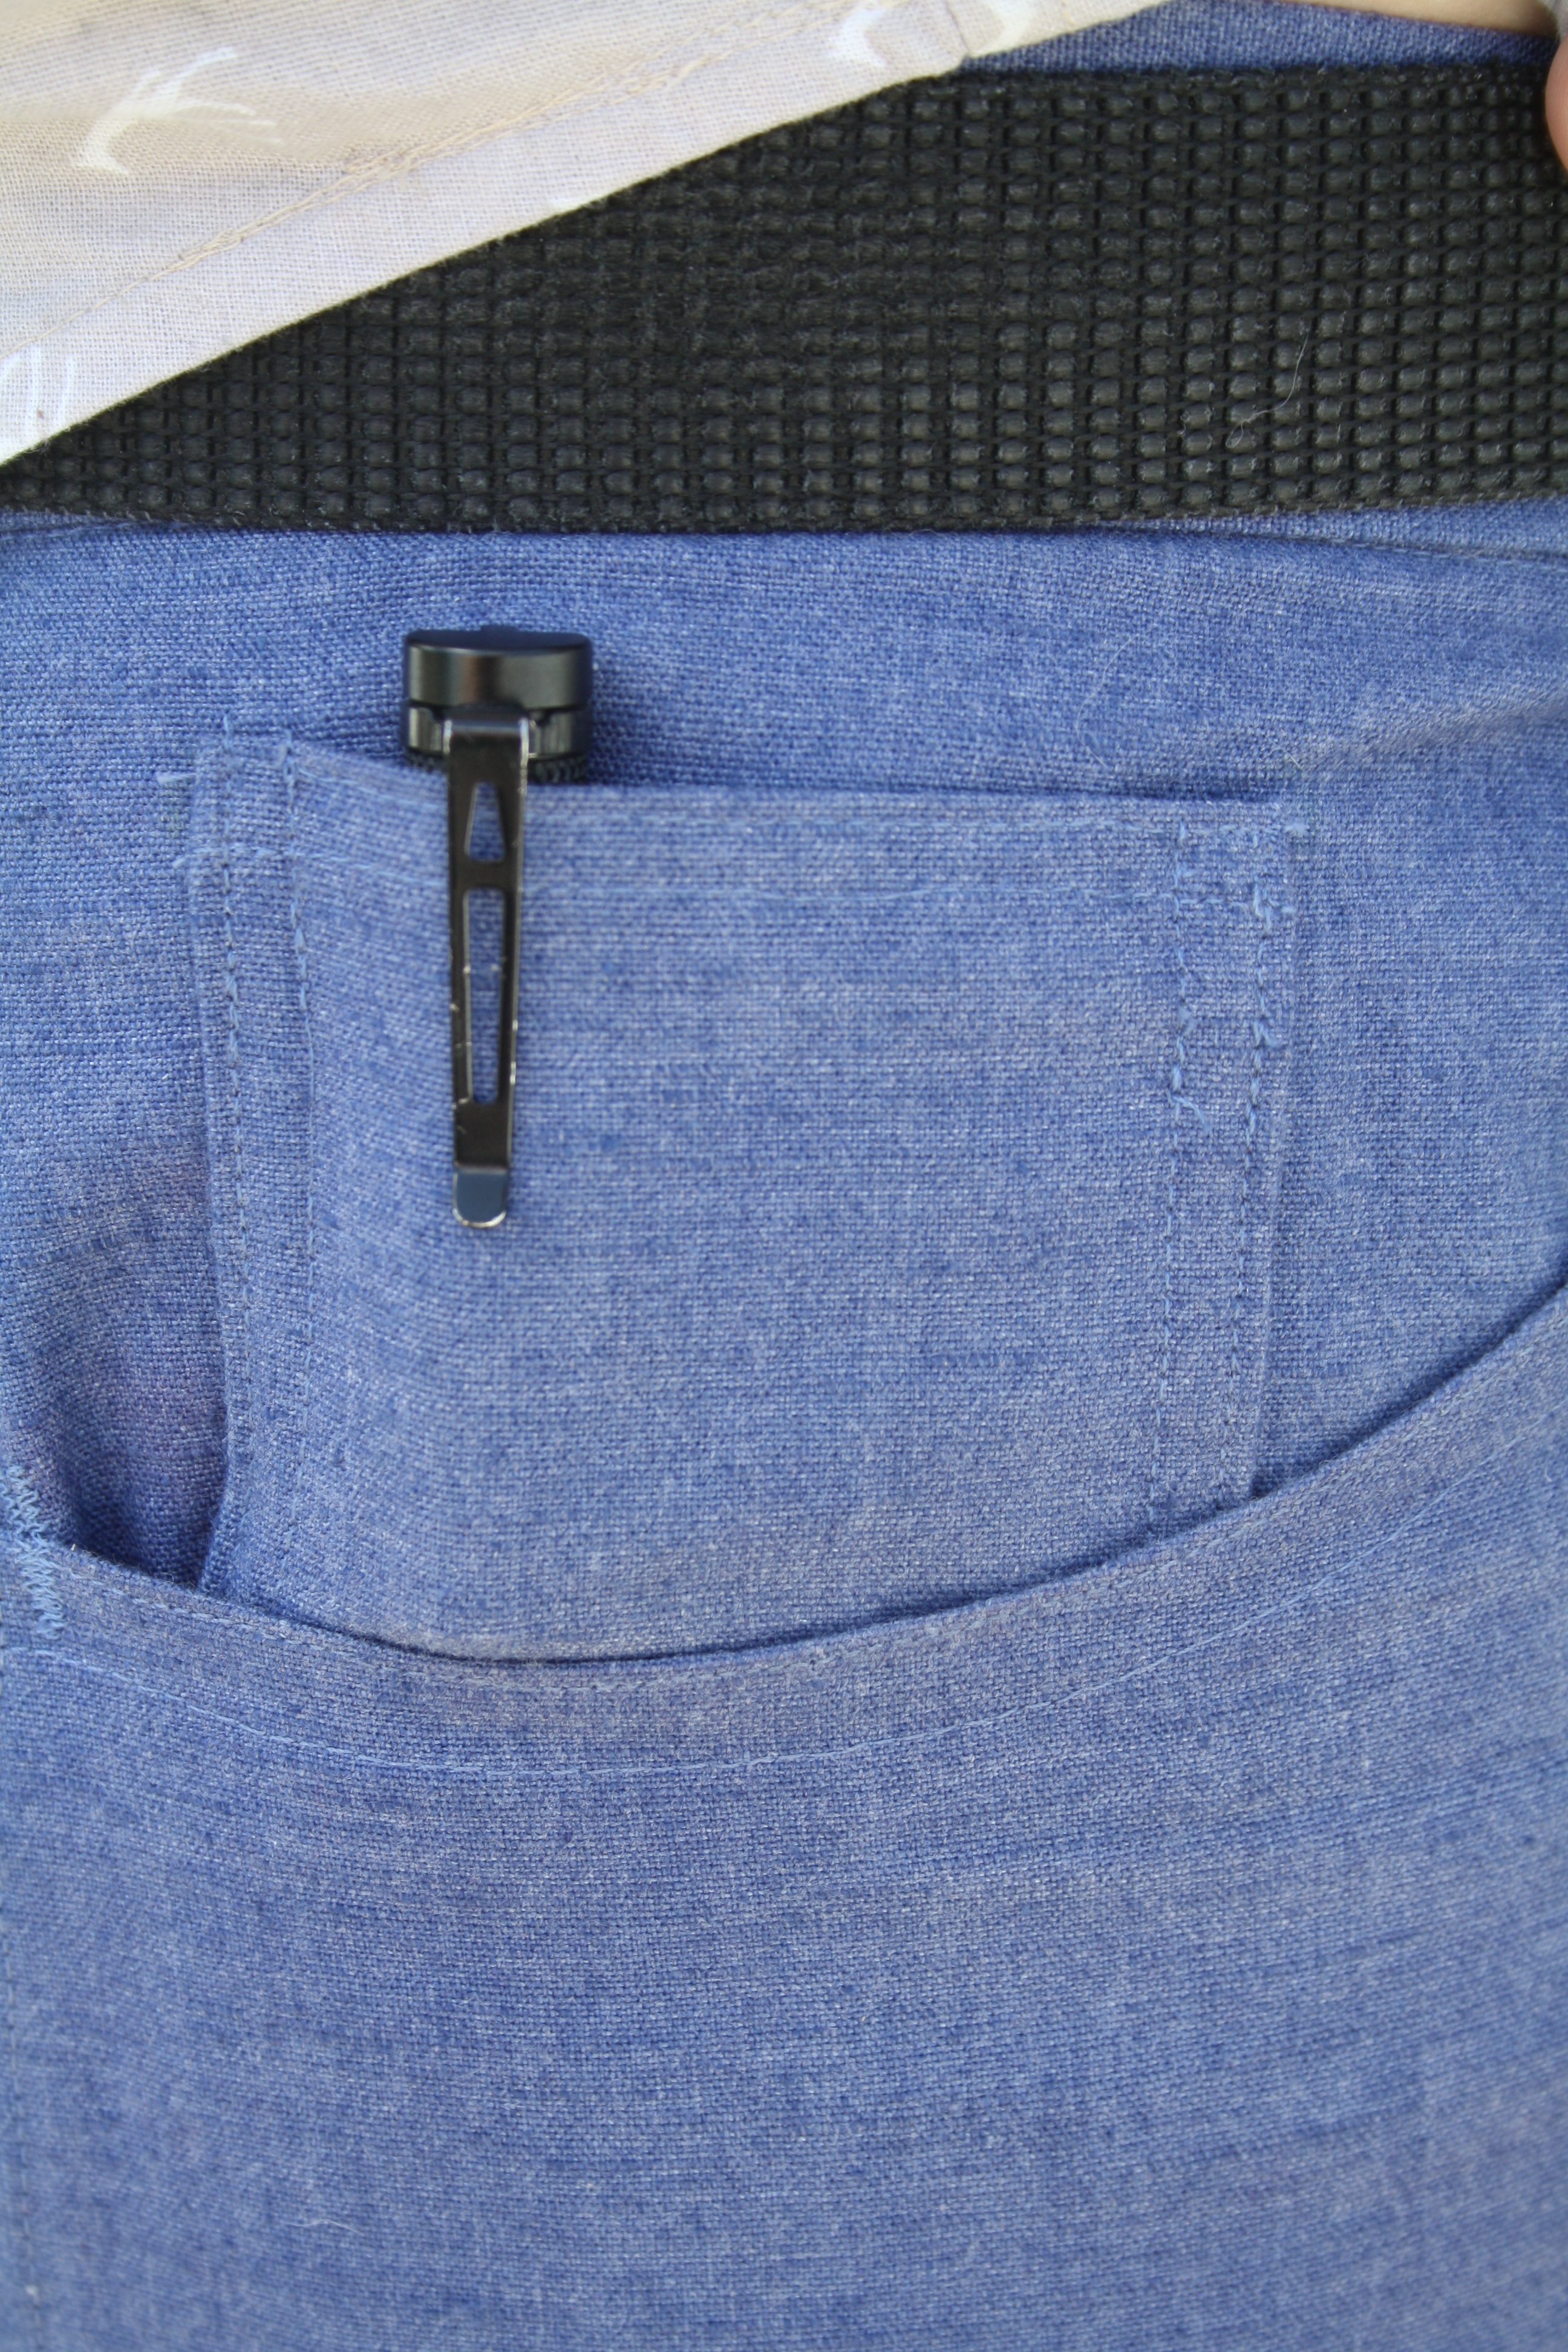
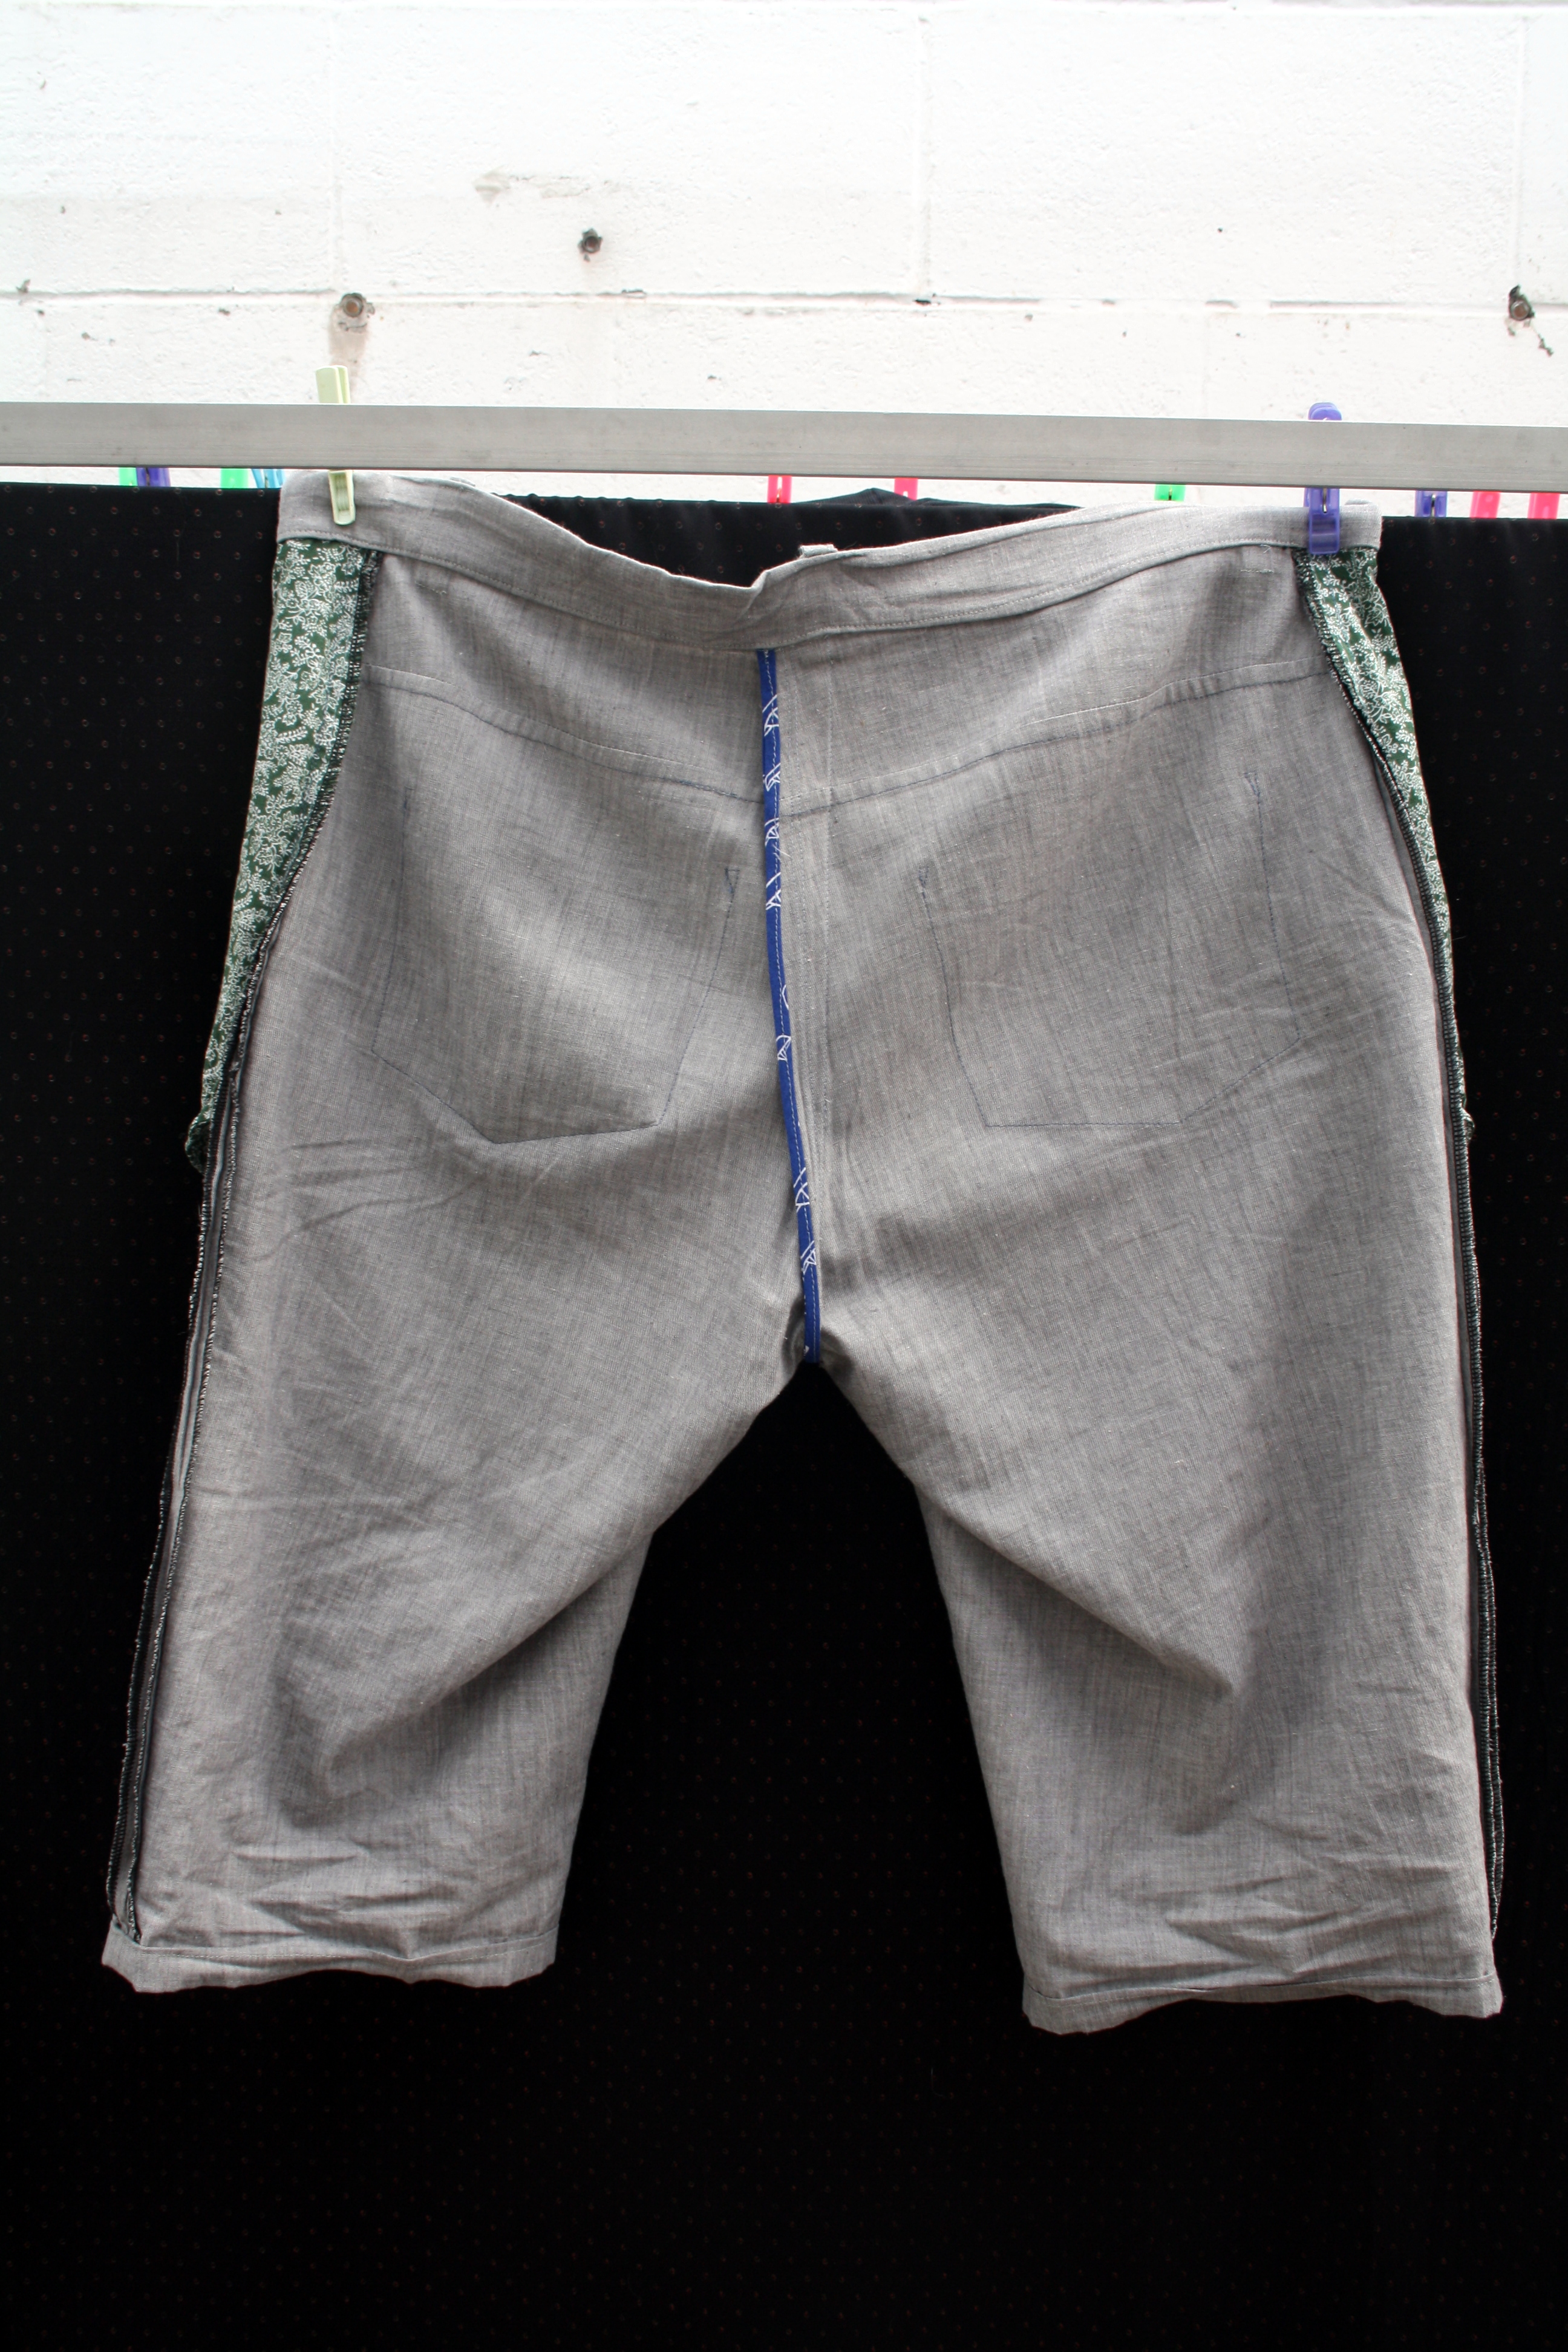
Guts. Speaking of improvement, I sewed the fly shield on the wrong side. I was using a combination of the Thread Theory instructions and the Ginger Jeans instructions and somehow got confused. It doesn’t really matter too much, but I wish I didn’t always stuff something up in every project! I bound the waistband with my own bias binding made from an Art Gallery cotton, and I used proper pocketing for the pockets, which I bought from the fantastic Hawes & Freer. Luke is especially thrilled with the pocketing, he says it feels luxurious. And you can see the lovely matching zip, too! Luke loves these pants a whole lot, and he said they’re the most professional thing I’ve made yet, which is a pretty big feather in my cap!

Next up is another pair for Luke in dark denim (when I get around to buying some) and some Ginger Jeans for me. What are you all sewing at the moment?

Advertisement
Standard
sewing

Sewing for the husband: Thread Theory Jutland

Whee, it’s not even the end of January and I have another finished project to blog! Look at me go.

IMG_3900

IMG_3902

Yes, it’s more sewing for Luke – this time a pair of shorts to go with his new short-sleeved shirt. After my failure with the Jedediah shorts, I was neither keen to use a Thread Theory pattern nor make shorts again. But, the weather in Auckland is humid and gross and warm, and Luke walks to work and back and was not digging it in jeans, so I relented. After trying and failing to find a suitable shorts pattern elsewhere, I gave in and bought the Thread Theory Jutland Pants pattern. The Jutland Pants are really more up Luke’s alley than the Jedediah – Luke is a no-nonsense, practical kind of guy, and these are no-nonsense, practical pants/shorts. He was especially keen on the cargo pockets! I used the instructions as a vague guide and I think they’re a bit better than the Jedediah ones. Or maybe I’ve just had more practice now. Either way, these weren’t a difficult make, just time consuming with all the topstitching and flat-felled seams.

IMG_3904

I made a quick and dirty muslin in a size 39, which is what Luke’s measurements put him at. They were MASSIVE on him, and so after pinning and re-measuring, I went down to a 36. In actuality, I think he’s probably a 37, but that size doesn’t exist on the pattern. It’s a bit odd there’s a 3″ difference between the sizes, really. I could have blended between the sizes, but Luke was impatient for shorts and so I didn’t bother. Between that and festive eating, when Luke tried on the finished shorts, they fit…just. With a helping of muffins over the side. No matter though, because one of our goals this year is to eat healthily and be more active, and I’m pleased to say that after some effort in that department, they fit him quite well! He does say the pockets are a tiiiny bit snug (and you can see kind of a weird fold where the pocket meets the side seam where the pocket lining bunches up if he doesn’t straighten it out), so when I make another pair (because of course he wants another pair) I will make them just a tad larger through the hips.

IMG_3906

The Jutland Pants don’t have any indication of where to cut them off for shorts (that I could see) so Luke indicated to me where he wanted them to sit, and we did it that way. I then carefully moved the cargo pocket markings up the requisite amount to fit them onto the shorts – I could not find anyone else in the sewing blogging world who had done the shorts with the cargo pockets, and believe me I tried, so I was a bit worried maybe it couldn’t be done for some reason, but they turned out great! They look uneven in the photo above, but they’re not – it’s just the way Luke was standing/the way the shorts are sitting with his belt. I did patch pockets on the back, and somehow fudged up the instructions for sewing, folding and turning with the tops of them, but I actually like the way they turned out – a design feature, if you will 😉 He declined any kind of decorative stitching on the pockets. All the seams are flat felled except the crotch seam, which is double stitched and then bound with store-bought grey bias binding, and the waistband, which is finished the way I like it – seam allowance folded in and stitched in the ditch to secure.

IMG_3908

One thing Luke requested was a coin pocket. It was pretty easy to make one – I just measured one on his existing jeans, added seam allowance, positioned it and sewed it on. Done. He wanted it deep enough to put his flashlight in (as seen above), so I added a little bit of depth to it to accommodate that. The inside of the pockets is just plain calico – Luke rejected all offerings of even slightly whimsical fabric from my stash.

IMG_3911

I’m pretty proud of the cargo pockets – I think they look pretty good! Luke chose the buttons from Masco Wools. The fabric for the shorts came from my local Red Cross op shop – they often have a basket out the front of fabric, and all lengths are $3. I brought home 5m of this blue drill fabric, so there’s enough to make some shorts for me if I so desire. Not bad for $3! It’s the perfect weight for these shorts. Zip came from my massive bag of zips from the Salvation Army I scored last year. All in all, a cheap, successful make!

Standard
sewing

Sewing for the husband: Thread Theory Jedediah

Please note: I have just switched my blog over from Blogger to WordPress, so if things look a little clunky, bear with me while I sort out all the teething problems!

As predicted, not long after I made Luke his Negroni, the weather got warmer and he started getting excited for the shorts I promised him. I initially bought something labelled as cotton drill from Trademe to make them with, but when it turned up and I prewashed it, it wasn’t suitable. It wrinkled hopelessly in the wash, and even a hot, steamy iron couldn’t get the deeper ones out. On top of that, one side of it was slightly brushed, and picked up any small piece of lint or cat hair lying about. Not practical. After a bit of a rummage in the stash, I found what I think is a cotton/linen blend that Luke approved of, and I got to work.

Front

The pattern I used was the Jedediah shorts pattern from Thread Theory. It was my first time using one of their patterns, although I’ve been following their releases since they started. I cut out a size 38, as it matched Luke’s measurements, and they’re supposed to be closer-fitting than other patterns. I think the photos speak for themselves, but let me just say, these are really way too big. I’m honestly not sure what happened – I measured the waistband against a pair of his favourite jeans, and all seemed well. Then when I got him to try them on sans waistband to check the fit, they were huge. I couldn’t really take them in at the sides by that point, as they had been bar tacked and topstitched, so I took them in another 3 inches at the back, and they were still too big, although wearable with a belt. I’m thinking perhaps I stretched them out a little during the sewing process, although I’ve never had anything stretch that badly before, and the fabric is not stretchy and is quite firm.

Back

I’m kind of mortified by how big they are, but Luke loves them. He’s on his third day of wearing them in these photos, and he says they’re lovely and cool in the warm weather, and that he feels trendy when he’s wearing them. He has said he would like them a tiny bit shorter when I make him another pair, and I’m happy to oblige – Luke is tall, so I thought simply hemming them by 1.5″ would be fine, but they sit just below the knee instead of just above.

Unfortunately, I kind of hated making these. I went into it not expecting many problems – I’ve inserted a front facing fly twice now, on my muslined-but-yet-to-be-completed Jamie Jeans, and on my Moss skirt, and both times it’s gone pretty smoothly. I resorted to using the sewalong posted by Morgan of Thread Theory pretty early on, because I found the PDF instructions to be a little sparse. I’m a visual learner when it comes to stuff like sewing, and I have a lot of trouble envisaging how things go together, although I’m getting better at it all the time, so diagrams and clear pictures are important to me. Unfortunately, I didn’t really find the sewalong very helpful, and at times, I found it very frustrating. It seemed like everything was too zoomed in or too zoomed out, and I couldn’t get a clear idea of what I was supposed to be doing, especially with the fly instructions, as they differed from those I’ve used before.

By the time it occurred to me I should just do it the way I know how, I was too far into the construction to back out and change without a LOT of unpicking, so I forged on. Luke loves practical, durable clothing, and I was disappointed in the lack of a flat-felled seam on the crotch and seat seam, as I feel that’s one of the areas you really want one. I found binding the seat seam to be very difficult, with the sharp curves of the fly front, and this is something Morgan glosses over in her video. Actually, I was a bit baffled by the sheer amount of bound seams in this pattern – I like a good bound seam, it’s a perfectly good seam finish, but I do find it to be a bit bulky, and even using a lightweight fabric for the shorts I found it created bulky seams where I didn’t want them. In the end, I only bound the seat seam (and wished I hadn’t), and the zipper shield, and I did it the more time-consuming way – sewing one side first, then folding it over and sewing the other side. Early on in my sewing adventures, I tried sewing binding the way Morgan does in her video and I find there’s a lot more room for error – not catching the seam in the binding being the major one. I overlocked the outer side seams – my first time actually using my new-to-me overlock! By the time we got to the waistband and I saw there was yet more binding and oddly turned under partway, I admit I closed the sewalong and just did it my own way – turning and pressing the seam allowance under on the inside and stitching in the ditch.

Insides

I used some leftover self-made bias binding from my nautical Reglisse for the seat seam. You can see where I took it in at the back 3″ – I didn’t trim the seam allowance as I’d already bound and finished it.  Luke picked some green and white cotton from my stash for the pockets. Apologies for the wrinkles in this photo, I had to ask him to take them off so I could finally get some photos of the insides!


Hook and eye

I used a repurposed zip from a huge bag I bought from the Salvation Army for $5 – there were numerous metal zips, all salvaged from old pairs of jeans, I assume, since most still had thread attached. This one is a YKK one, and seemed to be in very good condition. I also used a trouser hook and eye from my stash for the closure, after unpicking FOUR buttonhole attempts – I didn’t trim the top of the zip/zip shield as much as I should have before sewing on the waistband, and it’s quite bulky in there – too bulky for my machine to achieve any kind of decent buttonhole. I still sewed a button on the front for appearances sake though.

Belt loops

This also marked my first attempt at doing belt loops, which I’m pretty proud of! It’s also my best edge stitching to date.

So, another pair of these will be forthcoming – I found another big pile of a very similar fabric in my stash, and I’ve already trimmed the pattern pieces down to a size 36. Luke insists I make something for myself first, though (isn’t he sweet?) so I’m planning a Deer&Doe Airelle blouse in a bird print chiffon!

Standard