

Here we are on New Year’s Eve, and I’ve just completed my last make of 2014. Phew! The pattern is the Francoise Dress by Tilly & the Buttons, made up in a multi-coloured strawberry cotton fabric my husband brought me back as a souvenir from Estonia. As the strawberry fabric was a little sheer, I lined it with a cotton white siri fabric I bought from Gertie’s Etsy store a long while back.
I made it up in a size 5 – kind of. My measurements went 5-6-5, but when I made that up in a quick muslin, it was too loose around the waist, so I cut a straight 5. I moved the side darts down by 4″, and the curved French darts down by a few inches, too. I also shortened the darts. I’ve read a few complaints about the darts in this dress- mostly that they sit too high on most people who’ve made it. I’m short and have a low set bust, so I fully expected to have to move them. Unfortunately, Tilly does not provide much information on the moving/shortening of the curved darts, and as they’re quite unusual on patterns today (that I’ve found), I struggled a bit to find any kind of resource on how to deal with them. There’s probably an easy, obvious way that I didn’t think of though. I ended up having to mostly redraw the top part of them.
Lining this was a bitch, plain and simple. I couldn’t find anyone who had made it and lined it, and again, Tilly doesn’t mention the possibility of lining it in her sewalong. Perhaps it isn’t designed to be lined. Lining a one piece, sleeveless dress is not easy. I spent some time looking at various tutorials for lining sleeveless dresses – some people recommend sewing only the shoulder seams together, some recommend everything but the shoulder seams. I tried as hard as possible to get all the seams encased between the lining and main fabric, but I didn’t succeed with the side seams, so I pinked those. In retrospect, I can see how I could have done it in an easier, cleaner fashion, but hindsight is always 20/20, no? I did find lining it made the armholes tighter, too – I’d like a smidge more room there in future.
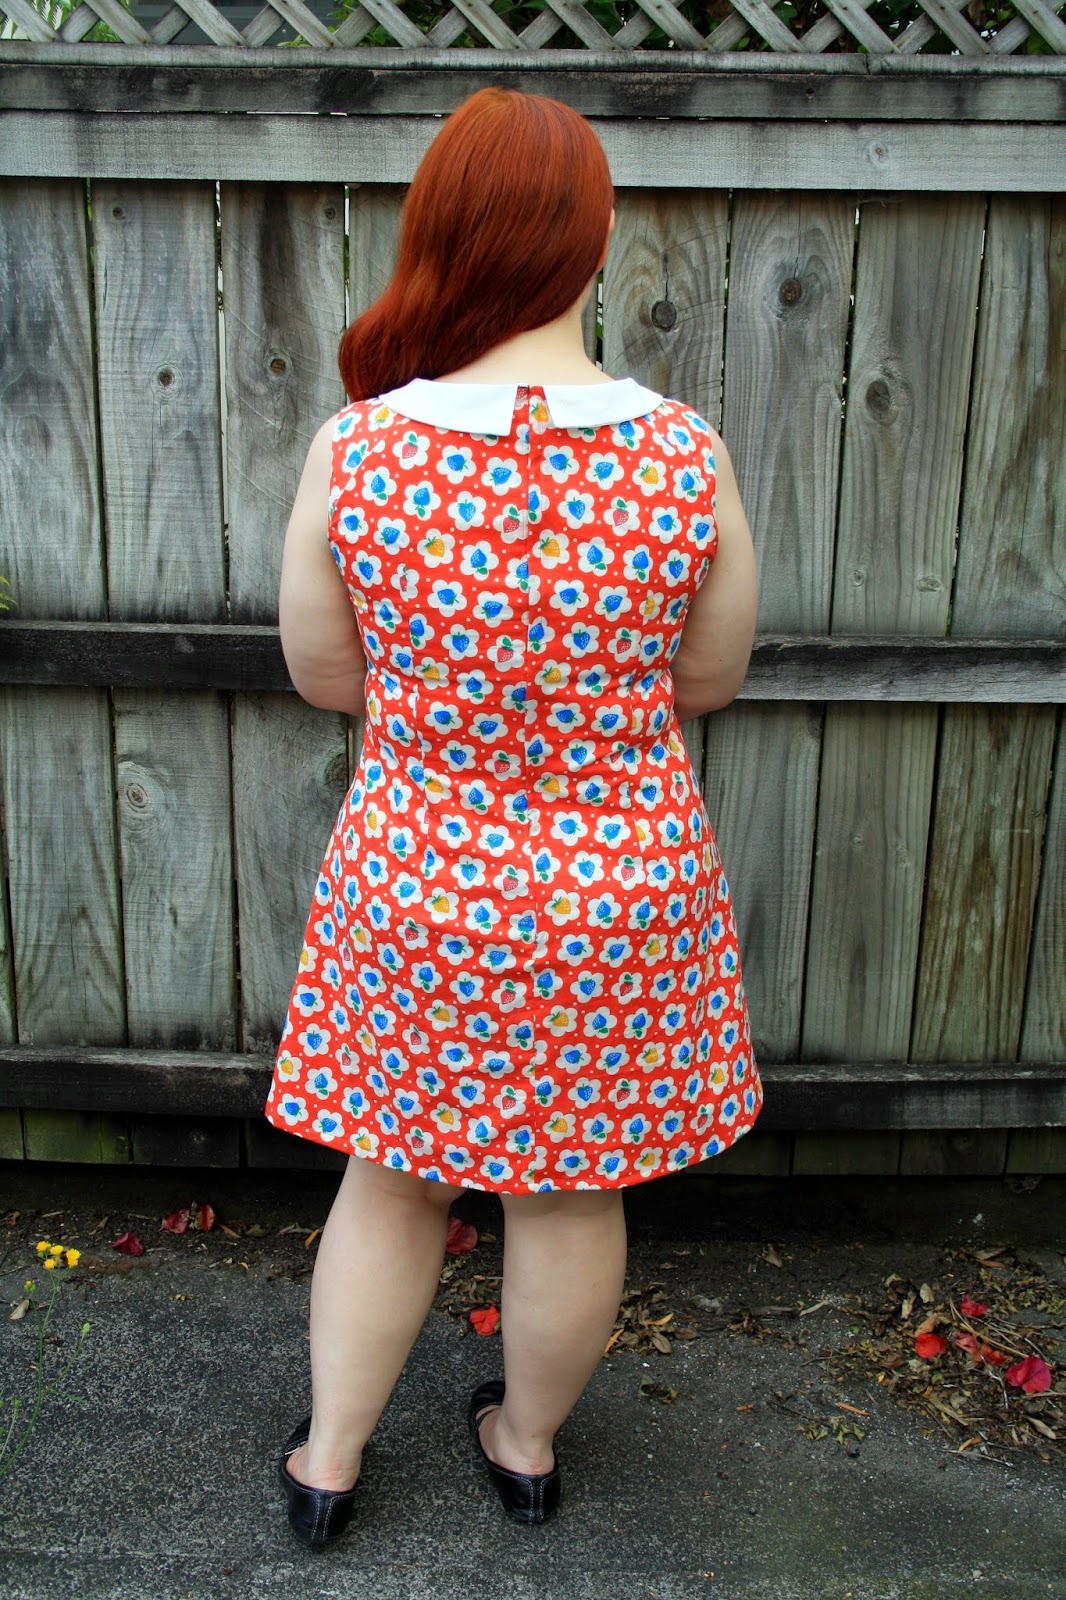
The back looks tight, but it doesn’t feel tight to wear. I did a lapped zipper rather than the invisible zip the pattern called for – I did try the invisible zip, but a) it was a cheap one and even a low heat iron warped the tape itself, never mind the coils. I forged on anyway, but I don’t have an invisible zip foot for my Husky and anyone who says you can achieve a good result with a regular zip foot is deluded. I have never achieved a zip that could be called invisible with a regular zip foot, and this attempt was no different. And yes, I ironed the coils back (as much as I could with my crappy zip), and adjusted my needle as much as my machine allowed, but no dice. So handpicked lapped zip it was, and despite appearances in this photo, it went in well. Unfortunately, it presented problems with the lining and how to attach it to the zip. I managed to get it looking nice on the inside, but it required extra rows of stitching.
Once I tried it on, I was a bit deflated – despite my muslin, it was still a bit baggy under the boobs and accentuated my tummy. I took it off again and took in the curved darts by another 1/2″ on each side at the top, and I like the result much better. However, the curve on them near the tip ended up quite severe and was difficult to press. You can’t really tell with this busy print though. Speaking of the print, I think it may have been printed off grain, as I made sure to cut the pattern on grain and the strawberries still seem to be falling on a slight diagonal rather than directly horizontal. Oh well.
In the end, I’m happy enough with the result – it will definitely get worn this summer for sure as it’s nice and light and cute.
Here’s to more productive sewing and more cute outfits in 2015!

Lovely! Linings are tricky and have tripped me up on many an occasion. It's hard to make it up on your own sometimes. Great result, and I hope you enjoy wearing it.
Despite all your troubles with it, the final product is really cute!!
Thanks Meg!
Thanks Jo! It's great for this warmer Auckland weather.
It turned out really nice! It's always so confusing figuring out how to attach a lining with minimal hand sewing.
Hmm I don't know if my comment just worked? Anyway…. your dress turned out really nice! It's always so hard to figure out how to attach a lining with minimal hand stitching 🙂
I wouldn't even have minded the hand sewing, to be honest – I was just trying to get it all together in a way that made sense! I find visualising stuff like that really difficult.
Ugh, you are way too cute! 🙂 Have you tried the “taco” way of lining a sleeveless dress. I first learnt it from Colette's Rooibos, it looks crazy but it works and is pretty amazing.
Oh, thank you! I think I saw that method as I was trawling the web for solutions – the one where they're sewn together at the shoulder seams? Unfortunately I'd already sewn the shoulder seams and trimmed them separately, and couldn't unpick them, so I couldn't try that out. But I will next time!
You sew the shoulder seams together, then all around the neck. Then you sort of roll them up inside each other to finish the arm holes and then over itself again for the other side and then it kind of pops out the right way. It's bizarre and I was doubting it the whole time I was sewing but it worked! I used it in this post: http://thecuriouskiwi.wordpress.com/2011/11/22/1930s-dress-construction-update/
It looks like a pretty nifty method – I'll give a go next time!