Uncategorized

Fawning over Plantain

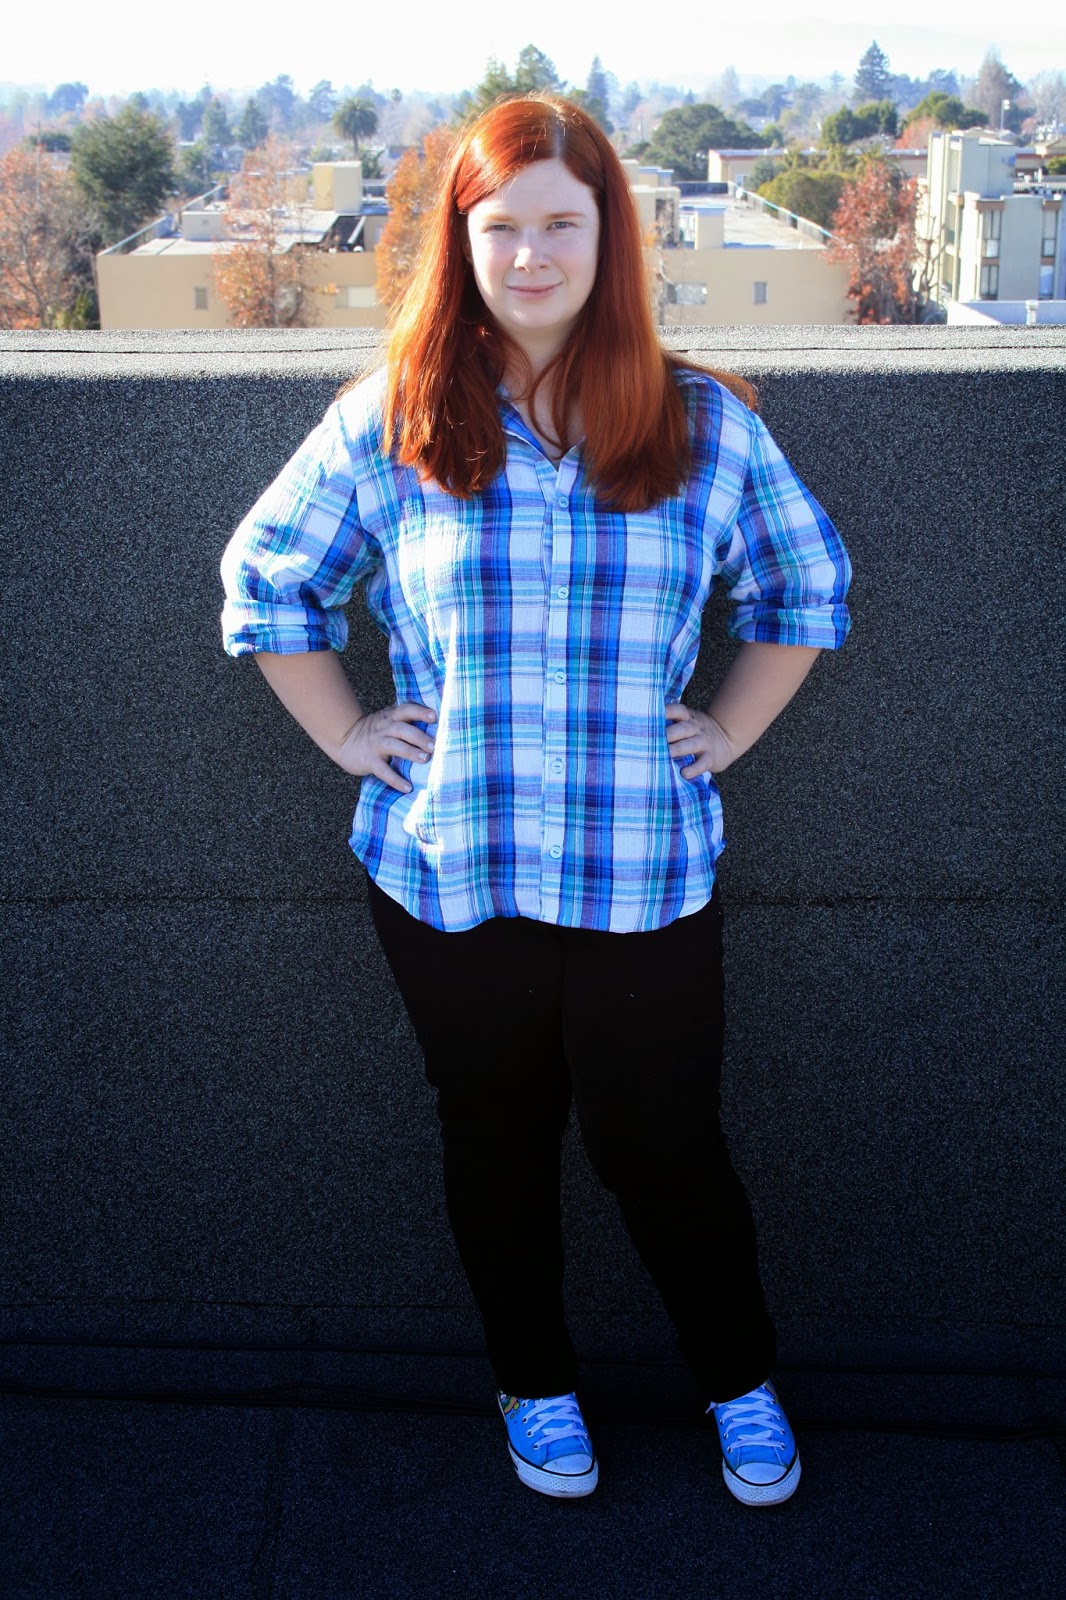
Like the rest of the blogging world, I jumped on the new Deer&Doe Plantain t-shirt pattern the moment it was released! Not only is it FREE, but it’s also a great, simple pattern that takes almost no time to make! Win-win, yes? (I know I don’t look too thrilled in the above photo, but the early morning sun was very, very bright).

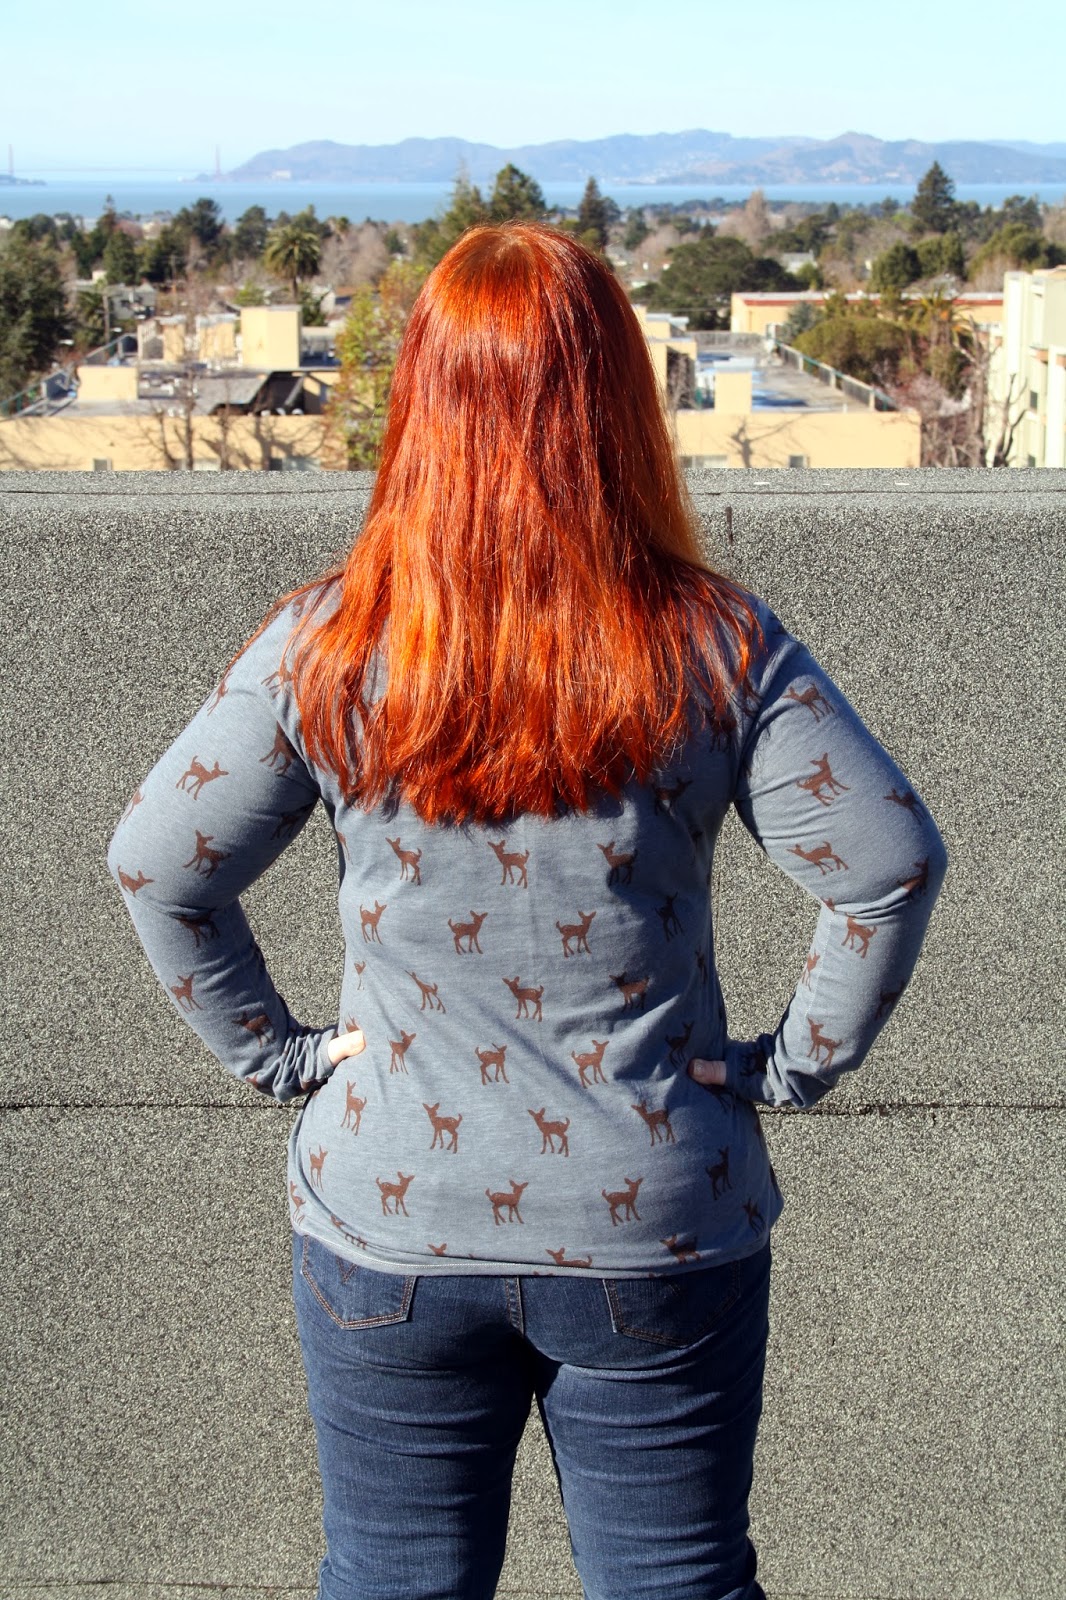
So the pattern itself is very easy to make – I probably took longer taping the pattern together than I did actually sewing it! I used some fawn fabric I got from Girl Charlee a while back – I’m actually pretty disappointed in it, since it’s not very soft (despite being described as such on their website) and also, not very stretchy! In fact, I spent a good ten minutes crouched over the fabric, pulling it this way and that to try and work out which way had the most stretch – I honestly couldn’t tell, since neither direction seemed to stretch much at all! I even got Luke involved, but he was just as clueless as I was. As a result of this, my Plantain is a little more snug than I would like, especially around my upper arms. I cut out a 46, which is the largest size the pattern offers, and I’m happy with the fit everywhere except the bust and upper arms. I do need to do a small narrow shoulder adjustment for the next one, and I have a couple more stretchier fabrics I plan to make this up in next, and I expect the fit then will be just perfect!

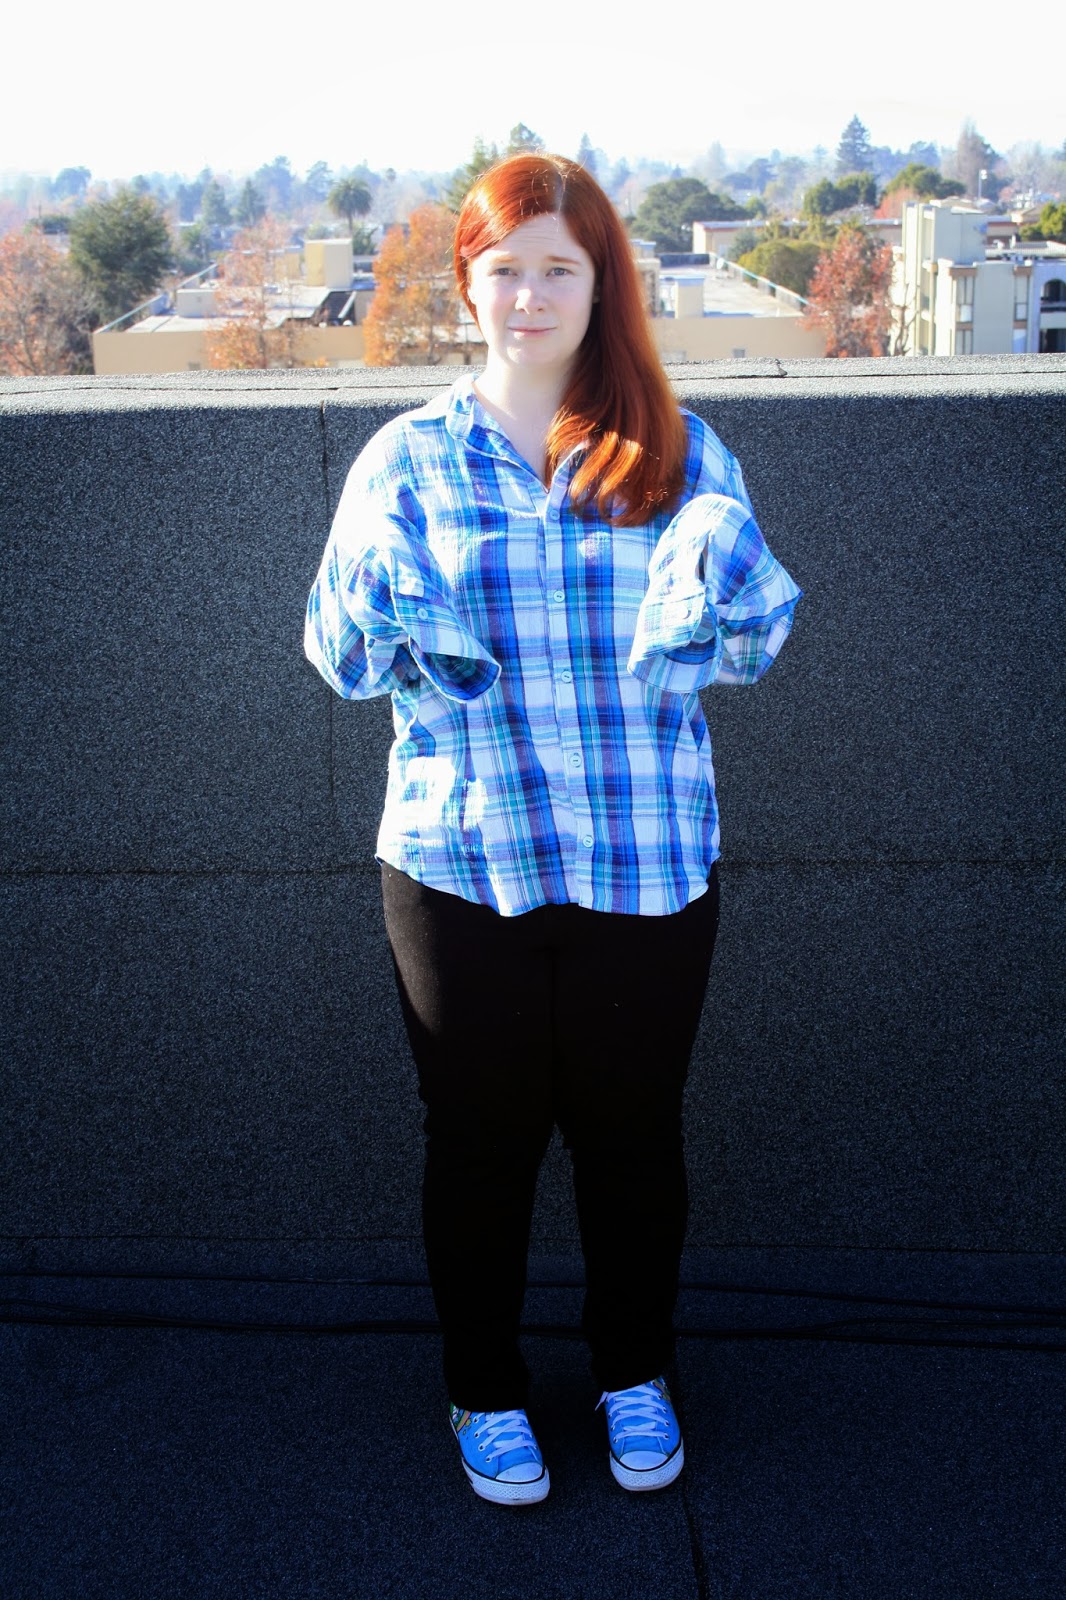
I was worried this top wouldn’t be flattering on me, given the flared design, but actually, I really like it! You may notice I omitted the elbow patches – they’re just not my style, I don’t think, and I really want to focus on making things I’ll actually wear this year. I don’t have a serger, so I sewed this up with a narrow zig zag, and used a twin needle to hem the bottom and sleeves. I’m super happy with how my neckband turned out – this fabric curled like a bitch when I tried to stretch it out to sew it, and I thought it was going to be a disaster, but I went slowly and thankfully the end result looks pretty sweet.

So in short, love this pattern, love Deer&Doe (as always) and I’ve got some fabric sitting in the laundry basket ready to be prewashed for another Plantain this weekend!

Standard
Uncategorized

Nautical Skater

This is actually a make from the end of 2013 – I made it up quickly just in time for the Bay Area sewcialist meetup! And I’ll make another admission while I’m at it…this isn’t even my first Lady Skater. I never blogged about the first one because I made a poor fabric choice, it stretched so much it wasn’t funny and didn’t stretch back, and consequently is now in the bin. C’est la vie.

So, the pattern is the ever popular Lady Skater by Kitschy Coo, in a straight size 14. I shortened the bodice by 2″, and I still think it could stand to be shortened a tiny bit more – the weight of the skirt pulls the waist to just below my natural waist (in this fabric, anyway). The sleeves are too long (a recurring problem of mine), but if I fold the cuffs back, they work. I’ll definitely shorten them next time.

The fabric is a nautical-themed knit from Girl Charlee that they don’t seem to stock any more – the anchors are silver and red dots are actually little boat tillers. It’s one of the better quality knits I’ve bought from Girl Charlee, in that it’s quite soft but not too thin and curly when I stretch it. On the whole, though, I’m generally disappointed by my purchases there, and probably won’t be making any more in the future.

Construction was fairly simple – I used knit stay tape instead of clear elastic to stabilise the shoulder and waist. I used clear elastic from Joann’s the first time round, and that stuff is god awful. It stretched while I sewed it no matter how hard I tried, my needle didn’t like puncturing it, and it felt horrible and scratchy against my tummy when I wore the dress. Ugh. I can highly recommend the knit tape, it was super easy to use and made sewing the seams a dream. I hemmed the skirt with my twin needle and two different coloured threads, because I’m classy like that.

In case you were wondering, these photos were taken at the San Francisco Zoo on Christmas Day. A bit of a change from my usual roof backdrop! It was quite nerve-wracking taking outfit photos in a public place, but I tried my best not to let it bother me. I wear this dress ALL the time – it’s so comfortable, and looks good, too! I have some more knit fabric with fawns on it (FAWNS!) that I’m planning to make another with. Please look forward to it!

Standard
Uncategorized

Archer Appreciation: Muslin

So, December was Archer Appreciation Month in the sewing world (Archer being the wonderful shirt pattern by Grainline Studio), and while I did buy the shirt pattern in the month of December, it seems like I appreciated it a bit longer than everyone else! Oops.

This is my Archer muslin, view A. I cut out a straight 16, and made no changes to the pattern (other than to leave off the pocket, because I’ve never used a pocket on a shirt, ever). I didn’t make any changes because even though I thought it might be too long/too big, I needed to see what I was working with first. I have to say, I am pleasantly surprised at the fit!

The Archer is supposed to be a “boyfriend” shirt, so not too fitted and kind of slouchy. I’m happy with the length of the shirt, I think it hits right about where I want it to. Apart from that, I think I could probably afford to go down one size all over and still have it be comfortable – it’s just a smidge too loose for my liking. I also want to do a narrow shoulder adjustment of about 1″, since I don’t like the look of stuff hanging down past my shoulders. There is, however, one rather large problem I am cleverly concealing in this photo…

The sleeves are a good few inches too long for me. They are, in fact, ridiculous. I expected them to be a little long, because I am shorter than average, but this shirt makes me feel like a hobbit. I will definitely be shortening them considerably in my final make.

Sewing the shirt up was not without its trials and tribulations – this fabric (a cotton gauze I picked up super cheap from somewhere ages ago) had no discernible right and wrong side, and this led to numerous issues with the construction. Having said that, it pressed like a dream and was very easy to sew and manipulate.

I sewed the sleeve plackets on the wrong side of the sleeves, so they sit on top of my hands, rather than behind. Given I’ll only be wearing this shirt with them rolled up, it’s not a huge issue, but one I will be very careful not to repeat in the final version. I also managed to do what I always do and stuff up which side the buttons go on for a woman’s shirt. I don’t know how I always do it, but I do. It doesn’t really matter, except it feels very wrong when I go to button it up. Given how large the shirt is, though, I can just pop it over my head so again, not a big problem in the grand scheme of things.

I went with the bias-cut yoke on the back, and messed up which way the pleat goes – I couldn’t be bothered going back to my laptop again to check, so I just did it the way that made sense to me. Oh well. I know for next time, now!

On the advice from other fellow sewers, I used the collar tutorial from Four Square Walls and it went in like a dream. I can’t really say whether it’s better than Jen’s method, though, because I’ve only used this one. I’m super proud of it, though!

So in conclusion, I love the Archer. Love love love! I can’t wait to make another, proper version – I have a blue and black plaid flannel ready, washed and waiting!

Standard