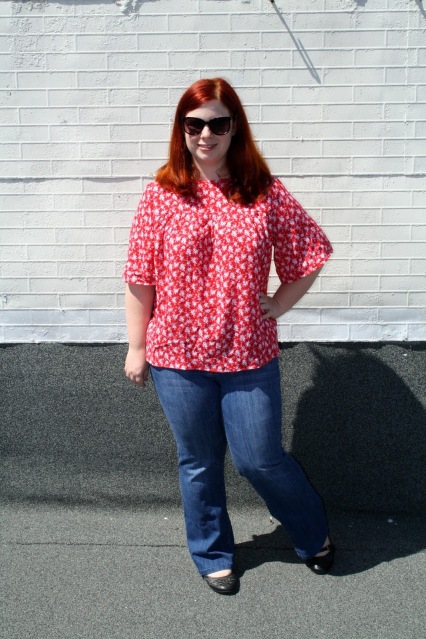
Tilly’s Mathilde Blouse has been on my to-make list for some time, but I wanted to wait until I had the right fabric. To me, Mathilde demands a soft, flowy fabric to make it that perfect summery blouse, and when I saw this rayon challis at Stonemountain & Daughter, I knew I’d hit the jackpot. I half-heartedly started to make a muslin out of some cheap horrendous tropical fabric I got from Goodwill, but in the end I couldn’t be arsed and just decided to make the largest size. I think I made the right decision – it’s meant to be a loose fit, and the softness of the rayon means that it skims my body rather than billowing out like a stiff tent. I love that this is a blouse I wouldn’t be afraid to eat a large lunch in!
I used little pearl buttons for the back – I only had two in my stash but luckily Stonemountain had the exact same buttons so I could buy more! As an aside, my button collection is shameful. Word to the wise – don’t buy random packets of buttons from Ebay and expect any of them to match in any way. They won’t. I wanted something nice and classy that wouldn’t take the focus off the fabric and I think I achieved that with the pearls. I added an extra button at the top afterwards, because I found it gaped a bit without it. So 7 buttons in total, all carefully lined up, and no buttonhole mishaps this time! I’ve now totally given up on letting my seam ripper anywhere near my carefully crafted buttonholes, and rely entirely on my husband’s Swiss army knife. I have yet to destroy a single buttonhole with the knife, as opposed to 4 (!) with the seam ripper.
I definitely want to whip up a few more Mathildes, and I want to try experimenting with a sheer yoke, amongst other things, but if I work with another fiddly, fraying fabric right now I might never sew again, so I think I’m going to refresh my sewing palate with a nice, sturdy cotton twill and have a go at the Moss Skirt next!


You look great Kirsty!
Super cute! And, I use washable crayola markers for fabric. They work like a charm and DO in fact wash out. You can even get fine point ones now.